Access
Web App | Windows | Mac Sketchup | Mac Vectorworks or ArchiCAD
SketchUp Mac Update Instructions: Updating Veras for SketchUp on Mac
SketchUp Mac First Install Instructions: Installing Veras for SketchUp on Mac
Vectorworks Mac Install and Update Instructions: Getting Started with Veras for Vectorworks
ArchiCAD Mac Install and Update Instructions: Getting Started with Veras for ArchiCAD
 The MODEL Tab — Turn Renderings To Geometry
Veras 5.0 introduces the MODEL tab, and with it the biggest idea in the product so far: a rendering is no longer the end of the line. What Veras imagines into your image can become real 3D geometry in your model.
The loop is short: render your scene, let Veras detect the objects in it, then turn any of them into a real 3D asset and drop it back into your model.
- DETECT OBJECTS finds the furniture, fixtures, planting and vehicles in a rendering and lists them as objects you can act on
- GENERATE meshes a selected object into a 3D asset — choose Hunyuan 3D 3.1 for the highest fidelity or Trellis for speed
- Or skip generation entirely and search the Chaos Cosmos library for a production-ready asset that matches what’s in the picture
- Generated and matched assets are placed in the 3D scene at the spot they came from, at the right size and facing
- The object list runs several jobs at once, so a whole scene’s worth of assets generates in one pass
NOTE: Detect the objects in a rendering, generate or match a 3D asset for any of them, and place it back in the scene it came from
 Chaos Cosmos Search — Find the Real Thing
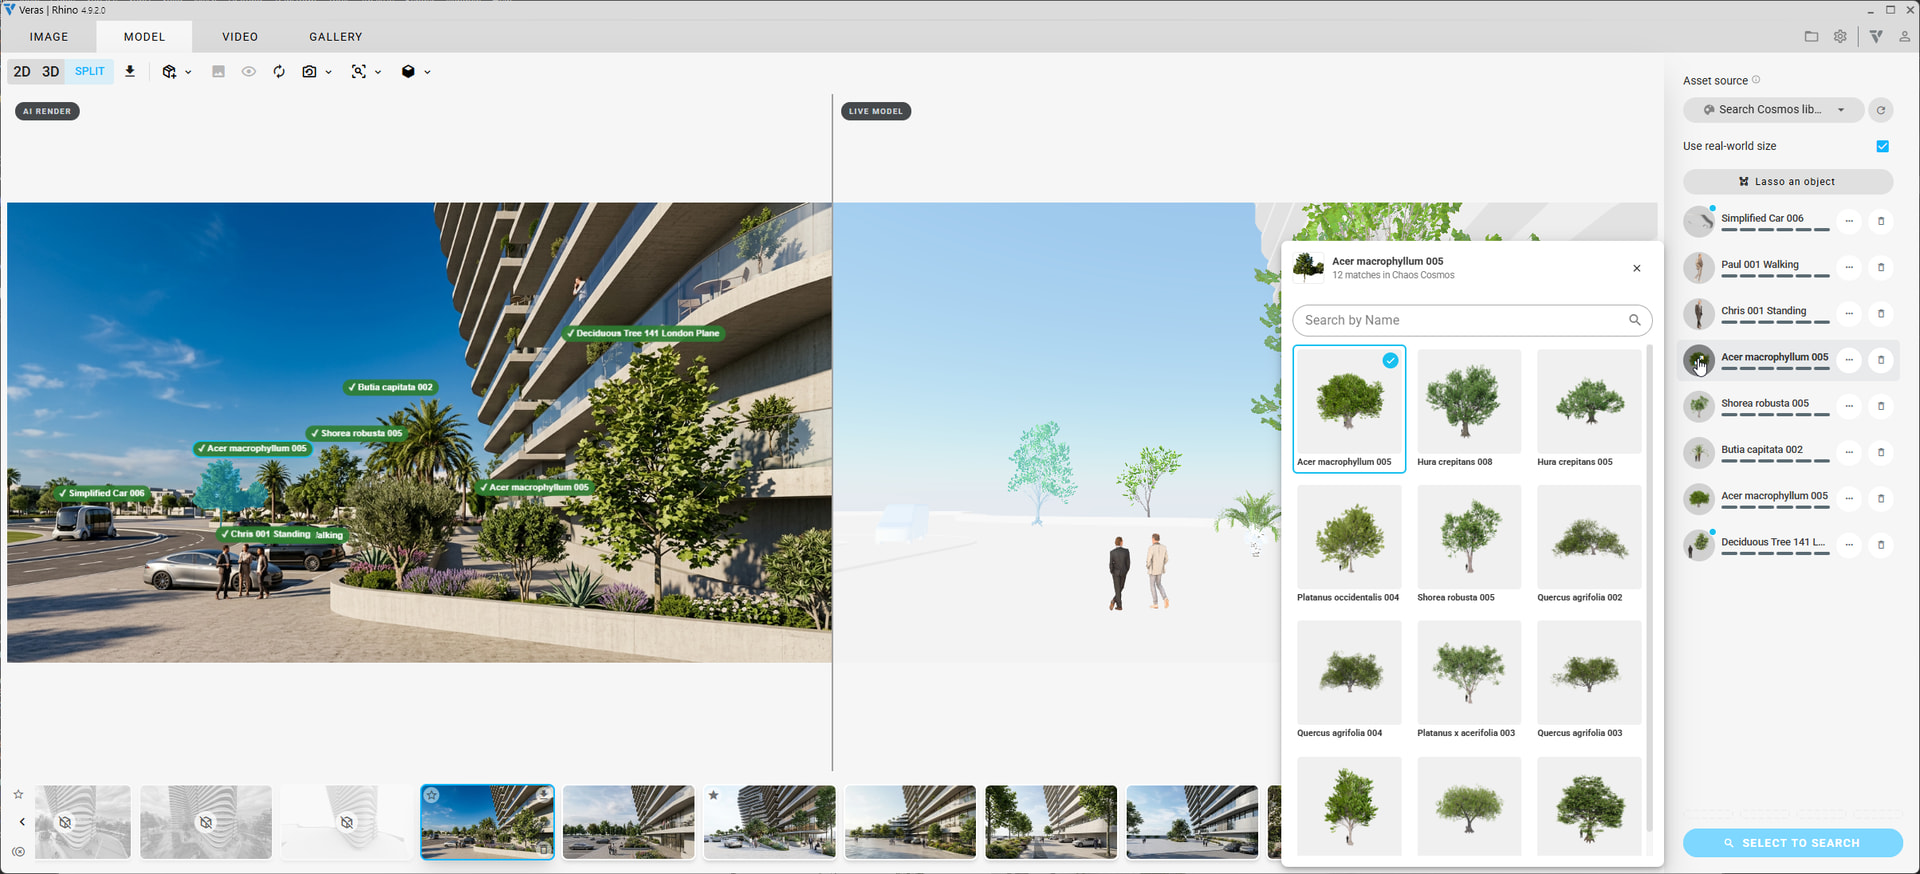
Not every object should be AI-generated. Pick Search Cosmos library as your asset source and Veras sends the cropped object straight to the Chaos Cosmos catalog and brings back real, production-ready assets that match it.
- Best match is chosen automatically — click the object’s thumbnail to browse the rest and swap
- Refine the search with a text hint when the picture alone isn’t specific enough
- Cosmos assets arrive at their real-world size, so a chair is chair-sized in your model
 Bake Assets Into Your Model — Revit, Rhino and SketchUp
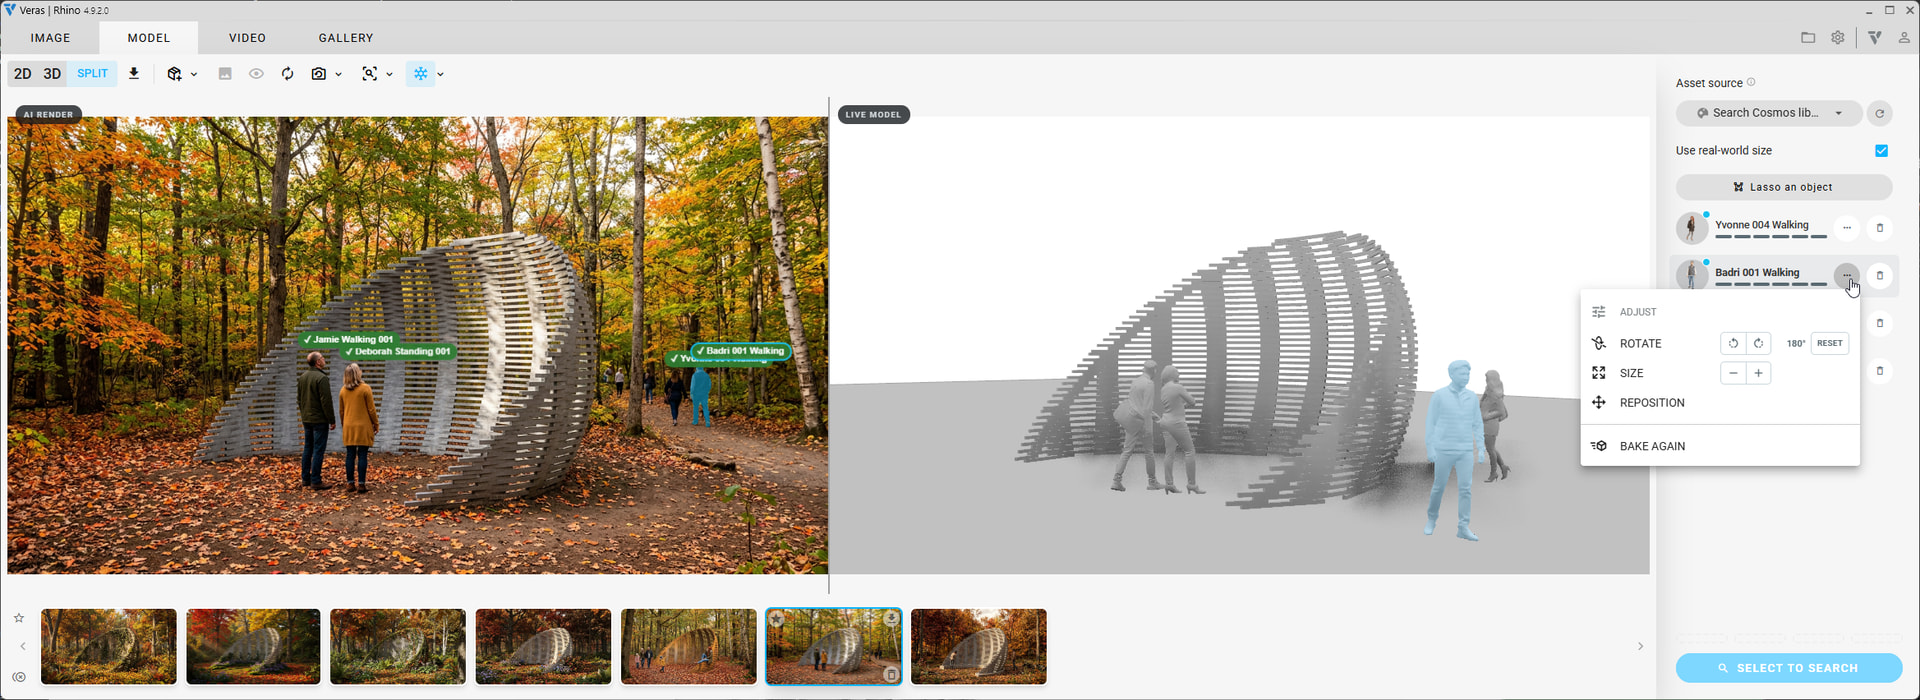
The part that makes this more than a picture: whatever you place in the Veras 3D view can be written into the live host model, at the exact position you placed it.
- Revit — baked as a real family, placed on the right level, with the Revit category picked automatically by an LLM that also names the object. OBJ or DXF object types supported.
- Rhino — baked as block instances (definition + transform), so repeats stay light. Rhino 7 and Rhino 8
- SketchUp — baked as a native component instance on a “Veras” tag, in a single undo step. Requires the SketchUp plugin at 5.0.0.0 or newer
- Bake everything at once — one action bakes every placed asset in the scene, not just the ones from the current rendering
- Everything comes across with its materials and textures, including alpha-masked foliage cards
Veras remembers what it baked. Refresh the model and Veras recognizes its own assets, re-links them to the rendering they came from, and lets you keep editing them. Re-baking replaces the old copy rather than stacking a second one on top, and an asset you move in the host stays a single asset through the next refresh.
NOTE: Bake writes into the model you actually have open — one undo step, real host geometry, no import/export round trip needed
 Placed Assets Are Yours to Adjust
Every placed asset gets its own controls:
- Rotate 90° to face it the way the scene wants
- Scale each asset individually when the auto-fit isn’t quite right
- Use real-world size as a global setting, with a per-object override — so Cosmos assets can come in at their true dimensions while a generated mesh keeps its fitted size
- Click to select anywhere on the actual mesh — selection and hover follow the real geometry, baked assets included
- Delete removes the focused asset, not the rendering behind it
 One IMAGE Tab — Explore, Compose and Edit Merged
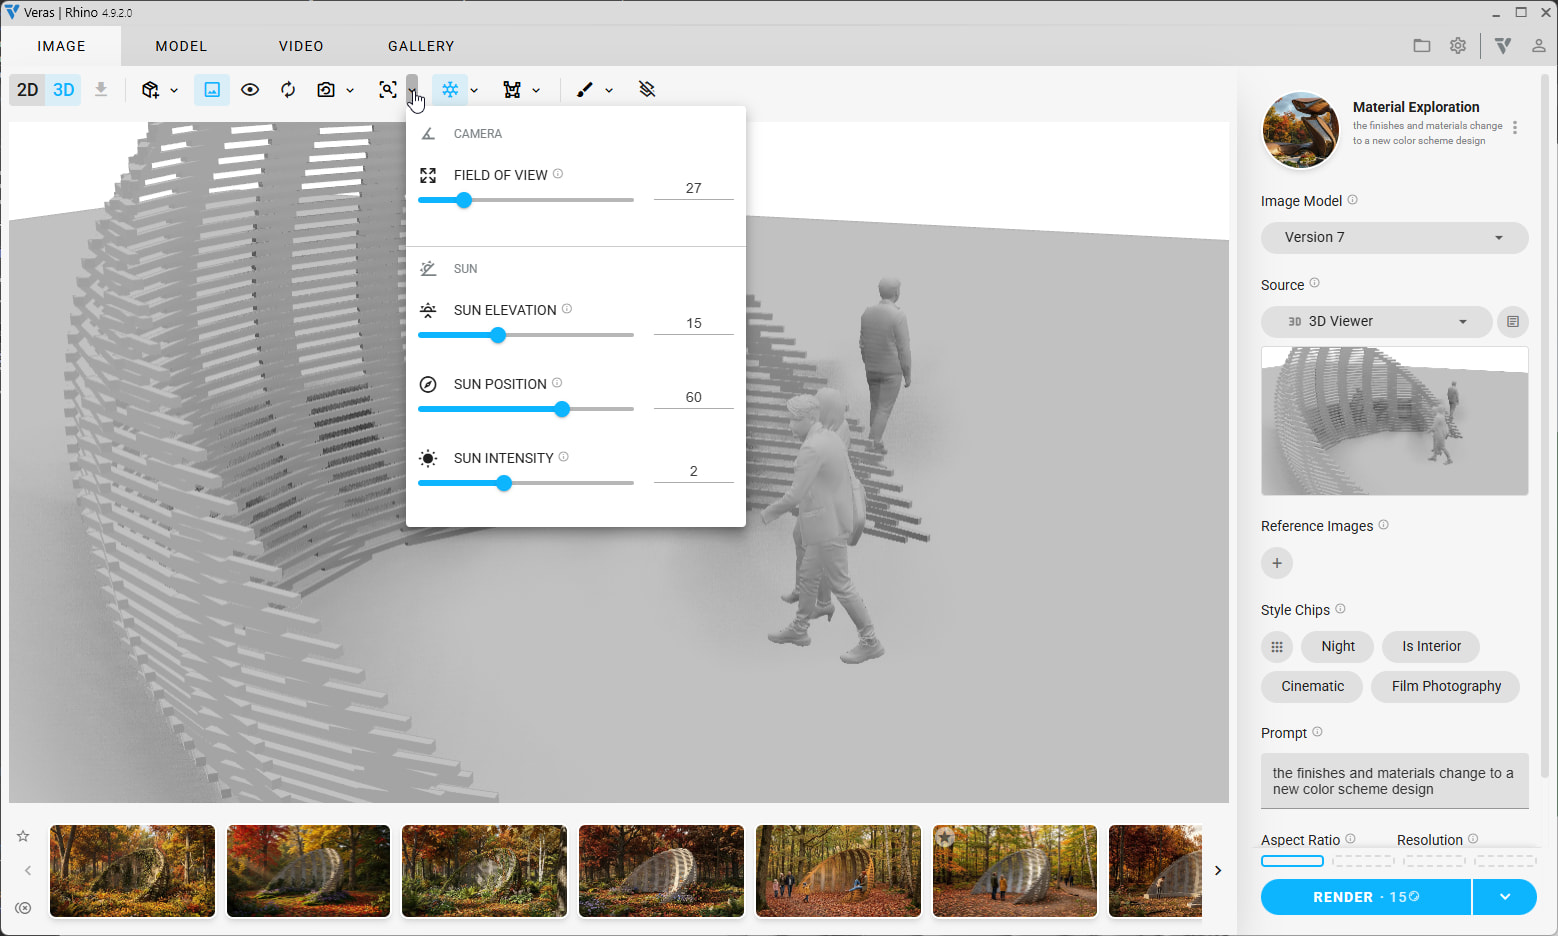
Three still-image tabs became one. The tabs now read IMAGE · MODEL · VIDEO · GALLERY.
- Explore’s preset grid moved into the presets panel, which you can now pin open beside the property pane and drag to any height — the old Explore browsing experience, available from anywhere
- Editing is no longer a separate tab. Masks, sketches, selections and the whole render-mode menu (Enhance, Rotate, Remove Background, Upscale, Post Process) work on any source you pick — your viewport, an upload, the 3D viewer, or a finished rendering
- Choose a rendering as your Source and you’re editing it; that’s the whole gesture
- New users start with the presets panel open at full height and it settles back on its own once you’ve found your footing
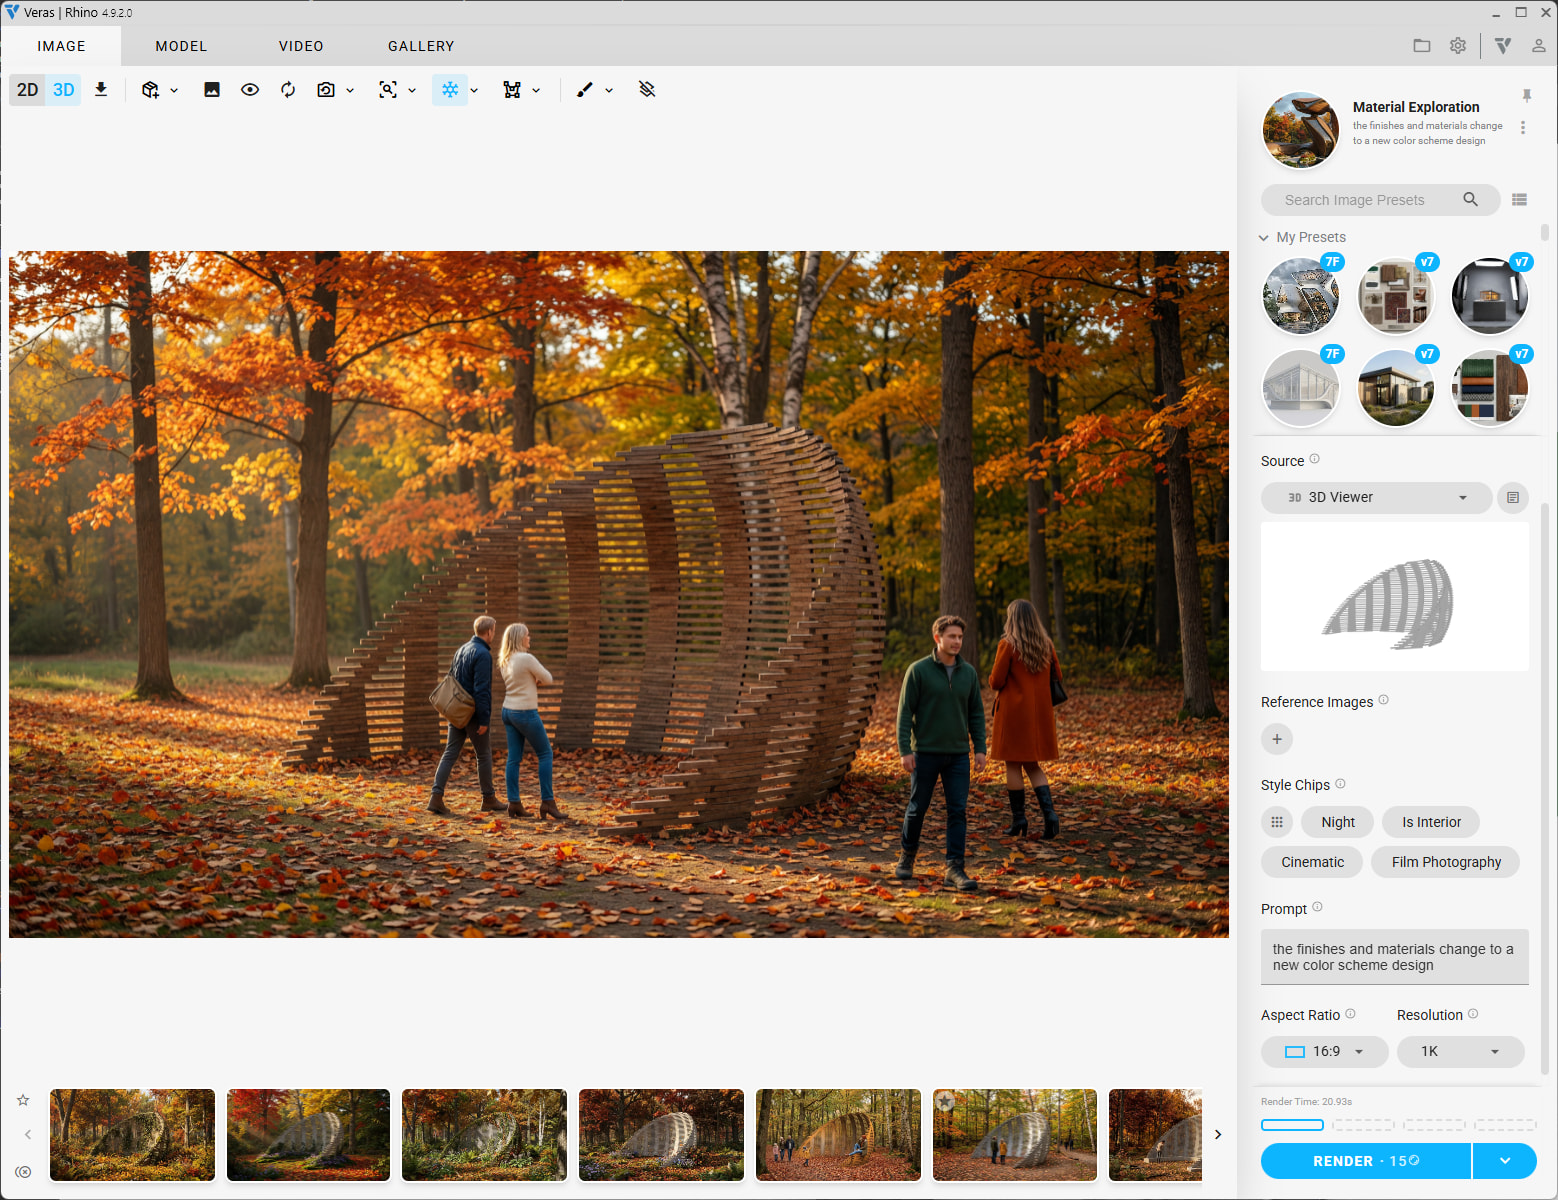
NOTE: Nothing was removed — every Explore and Edit tool lives in the IMAGE tab now, and works on whatever source you’re pointed at
 A Cleaner 3D View
- Consolidated toolbar — the standalone 3D buttons folded into two caret menus (open model, view controls), and every caret dropdown in the app now shares one geometry
- Zoom to extents frames everything, generated content included — three separate bugs fixed
- Generated meshes read correctly in Arctic and clay modes, with proper shading instead of a flat sheen
- Middle-click pans again after alt-tabbing away mid-orbit
- Generated assets show up on the 2D rendering too, so clicking a card tells you where you are without moving the camera
More Improvements
- Cancel a generation or a search mid-flight from the card’s X, without losing your place in the queue
- Keep working while a mesh generates — the pane stays live, so you can keep selecting and queuing, with detection progress shown on the slot counter
- Compare against the original — Show Original and Show Preview work in the MODEL tab’s split view
- Property pane no longer twitches when its contents change
- Forma trial redirect now explains itself with a pop-up instead of a silent bounce
- Renderings that didn’t come from your 3D scene are flagged up front as unusable for asset generation, instead of failing later