
Workflow Advantages
- Certain products and objects are very difficult to be modeled in Revit and sometimes impossible without external plugins or tools
- There have been multiple instances when I was asked to bring certain products into Revit so that they can be rendered in Enscape from Revit. Many times I would spend time to parametrically model these products if they did not include rfa’s from the manufacturer
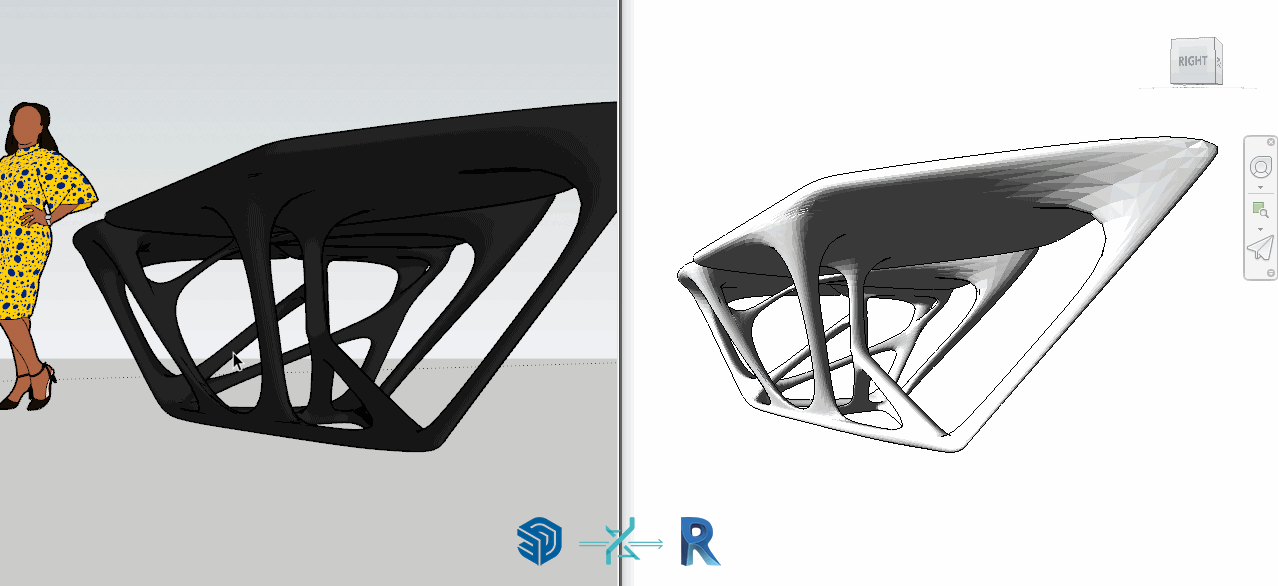
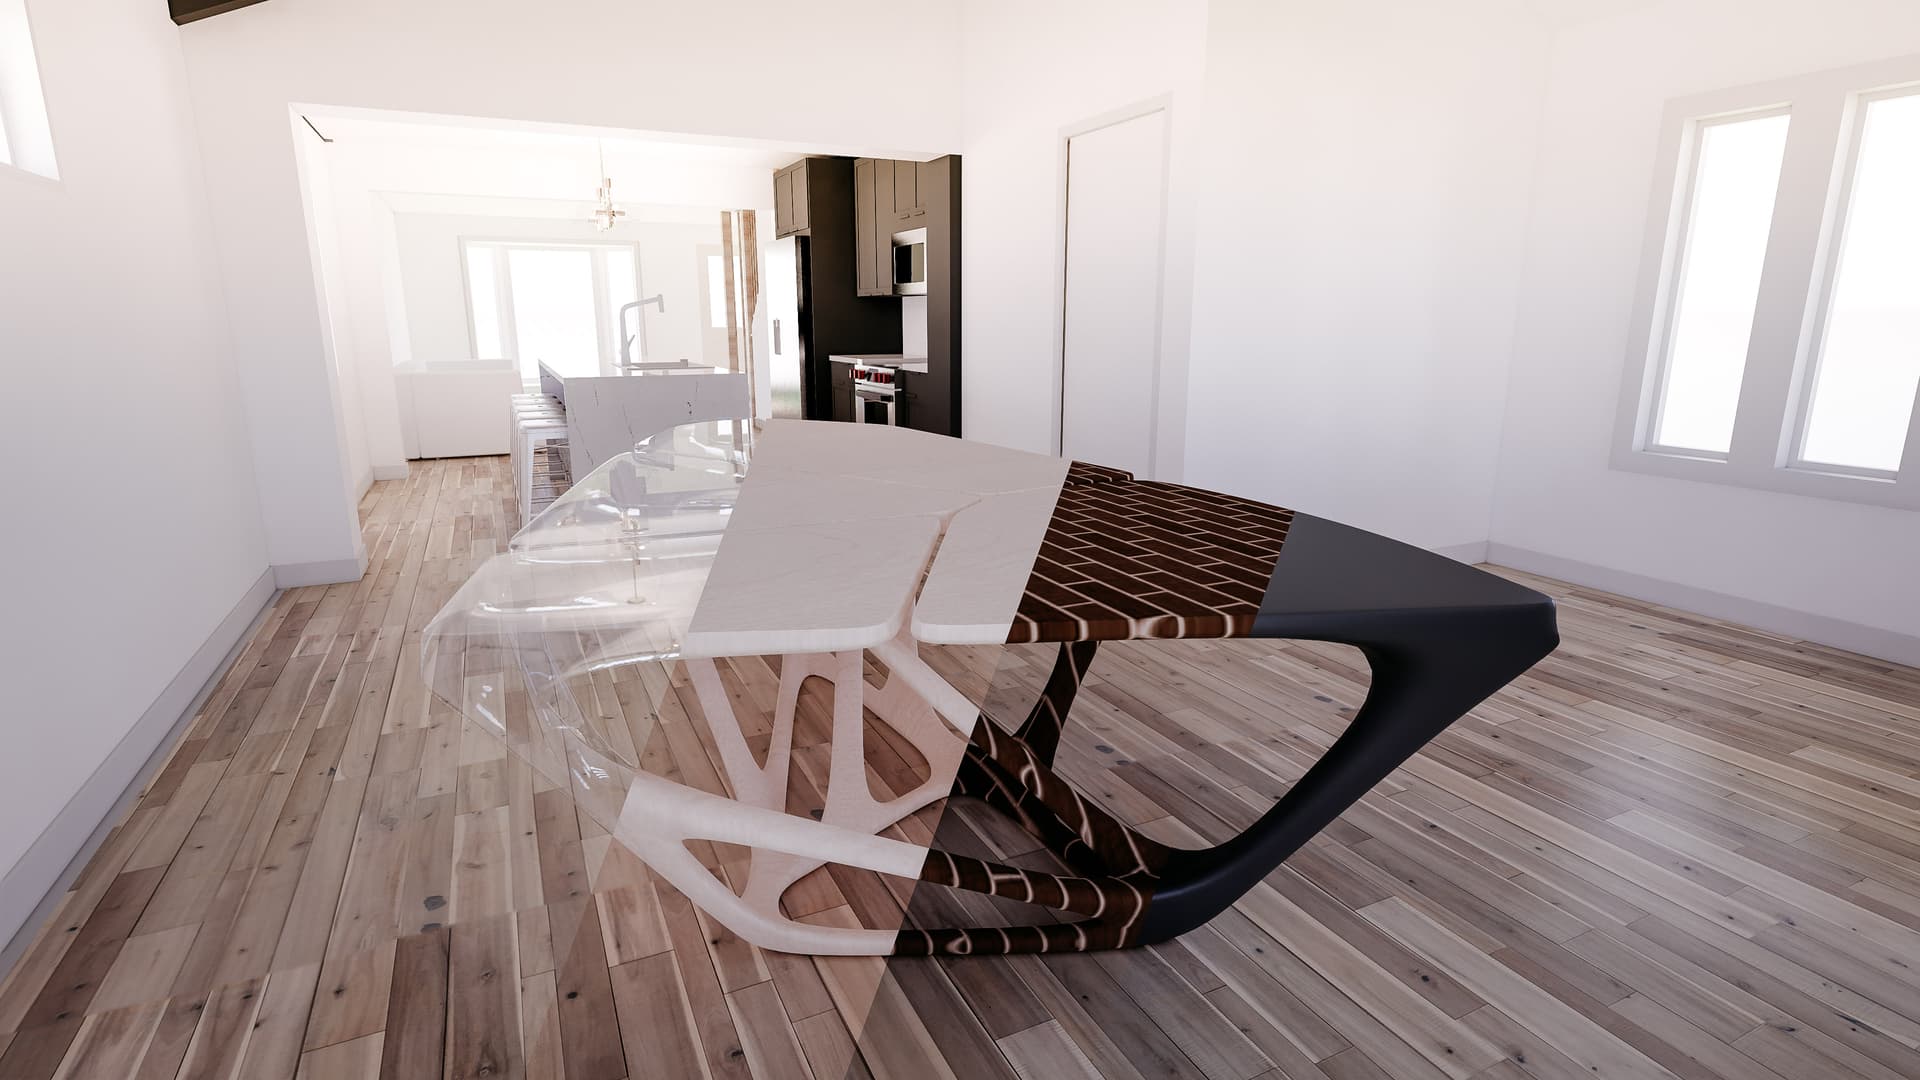
- This workflow allows a quick way to bring in mesh based elements that would otherwise not be shown in Revit due to time restrictions for modeling and the unnecessity of these geometrically complex models to be parametric. The Zaha Mesa table is a good example of an element that fits this criteria. There are many light fixtures, and furniture pieces that have either use a low poly estimation in Revit or a placeholder element. This no longer needs to be the case with Helix’s DXF importer from SketchUp to Revit.
1 | Get the SketchUp model from the 3D Warehouse & Place in Revit Model
- Search SketchUp’s 3D Warehouse for the “Zaha table” model (or use link: Mesa Table | 3D Warehouse)
- Bring the SketchUp model into the existing Revit model using the DXF mapper. For more detailed way to do this see: Align SketchUp 3D Warehouse Component To Existing Revit Model
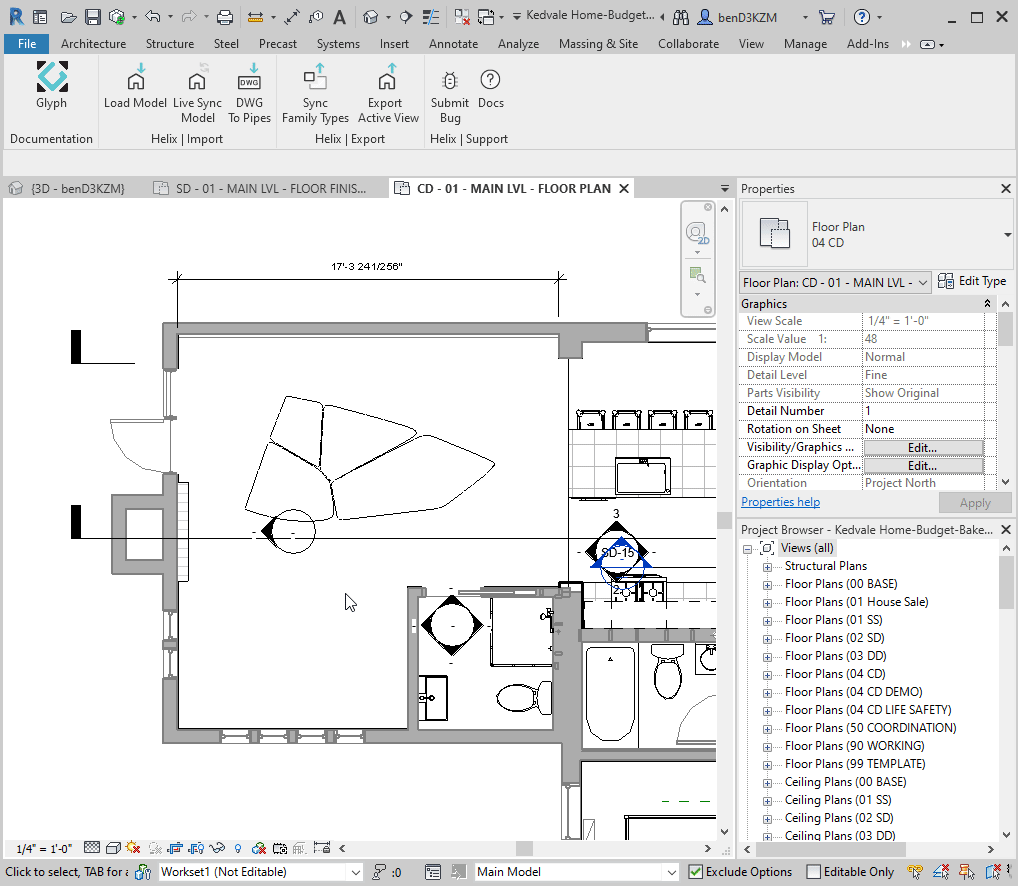
2 | Make Views For Documentation
- Make a plan view and a section view in Revit
- NOTE: The mesh geometry does not have the mesh edges visible, rather they are hidden. This allows the imported geometry to be used in drawings with the hidden line mode
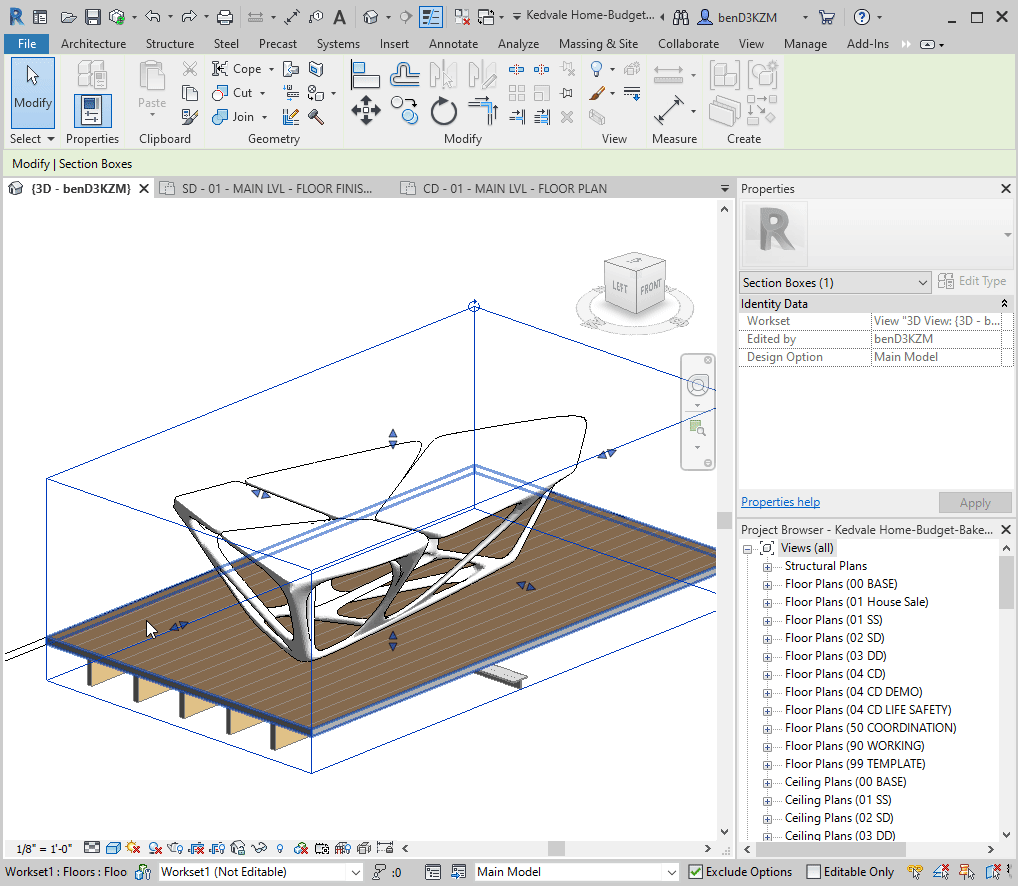
3 | Make 3D Section Boxes
- When the mesh is enclosed, Revit treats the imported mesh as a solid and encloses the geometry when it is cut.
- This behavior is best visualized in 3d, but becomes very useful in section views, as geometry behind the cut plane and occluded by the solid is not visible (the mesh cut does not appear hollow, when cut)
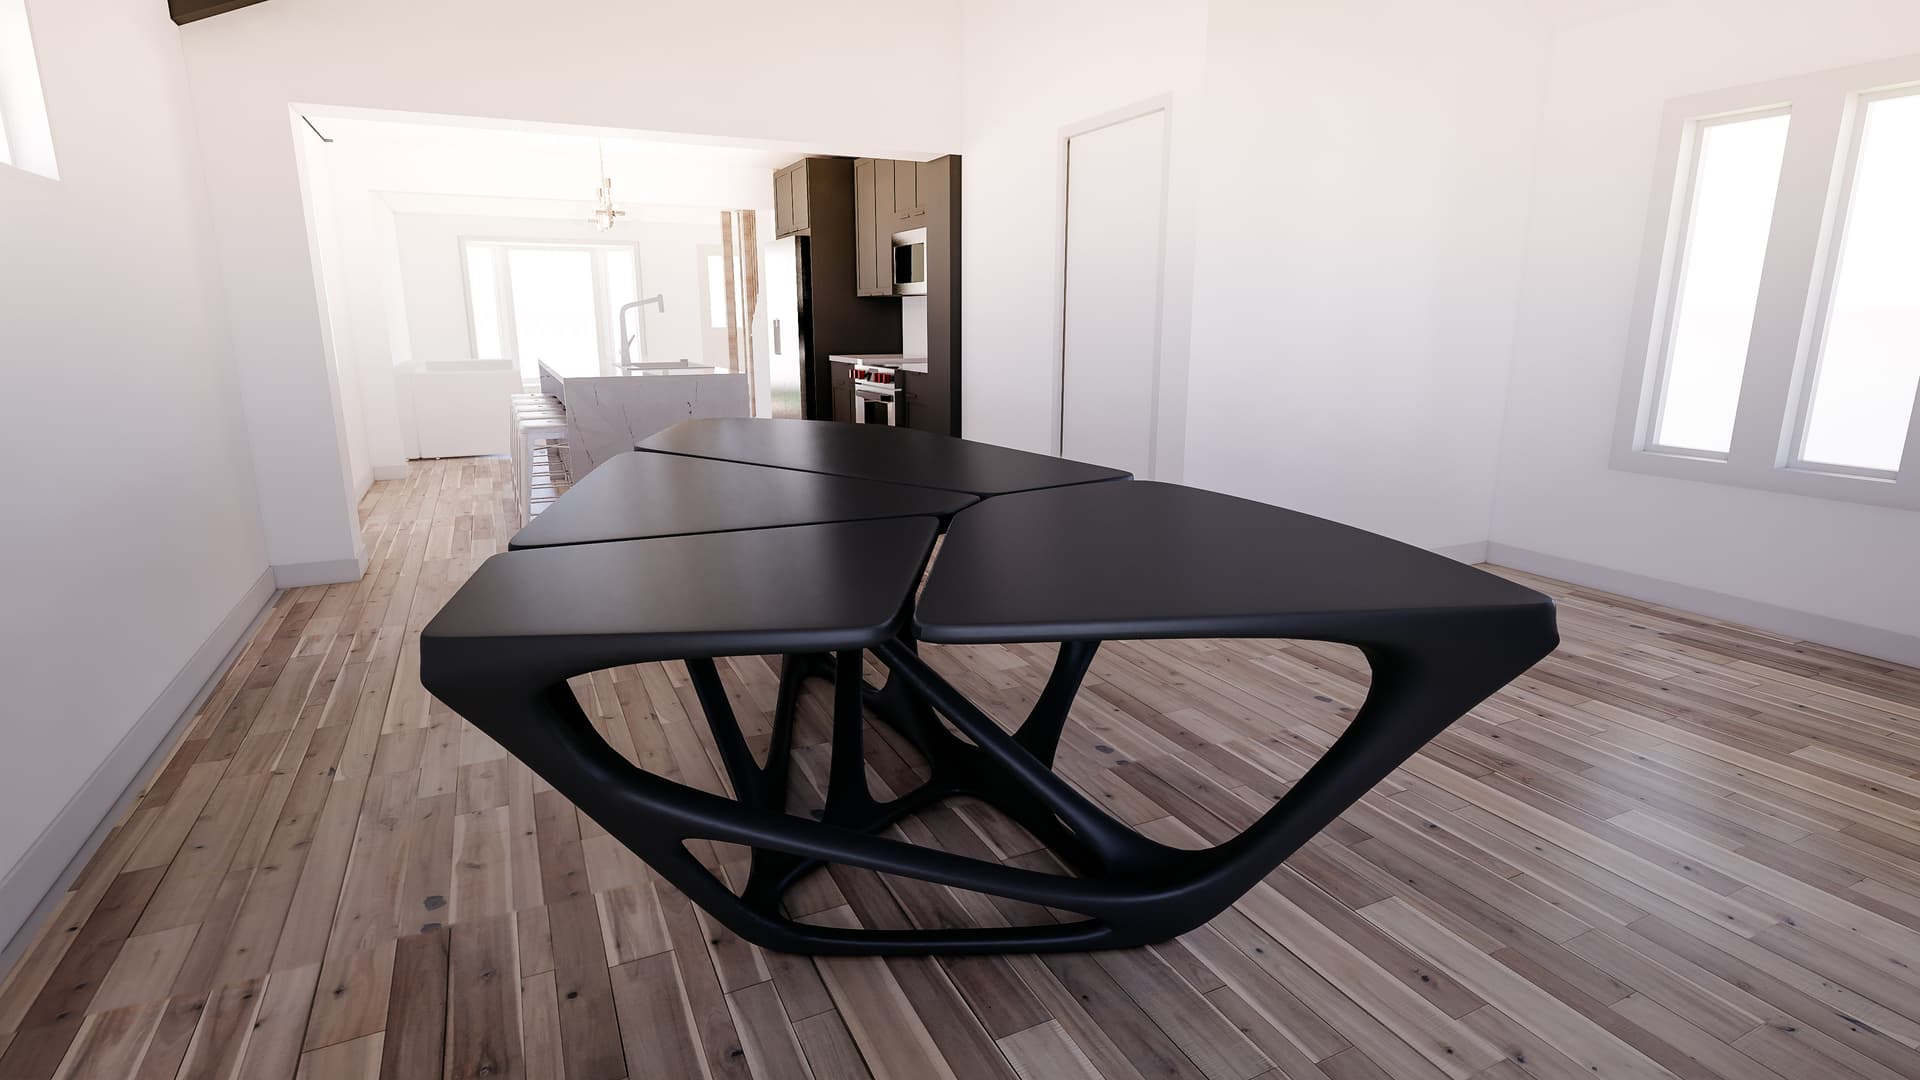
4 | Render the Scene
- Render the scene in Enscape (or other rendering solution)
NOTE: Enscape does a good job at smoothing the mesh normals that appear faceted in Revit
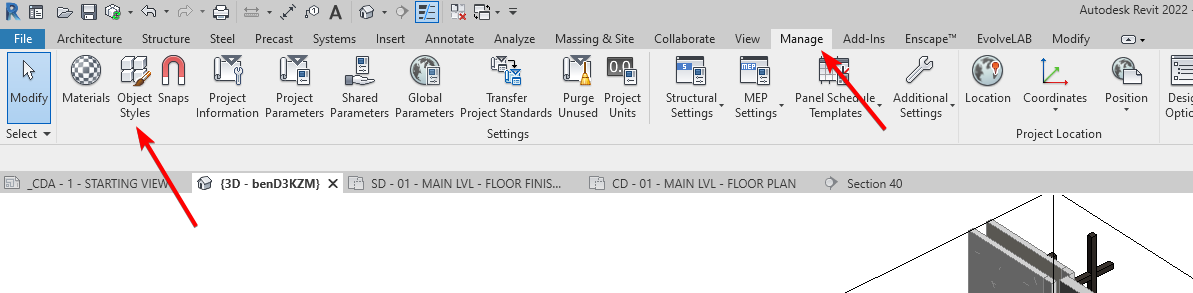
5 | Update Materials
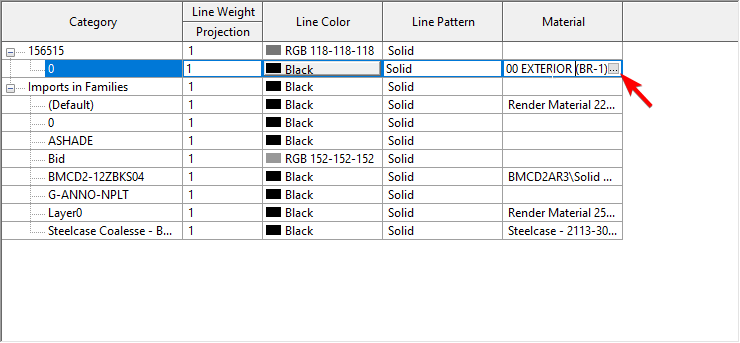
- To update the materials, the dxf object material appears in the Imported Objects tab in the Object Styles
- Manage → Object Styles → Imported Objects → Object ID → Material Column
- Select the Material column text and the 3 dots
- Change the material with a new one loaded in Revit
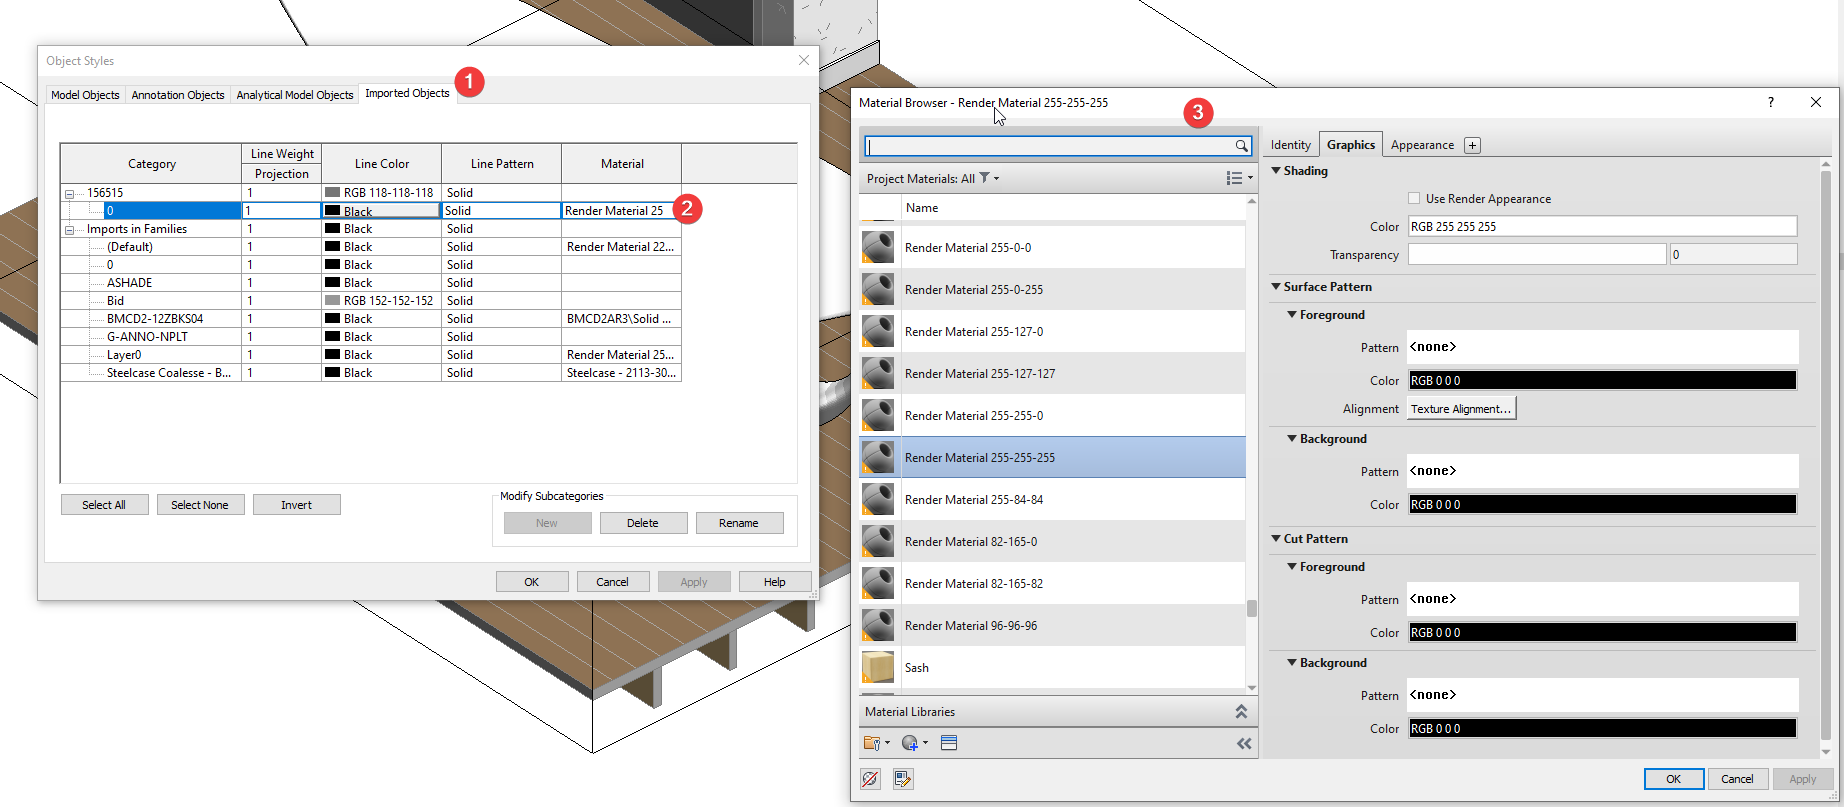
TIP: 3 dots appearance on material field selection
Ideas & Feedback
Let us know how we can improve this workflow.
Are the ideas below important to you for this workflow?
- creating a new Revit material editor for these components
- other ideas that could be useful to this workflow