Workflow Advantages
- Convert free form SketchUp geometry to structured native Revit content
- The native content will behave as if it was originally modeled in Revit. Ex: moving a level will further adjust the Helix generated geometry based on the wall, window and door constraints to that level.
- When setup is standardized, non-Revit users can have their content converted from SketchUp to Revit
Sample Files
Modern_Mutifamily_Building_SU2023_01_base.skp
Modern_Mutifamily_Building_SU2023_02_tagged.skp
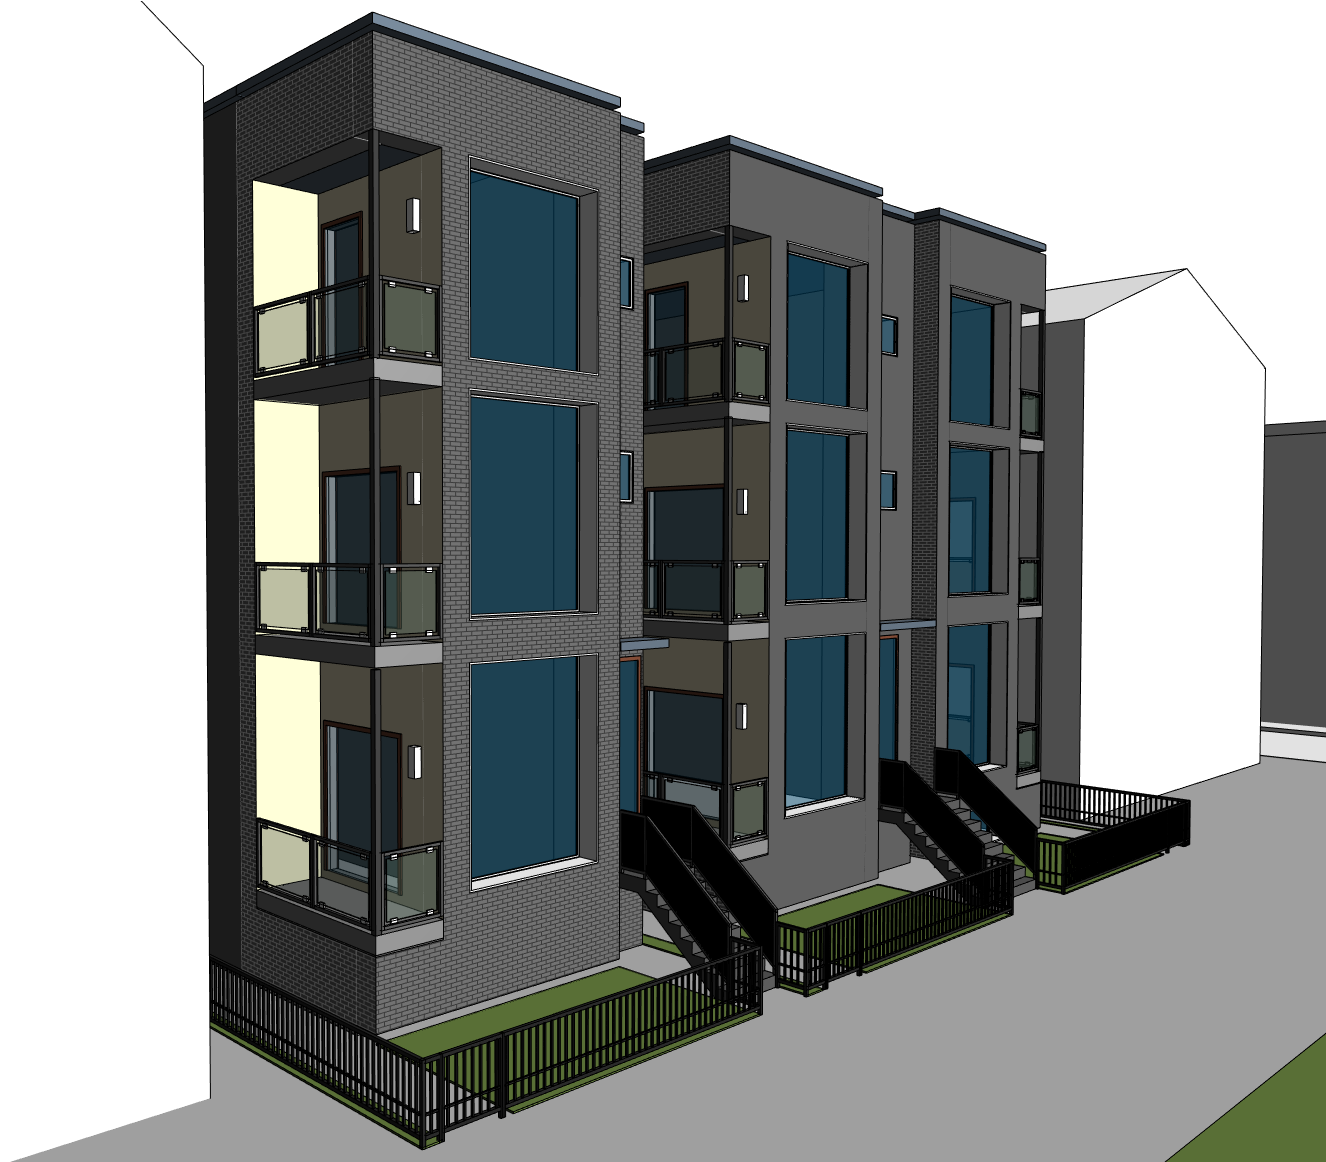
Modern_Mutifamily_Building_R2023_01_Complete.rvt
1. Setup SketchUp Model Tags
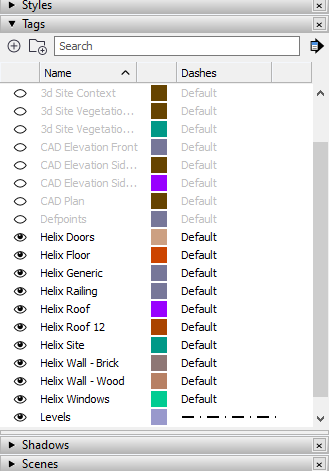
- Create Tags for Helix to map as Revit Family Categories
Alternate: if the SketchUp model is properly setup with tags, you can also use this setup. I prefer using new tags to make sure that unwanted geometry is not placed on that tag
2. Tag SketchUp Geometry
- Place the SketchUp geometry on the correct tag
- For surface based elements, place the SketchUp face onto the correct tag.
Ex: walls, curtain walls, floors, roofs and ceilings - For point based elements, place the component or group on the correct tag.
Ex: windows, doors, meshes - NOTE: some elements, like topography, can have face geometry or component geometry placed on a tag to be mapped. For a list of mapping compatibility, see this post: SketchUp ⥤ Revit | Supported Categories and Mapping
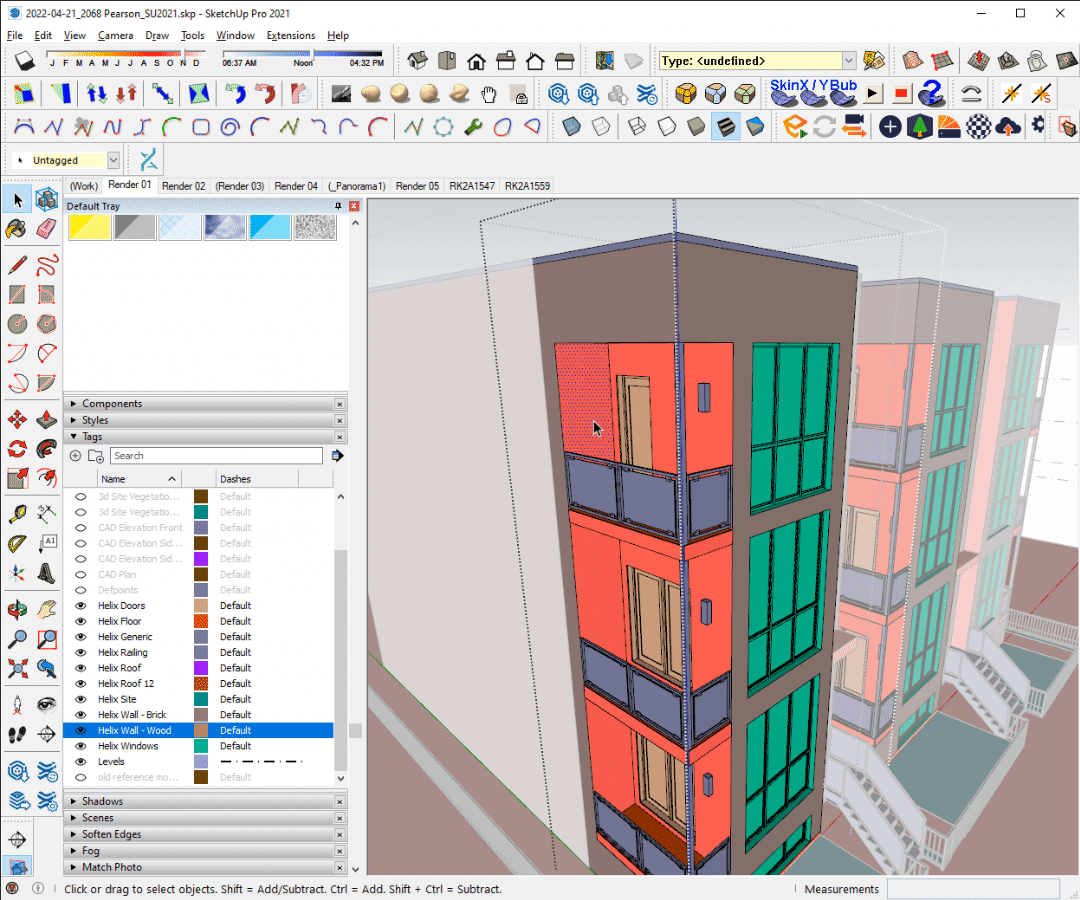
Tip: can use the color by tag feature to visualize the process
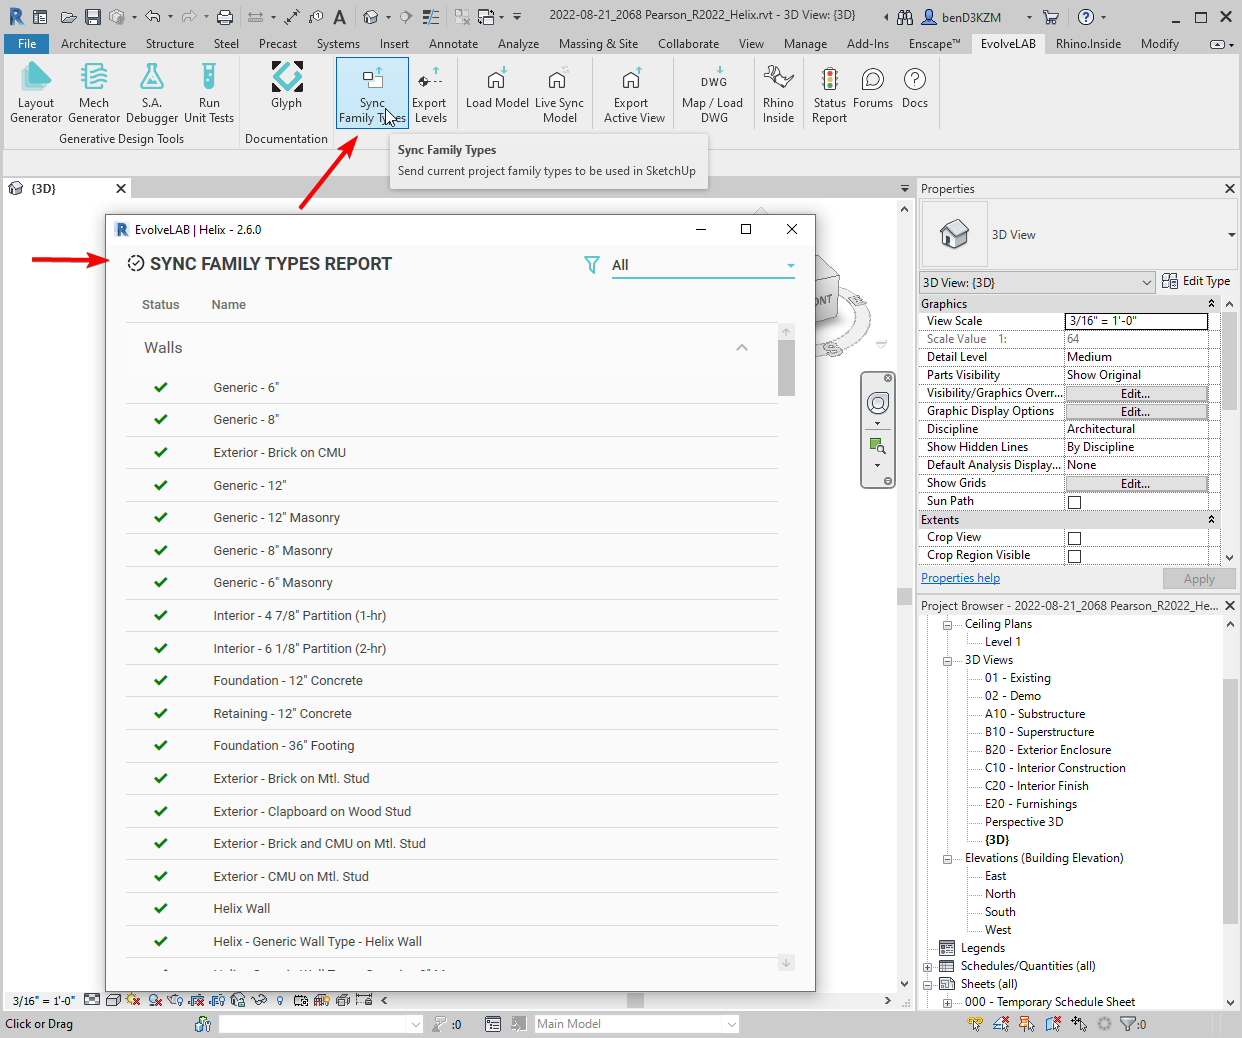
3. Send Revit Family Type Data to SketchUp
- Open a Revit model that has the necessary families types loaded (wall types, doors, windows, curtain walls)
- On the EvolveLAB Revit ribbon tab, click the Sync Family Types button. You should get a dialogue with a summary of the synced content.
- NOTE: Skipping this step will only allow you to map to Helix starter families, instead of the families that you have in your template/standards
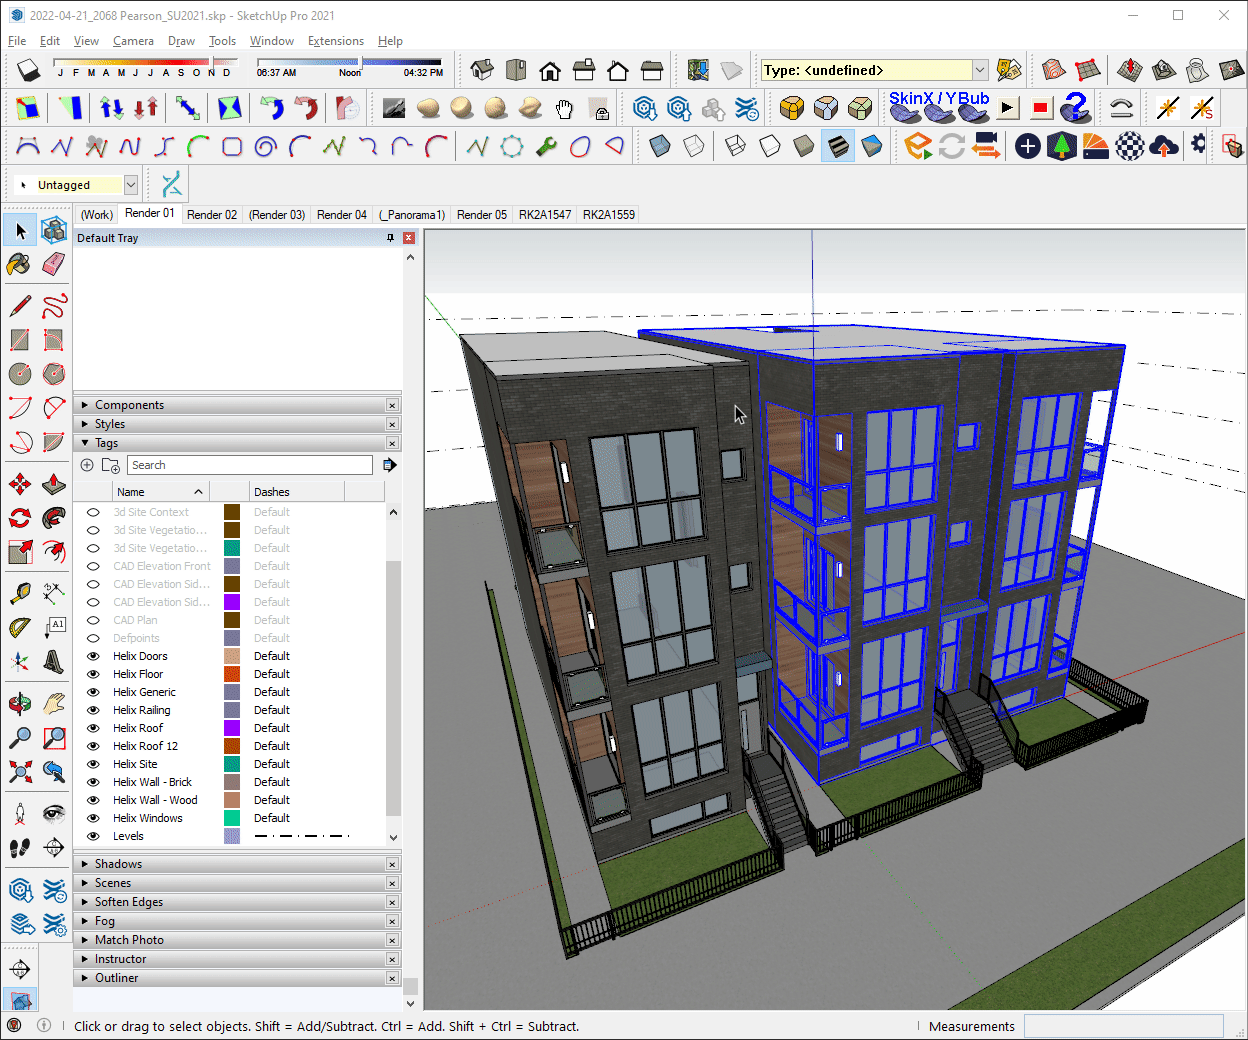
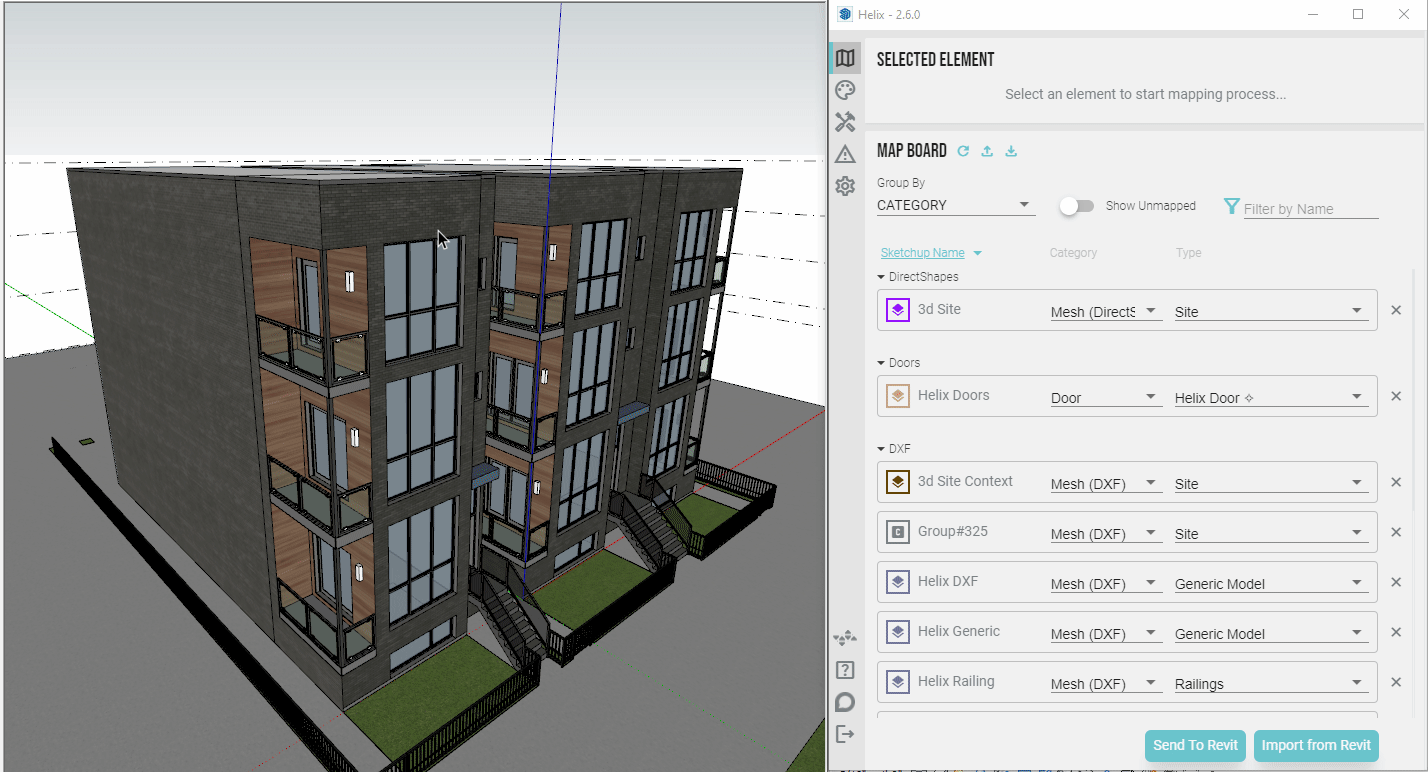
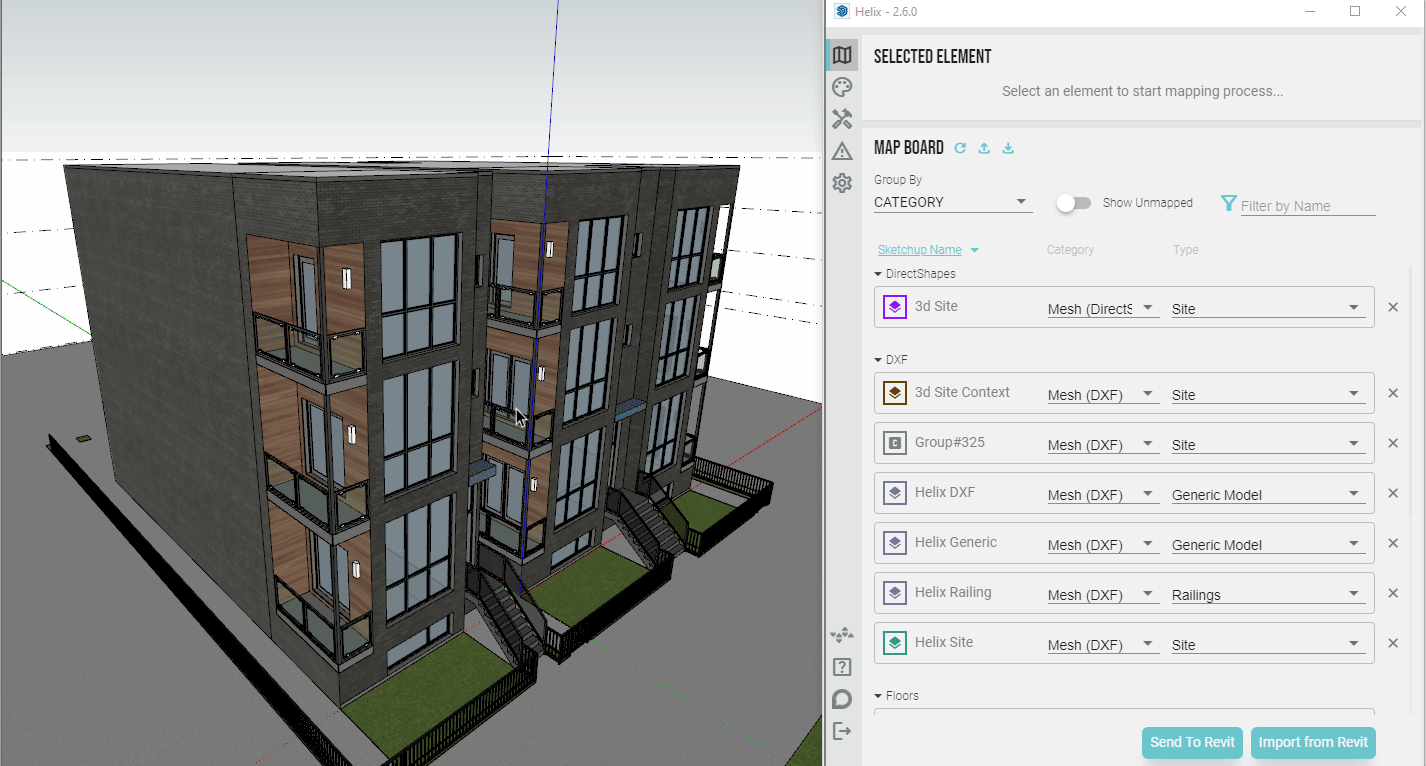
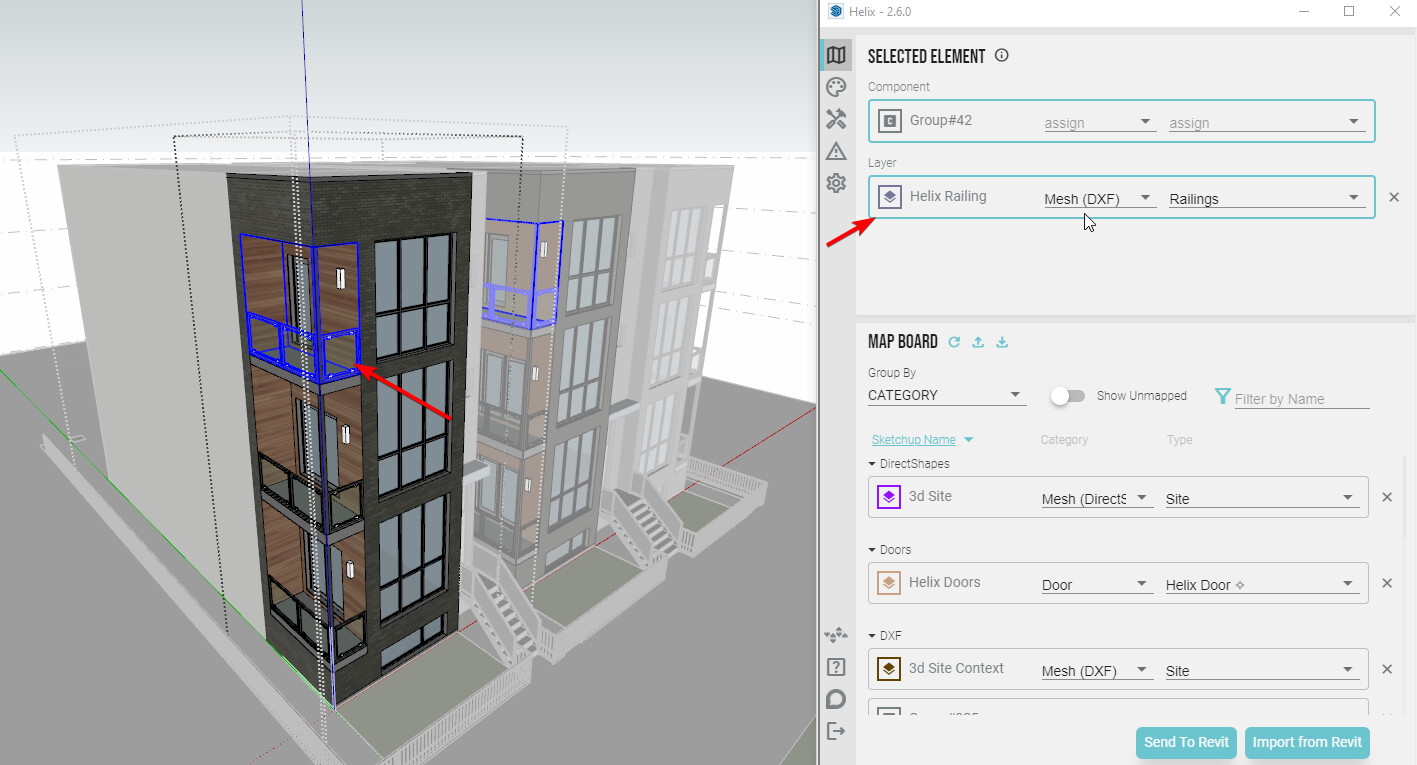
4. Map SketchUp Geometry to Revit in Helix
- Open the Helix interface by pressing the Helix button on the SketchUp toolbar
- Select a face with the proper tag, and assign the Revit category & Family Type
Alternate: You can also use the interface without selection to map the tags. Using the selection is helpful to quickly find the layer of the geometry - For components that need to be represented 1:1 in Revit, you can map that geometry as a Mesh.
- NOTE: You can also map as Mesh, any geometry of categories not currently supported as native Revit elements. Ex: the railing and post geometry in this example are mapped as Mesh (DXF) and set to the Railing category
- Repeat this process for all the tags
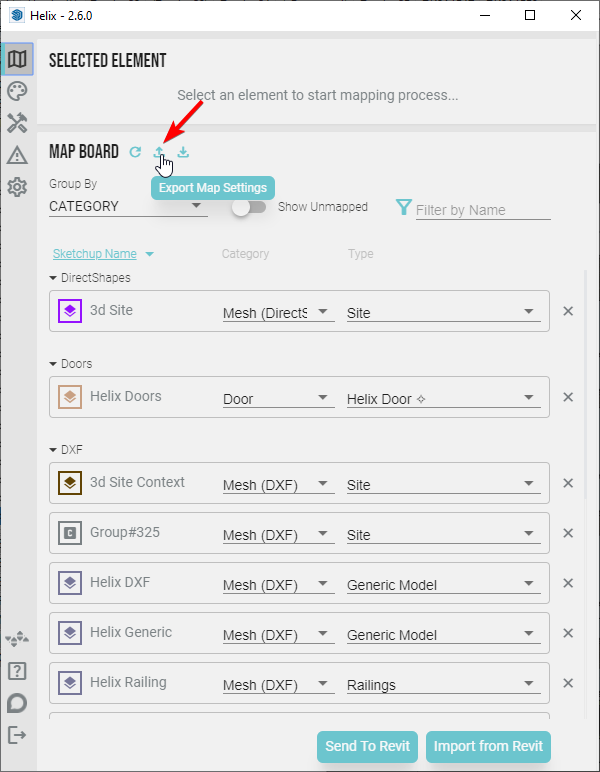
5. Save the Helix Mappings (Optional)
- To use the same mappings for other projects, or to restore the mappings in the current project, export the mappings to an externa file.
- On the mapping tab, click the Export Map Settings button
- Choose a directory to save the file.
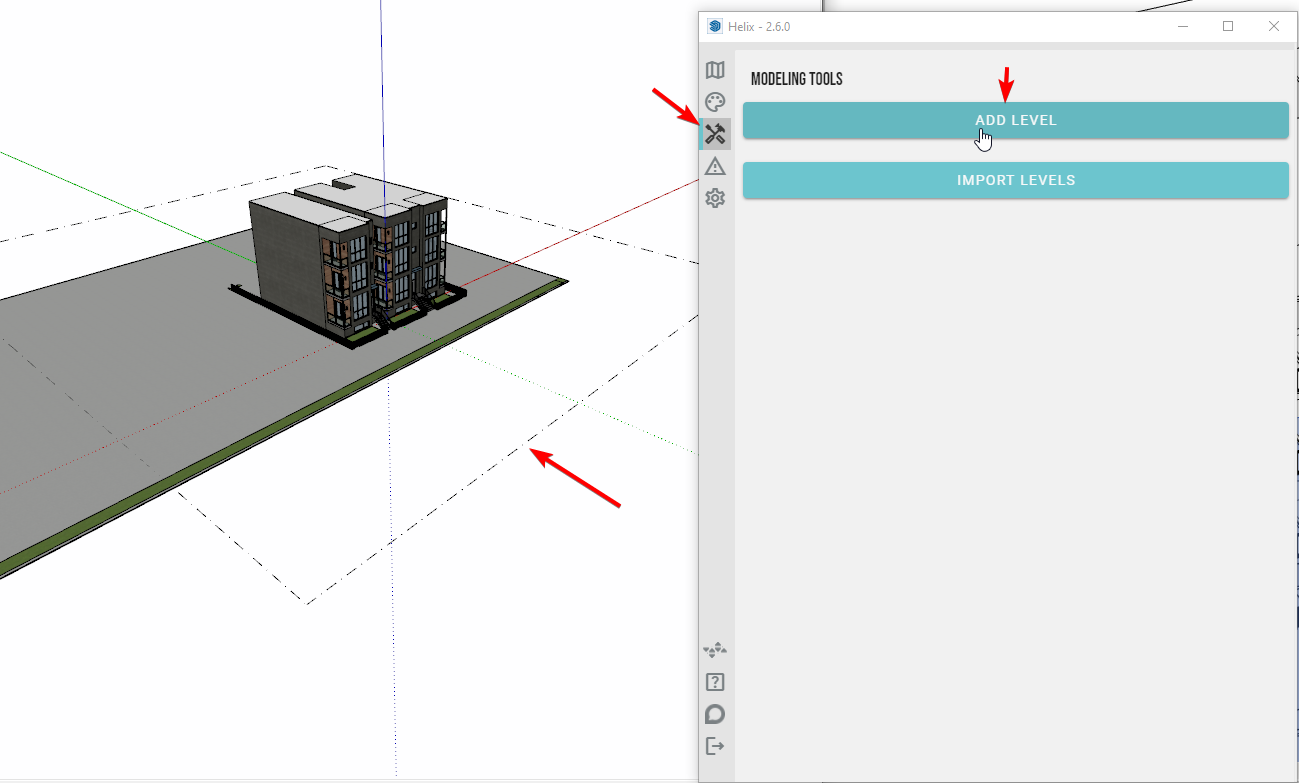
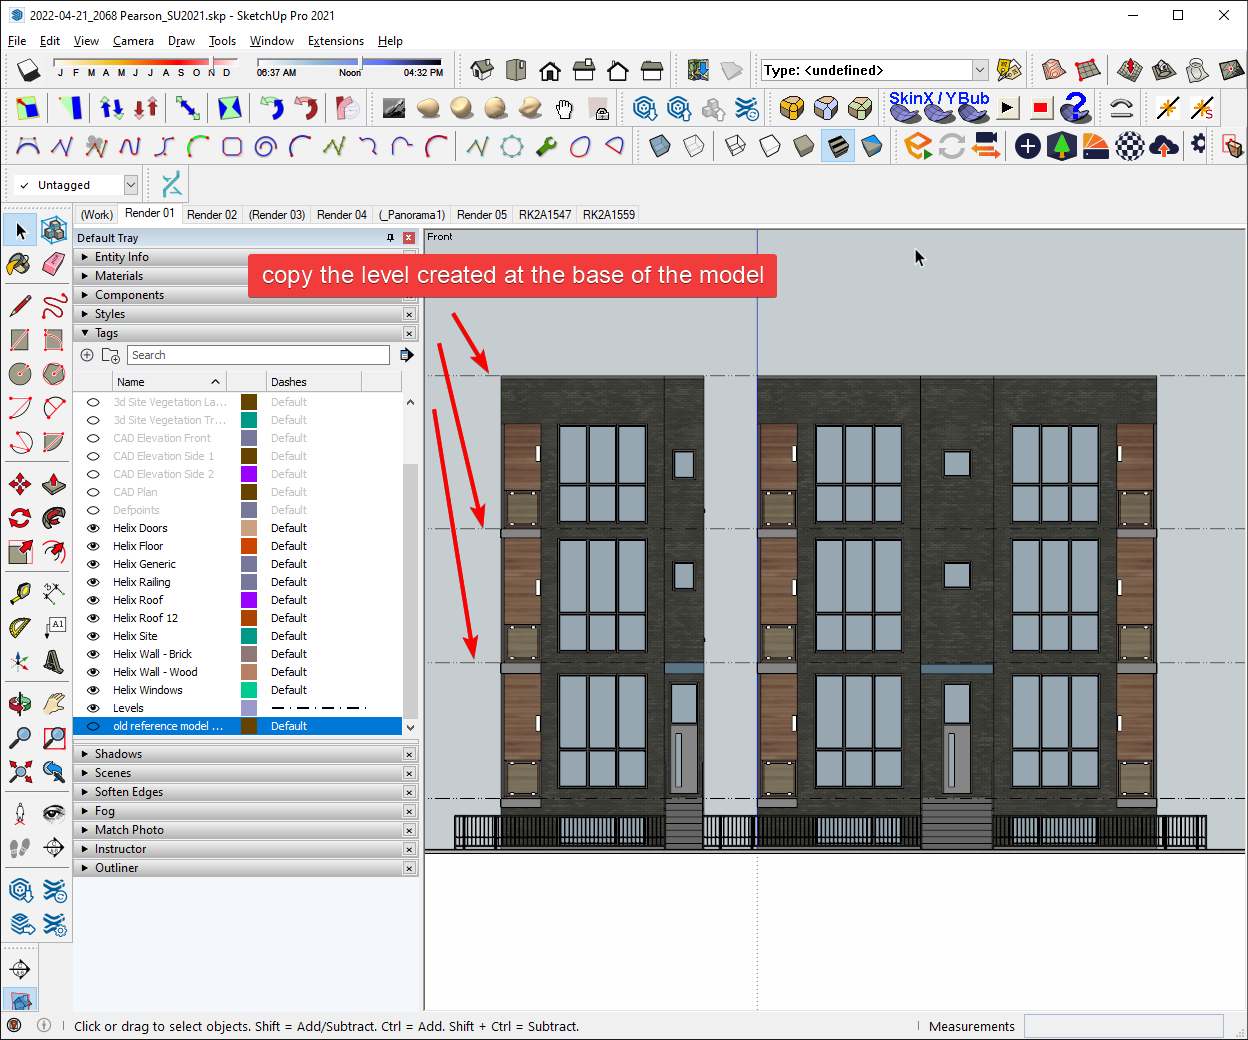
6. Create Levels in SketchUp
- In the Helix SketchUp UI, go to the tools button
- Click on the ADD LEVEL button to add a level in SketchUp
- Copy this level to other floors, to make sure that elements have the proper base constraints.
- NOTE: if this step is skipped, all native geometry is hosted to the level closest to 0’-0"
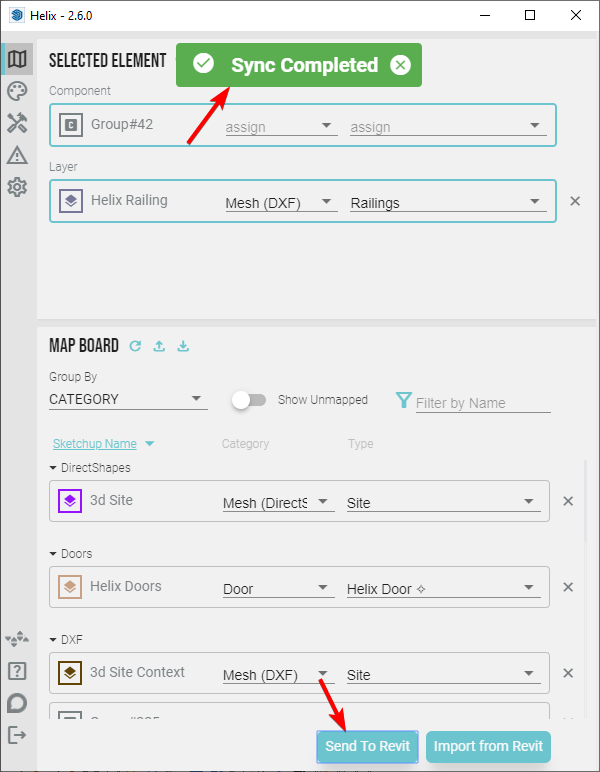
7. Send Mapped Geometry to Revit
- Press Send to Revit button on the SketchUp Helix UI
You should get a Sync Completed notification
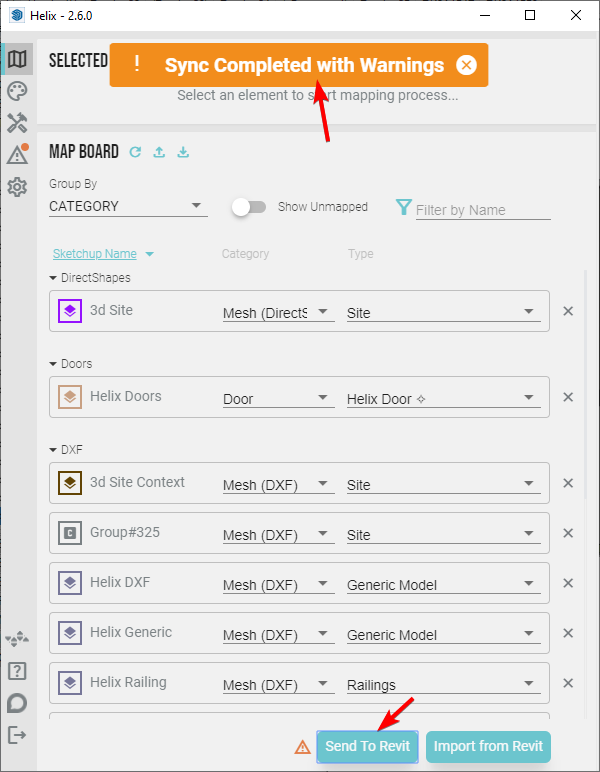
8. Fix Any Model Errors (Conditional)
- If you get the Sync Completed with Warnings notification, after clicking Send to Revit, review the warnings and correct the model
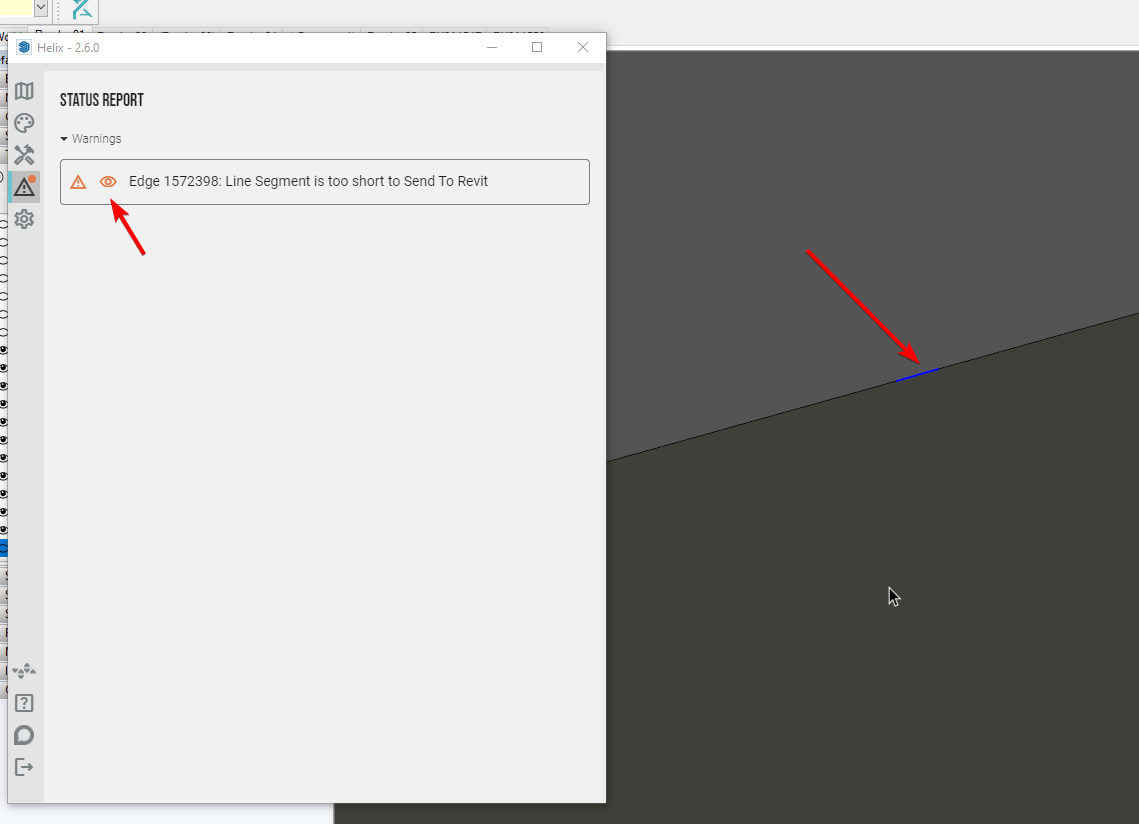
- Go to the status report tab
- Click the eye button to investigate the modeling error
- In this example, when mapping to a Revit wall, an edge cannot be less than 1/256" in length, per Revit’s smallest edge limit. This edge needs to be cleaned up before exporting, so that the wall can be properly constructed in Revit (otherwise it is skipped).
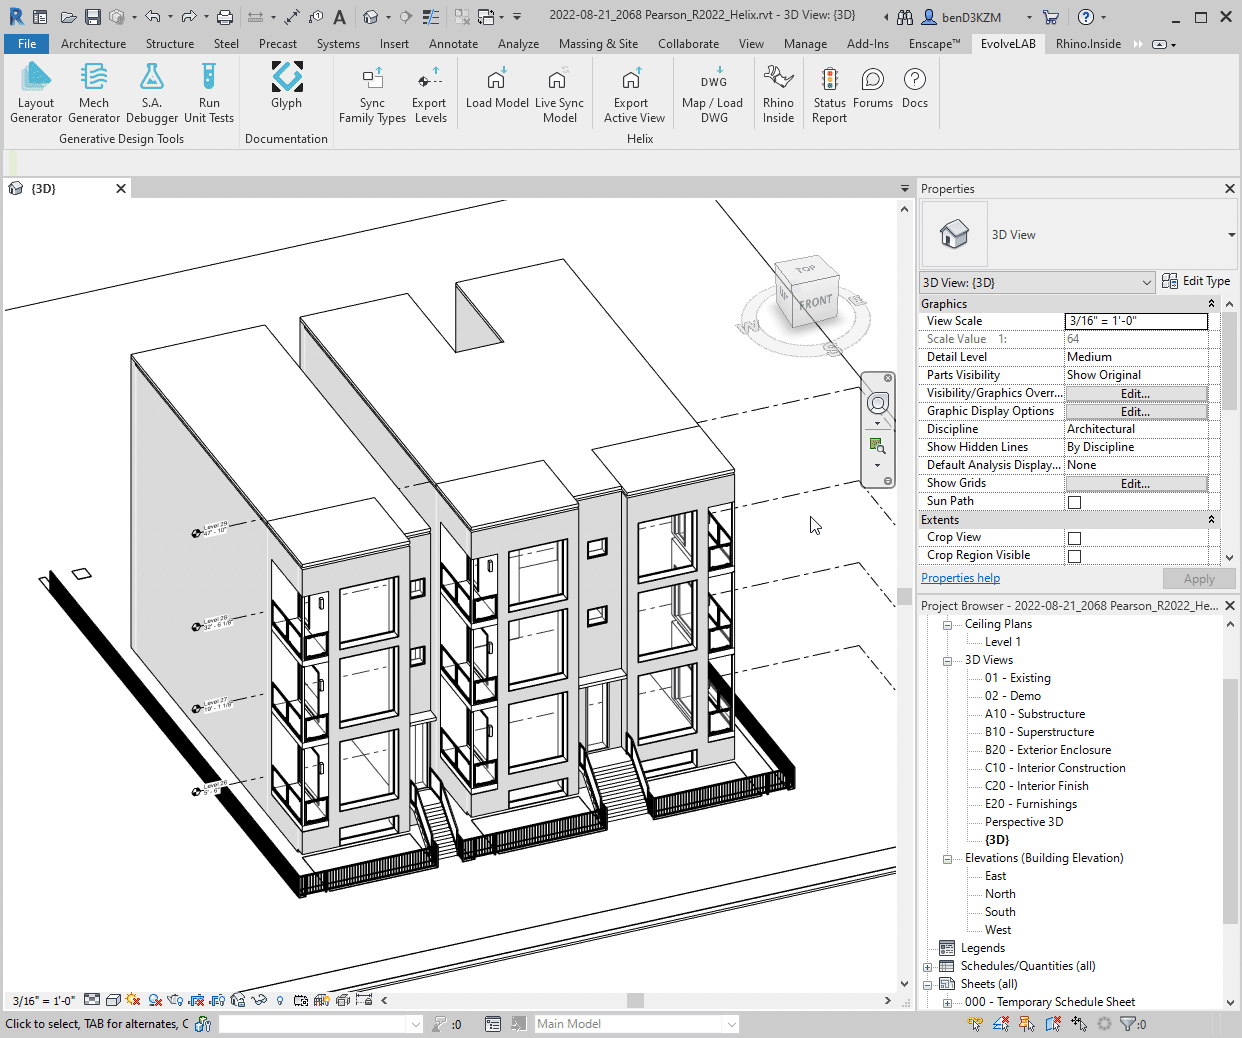
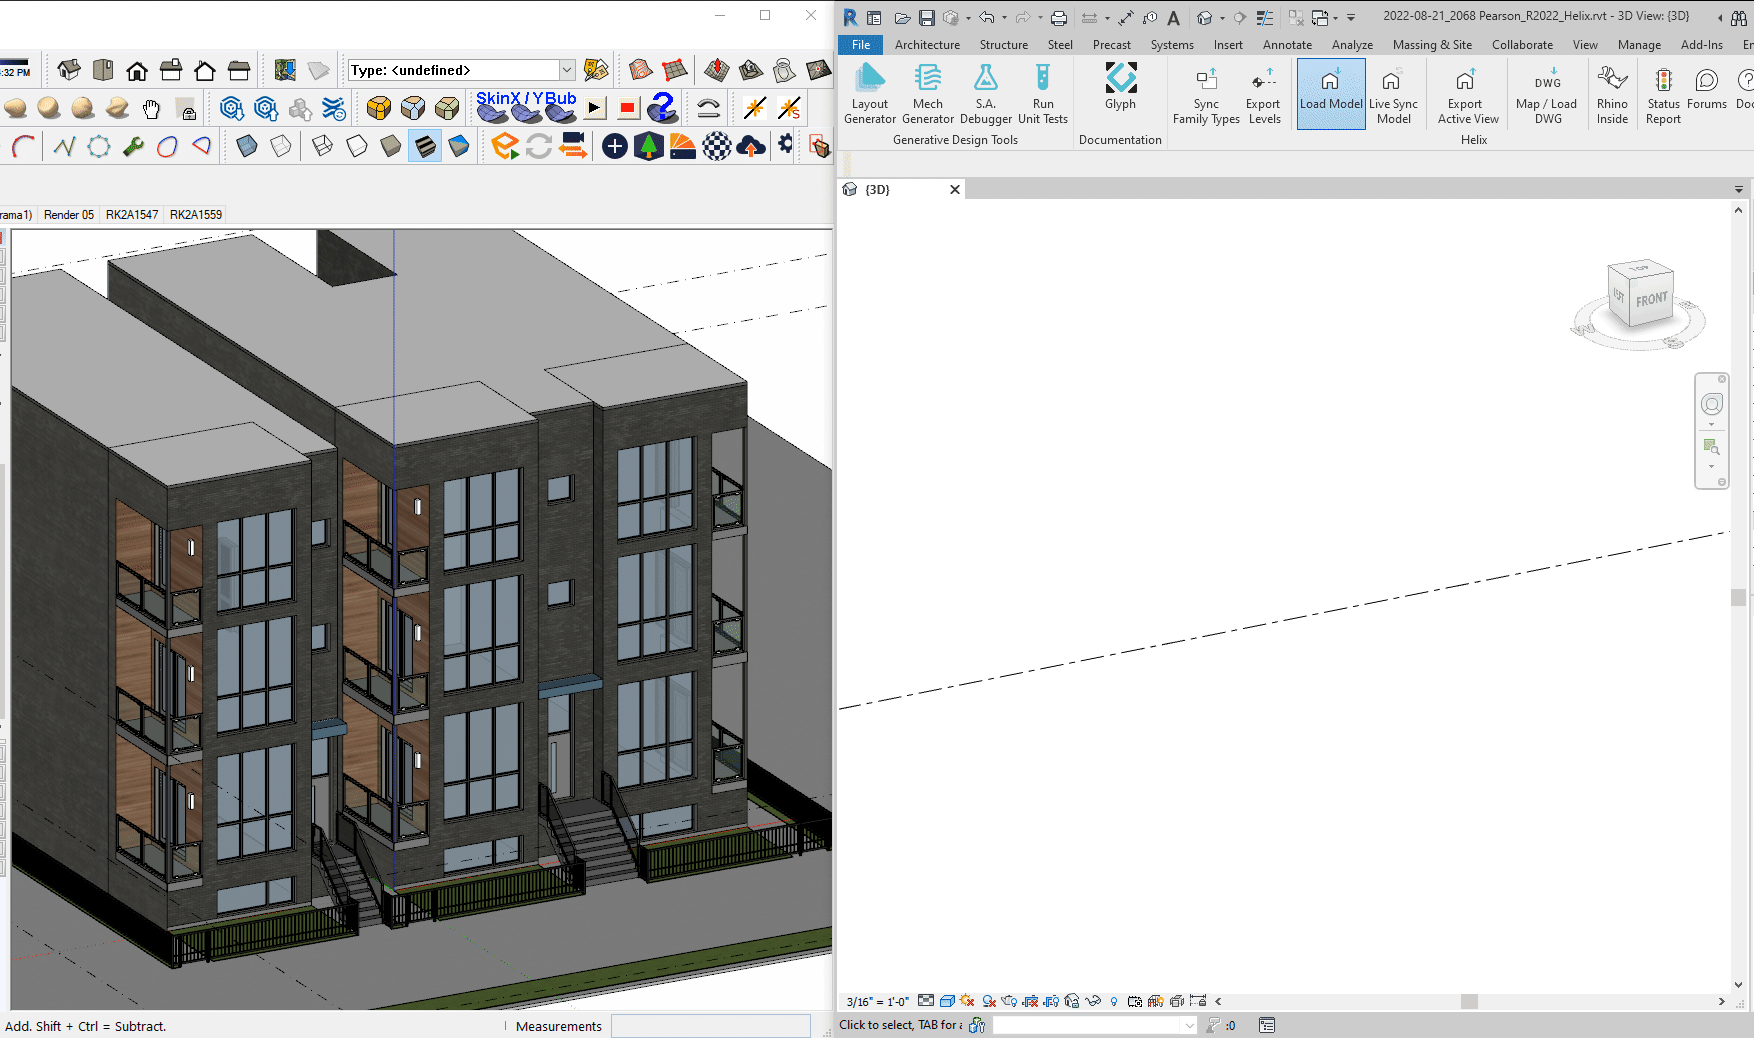
9. Load SketchUp Geometry in Revit
- Back in Revit, press the Load Model button on the EvolveLAB ribbon tab → Helix Panel

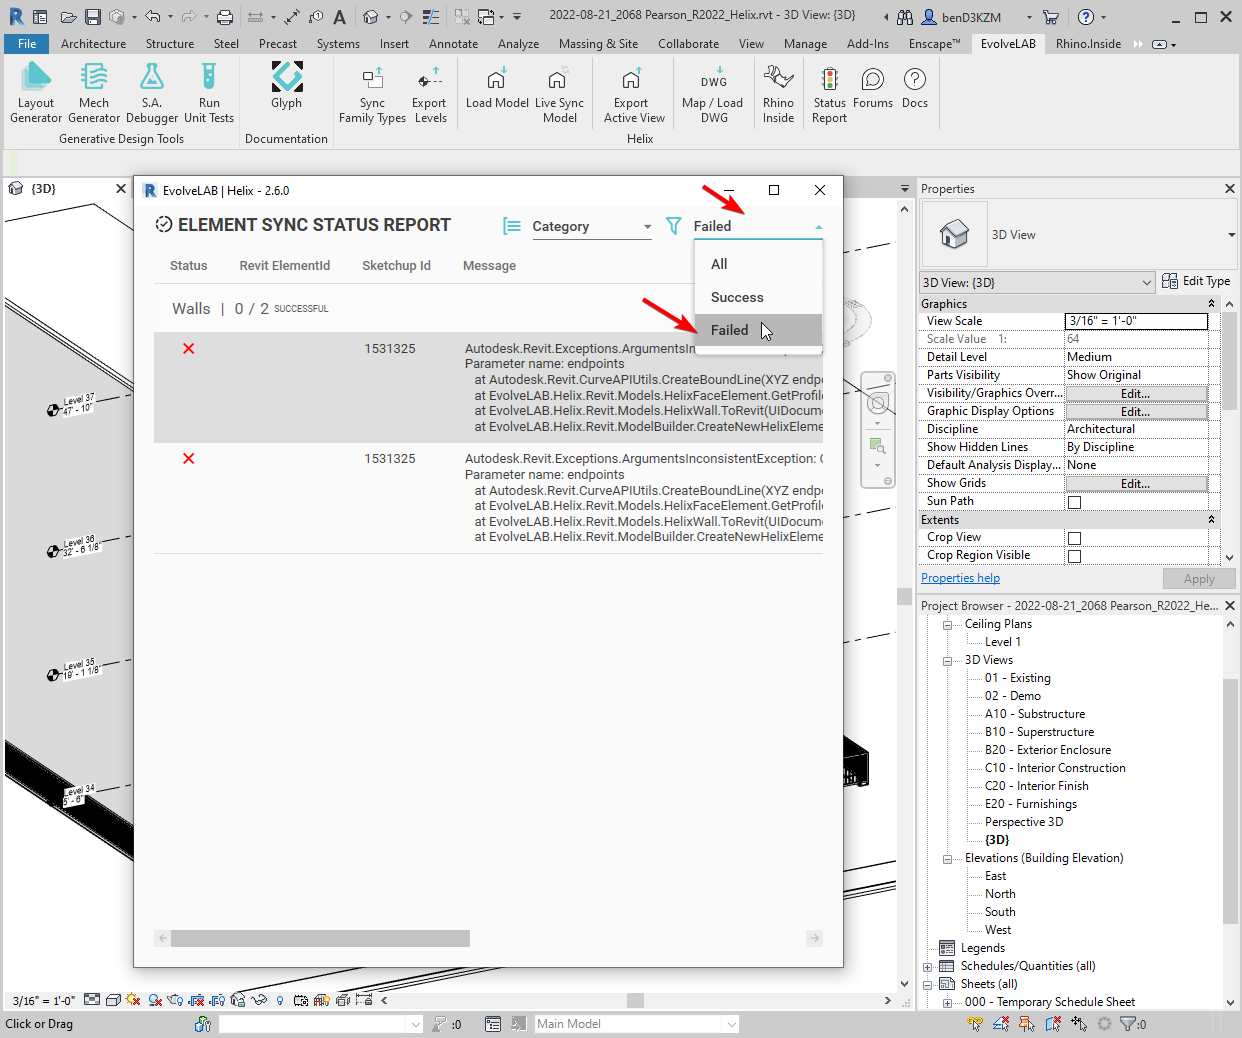
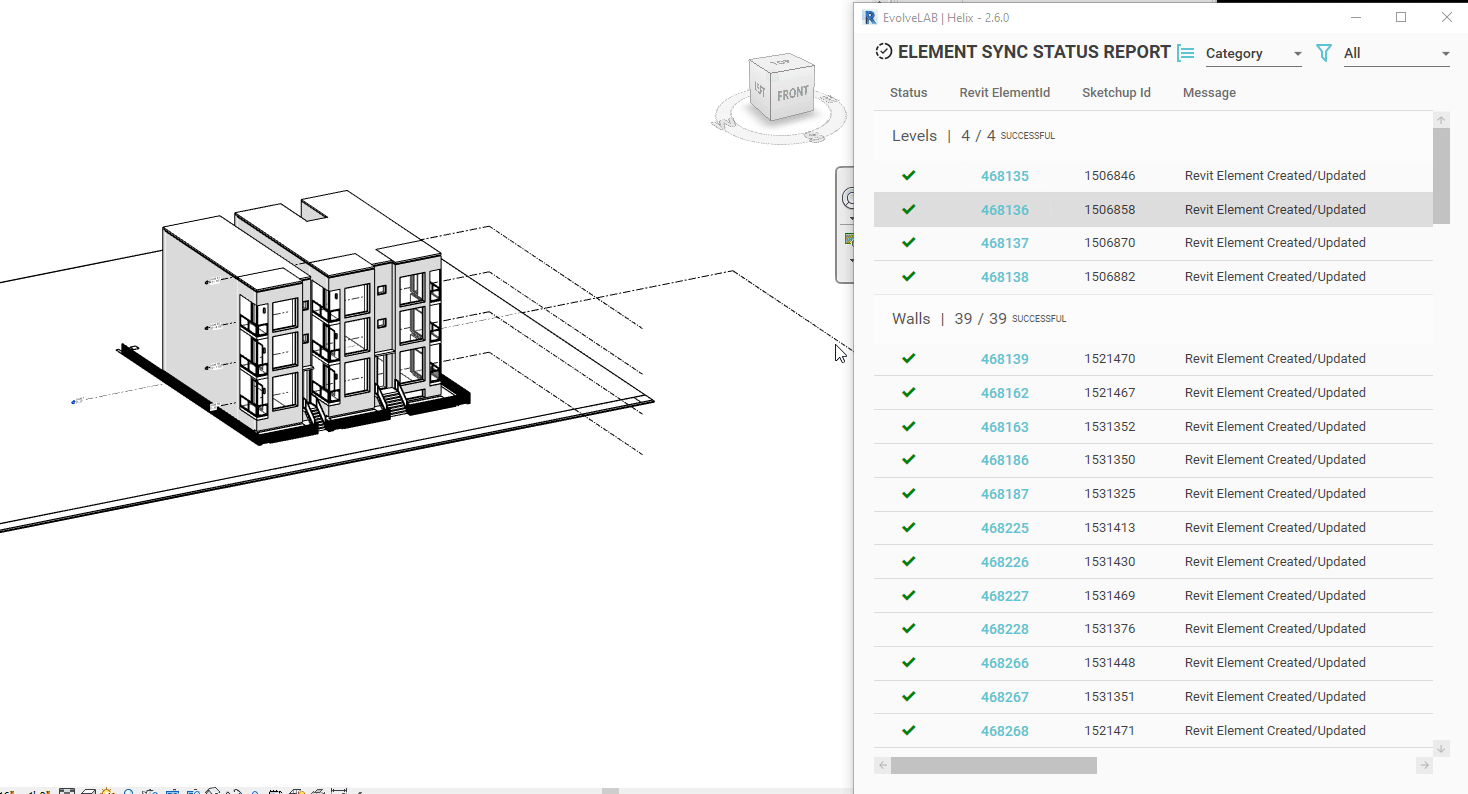
10. Review Element Status in Revit (Optional)
- If not all the geometry transferred correctly in Revit, review the status report for more info.
- Click the Status Report button in the EvolveLAB Revit ribbon tab, Helix panel.
- Filter the report to see Failed elements only
- In this example, the Line Segment is too short warning is not resolved. Notice how the missing walls also cause the windows and doors to not transfer, as the missing walls cannot be found for proper hosting.
- NOTE: Clicking the element ID cell, in the table, will select and focus the element in Revit

11. Make Adjustments in SketchUp (Optional)
- You can make changes in SketchUp and re-sync the model with Revit
- NOTE: Only the changed elements in SketchUp will be updated in Revit. Unchanged elements stay are left unmodified in Revit (even if they were adjusted in Revit)
12. Make Adjustments in Revit (Optional)
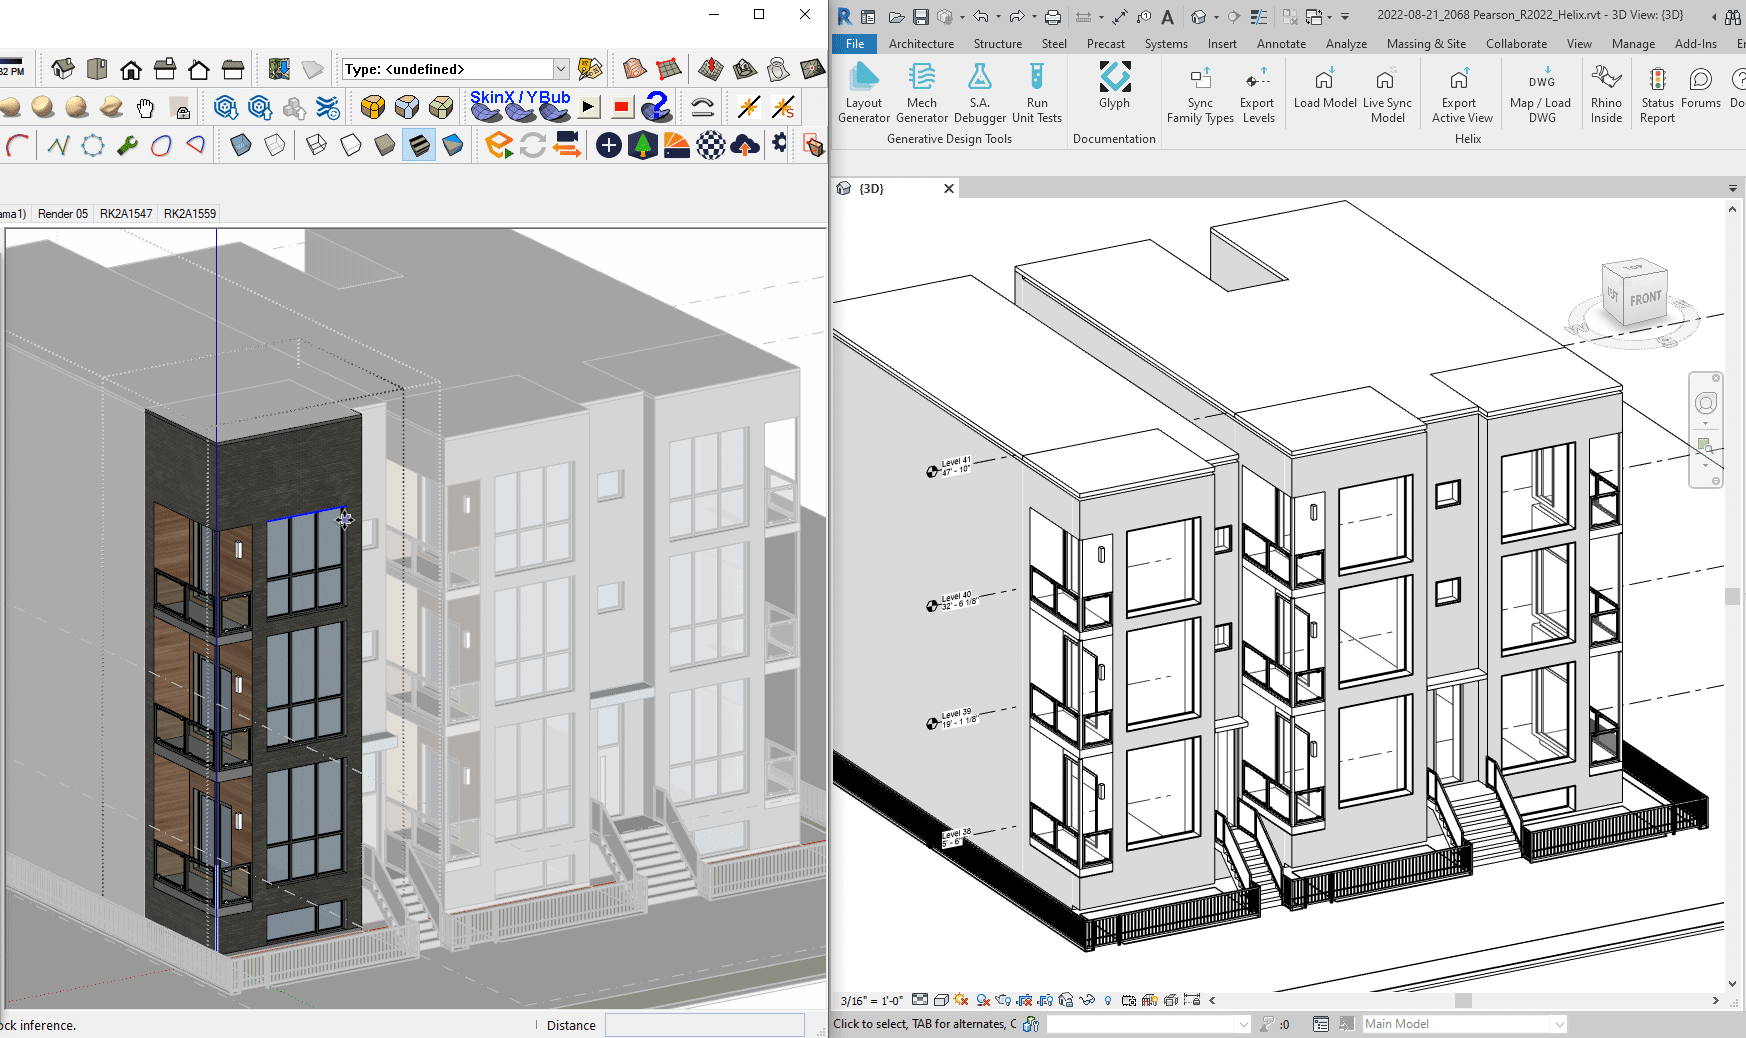
- Further refine the geometry in Revit.
Ex: moving a level will properly adjust the elements constrained to that level (walls, doors, windows…)