Glyph is installed using the Glyph_Setup.msi. MSI’s have built-in functionality that allows for mass deployments. For example, admins can silently deploy Glyph to multiple machines using something like PDQ Deploy. We also added some custom flags that further configure how Glyph is deployed within the office.
Disable Analytics
Some entities would like to disable the default option for analytics.
Using a deployment software (ex: PDQ Deploy), admins can add the DISABLEANALYTICS=TRUE property.
Here’s an example of a silent install with this property using the command line:
msiexec /I EvolveLAB_Glyph_Setup.msi DISABLEANALYTICS=TRUE /quiet
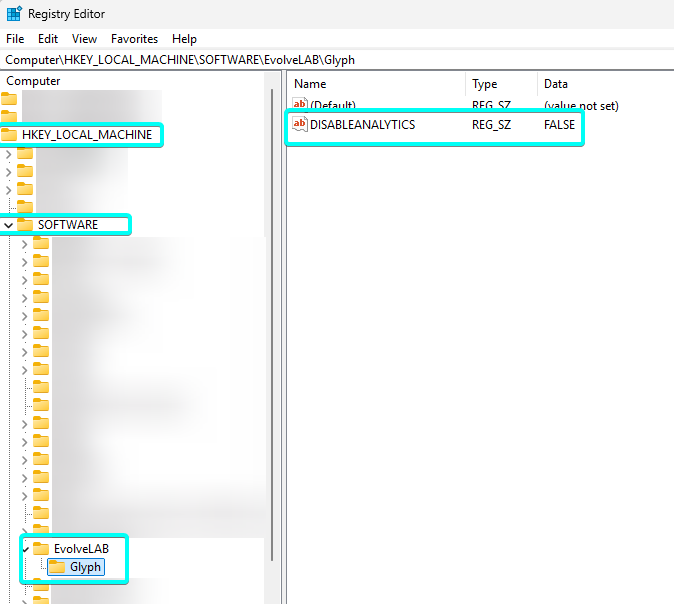
Running this should create the proper registry keys and values in this location:
HKEY_LOCAL_MACHINE\SOFTWARE\EvolveLAB\Glyph
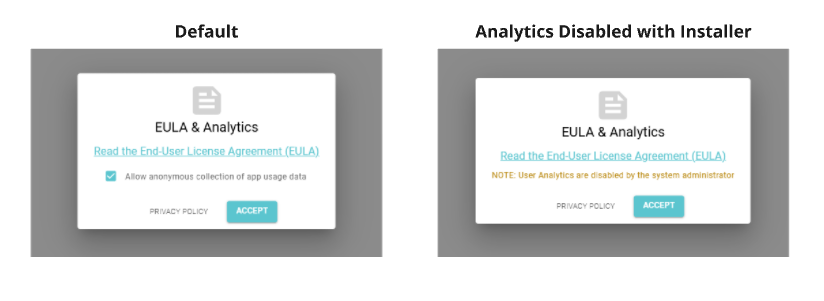
When users first open the app they will see the image on the right, instead of the default options.
Disable Copilot Flag
Some entities would like to disable the AI-powered Copilot features in Glyph.
Using a deployment software (ex: PDQ Deploy), admins can add the DISABLECOPILOT=TRUE property.
Here’s an example of a silent install with this property using the command line:
msiexec /I EvolveLAB_Glyph_Setup.msi DISABLECOPILOT=TRUE /quiet
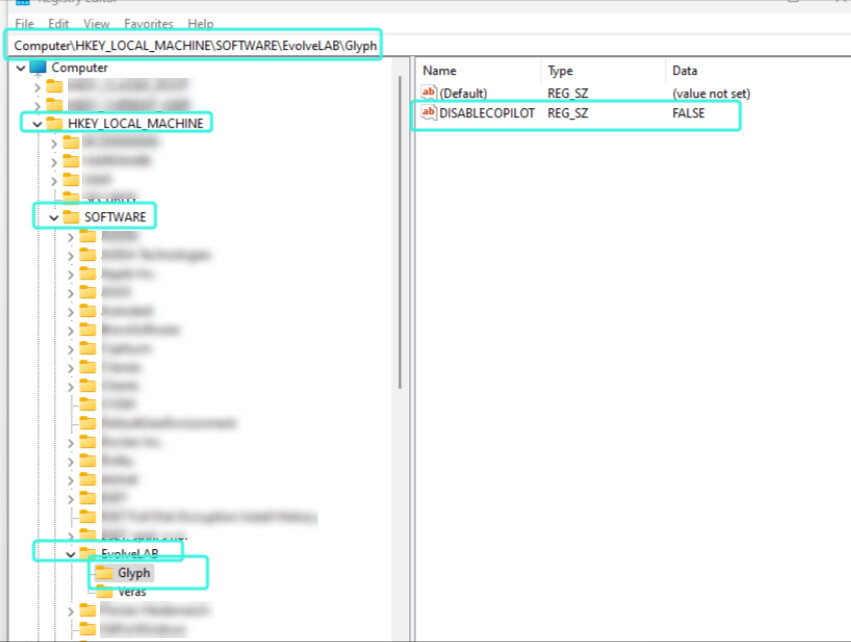
Running this should create the proper registry keys and values in this location:
HKEY_LOCAL_MACHINE\SOFTWARE\EvolveLAB\Glyph
When users now open Glyph, they will not see the Copilot button in the Revit ribbon, nor in the Glyph sidebar.
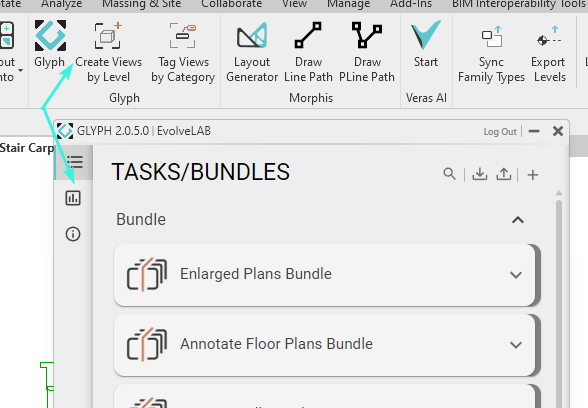
Revit ribbon and Glyph UI with copilot feature disabled

Revit ribbon and Glyph UI with copilot feature enabled (default)
Note:
To re-enable the copilot feature, uninstall and then reinstall Glyph with the flag DISABLECOPILOT=TRUE, or omit that flag as the default is to have copilot enabled.
While you can also update the registry key value instead of re-installing, but we don’t recommend manually editing any registry values, as small errors can cause irreversible consequences.