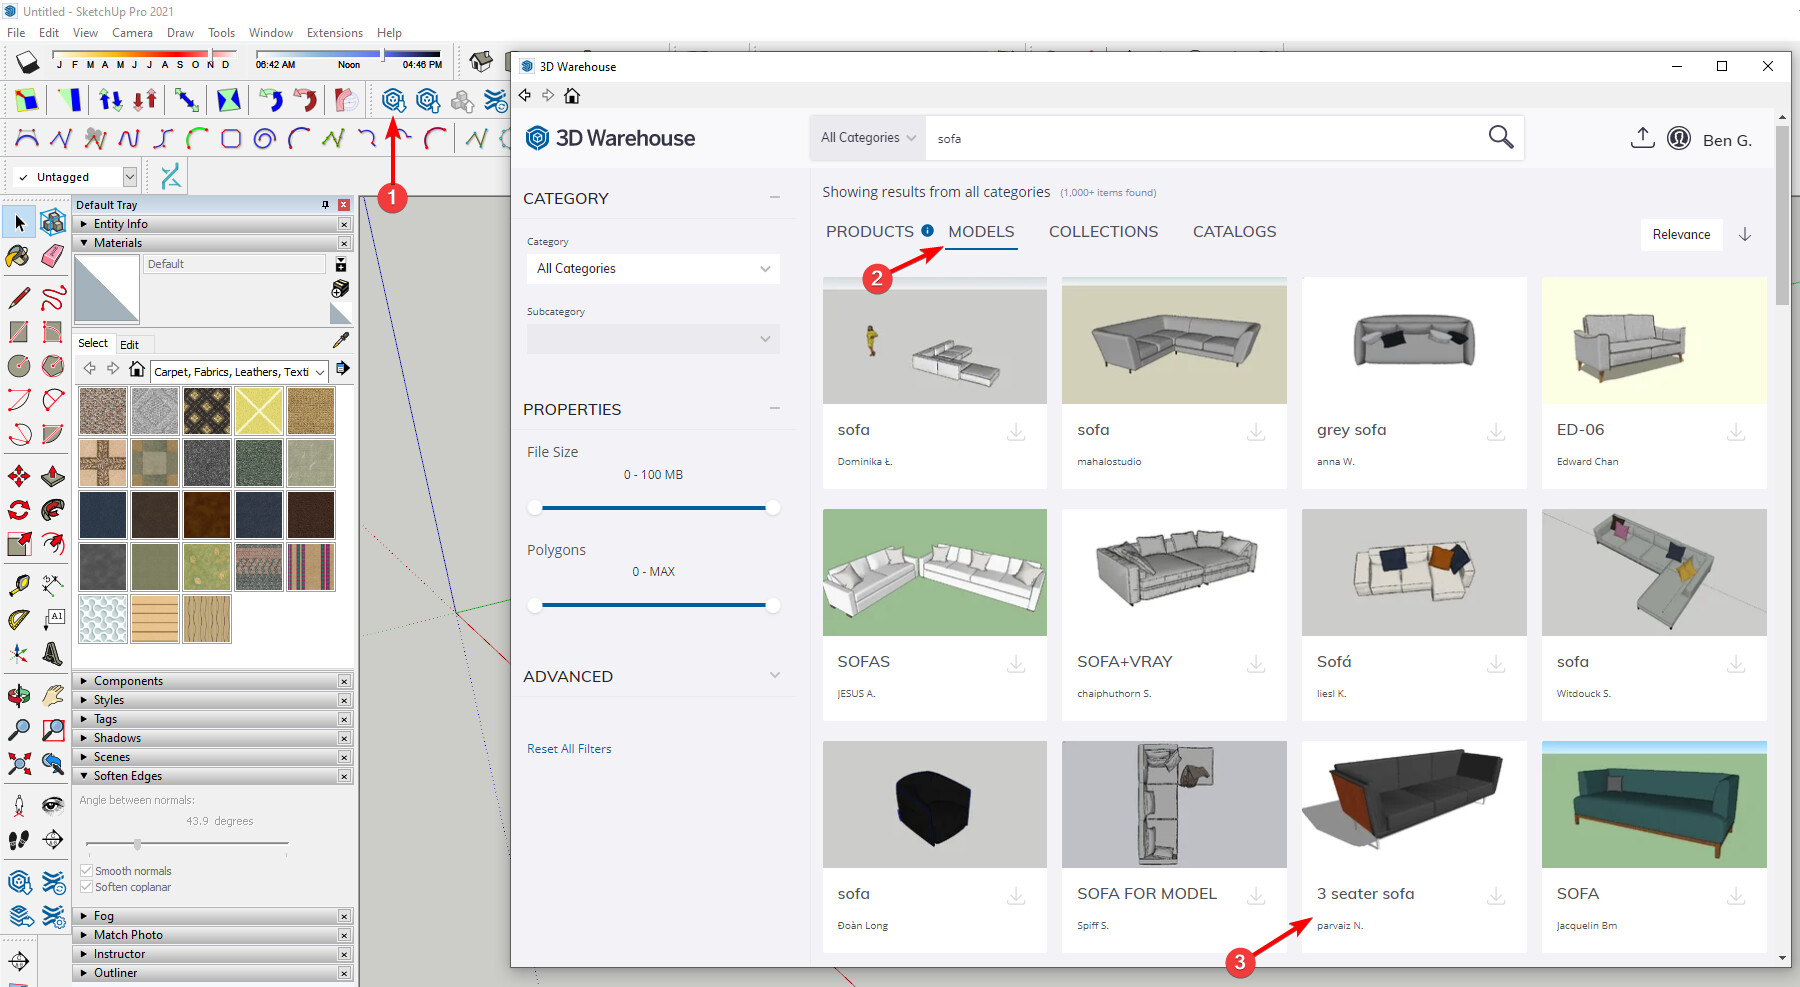
1 | Download the SketchUp model from the 3D Warehouse
- Search SketchUp’s 3D Warehouse for the “sofa” model (or use link below)
- 3D Warehouse
- NOTE: this model has 5,077 polygons
2 | Smooth the Triangles (Optional)
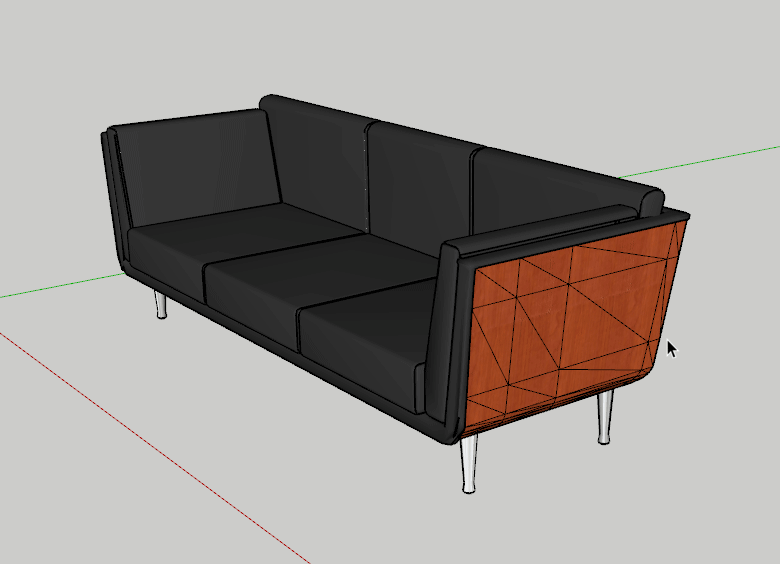
The wood portion of this sofa has visible edges for the triangles that make up the geometry. If these are not softened in SketchUp, they will show up in Revit. To soften follow these steps:
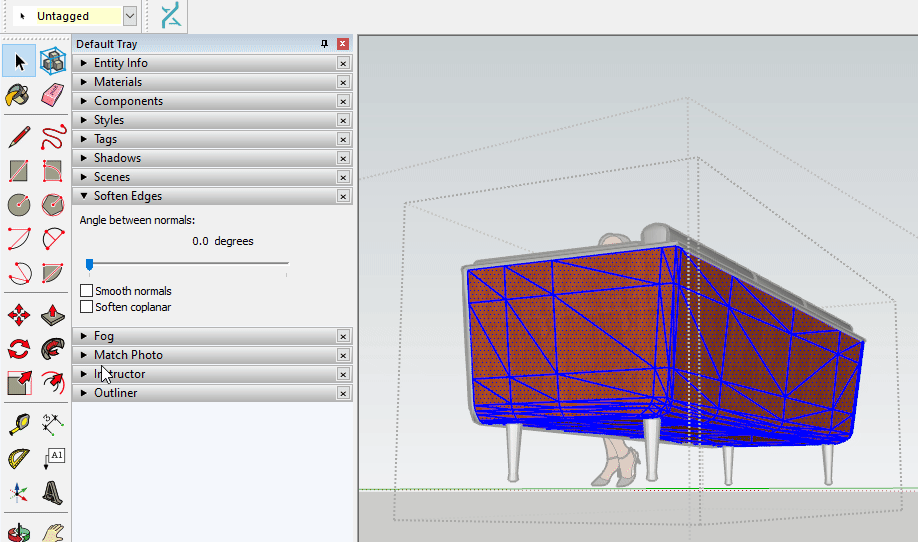
-
go inside the group and select the geometry by triple clicking (or can select with a crossing rectangle)
-
in the Default Tray check the Smooth normals and the Soften coplanar ON, and increase the Angle between normals slider to a desirable position (you can visualize the effect in SketchUp)
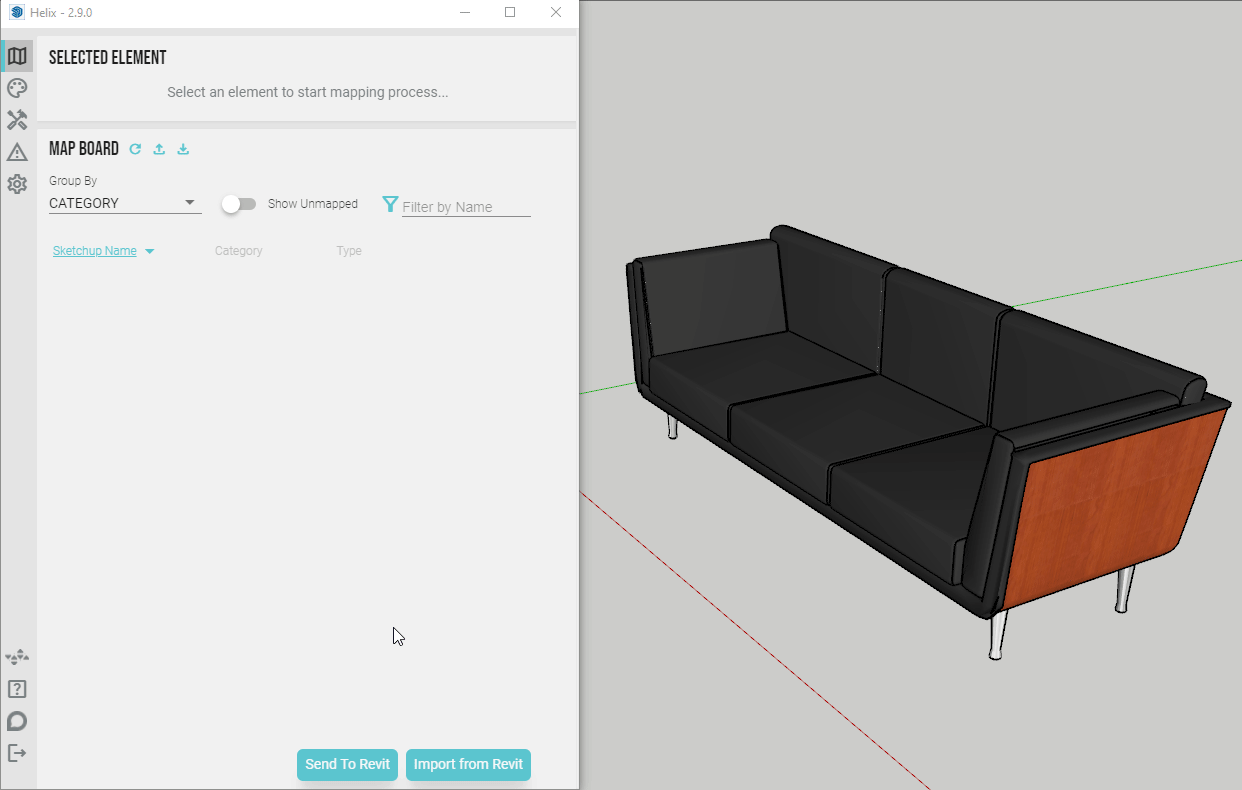
3 | Map Component in Helix
- Open the the Helix UI by clicking the Helix Icon in SketchUp
- Select the component
- In the SELECTED ELEMENTS section change the selected Component “Group #1” to DXF in the dropdown
4 | Sync with Revit
- Click the Sync SketchUp button in the Helix UI
- With Revit open, click the Load Model button in the EvolveLAB Revit Ribbon Tab

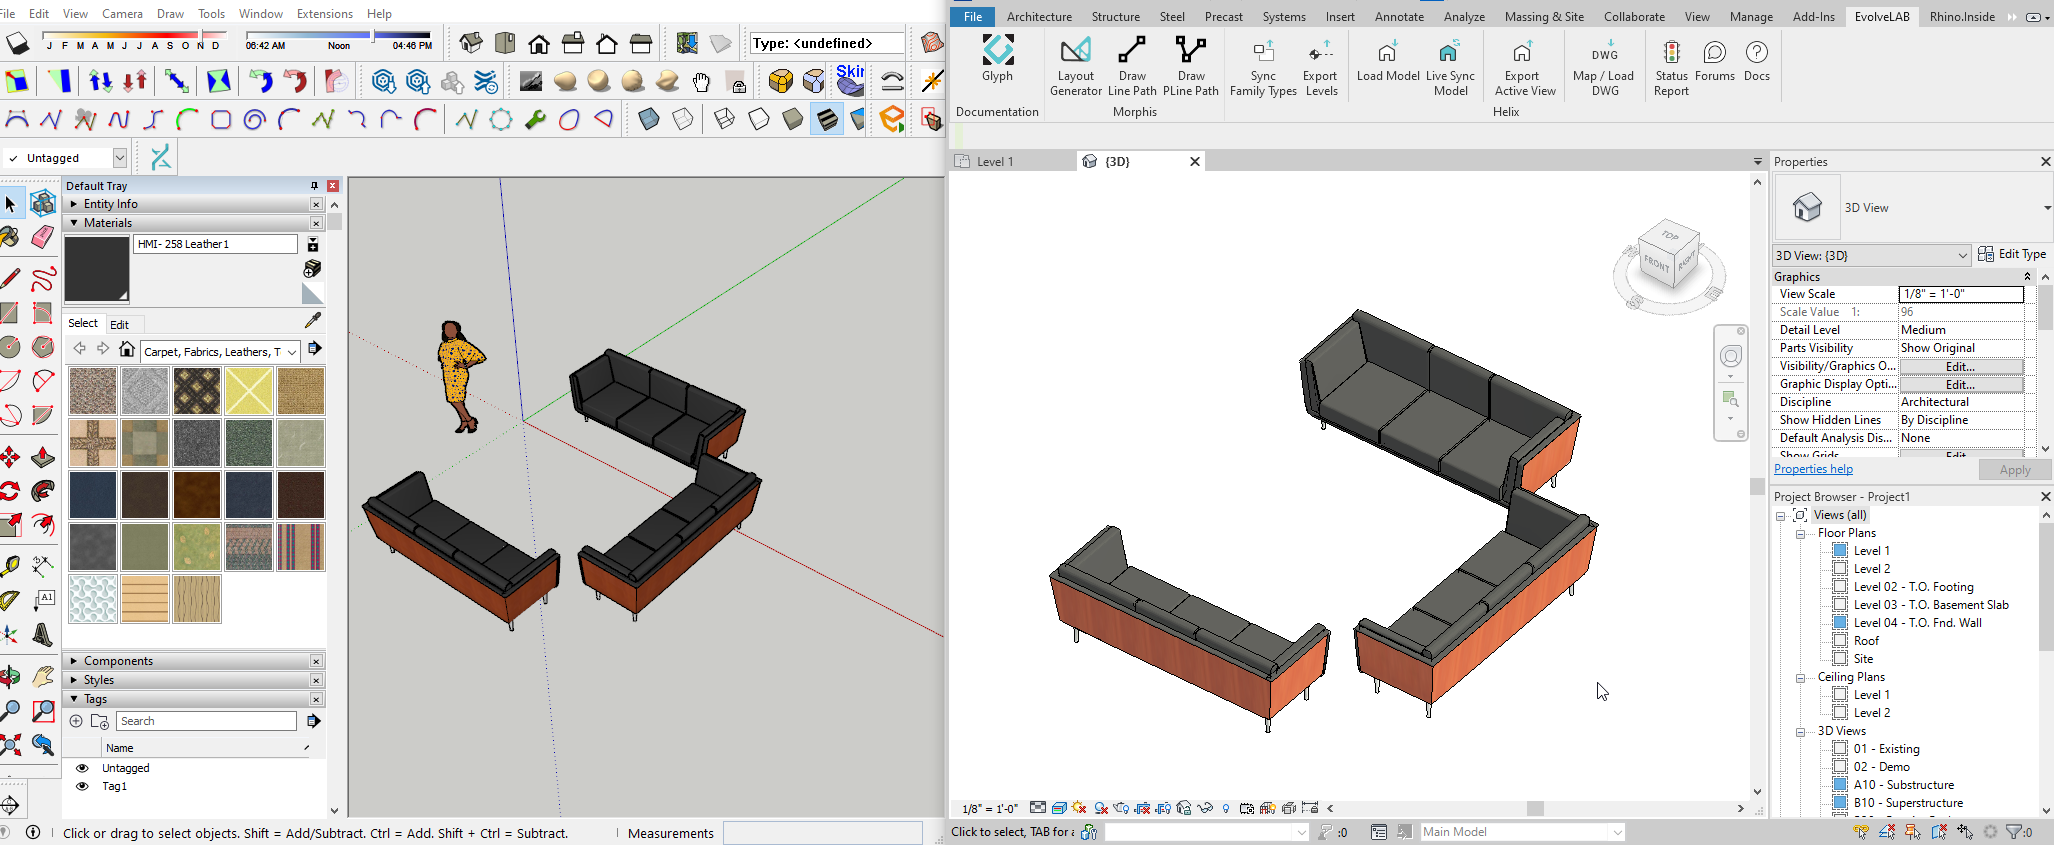
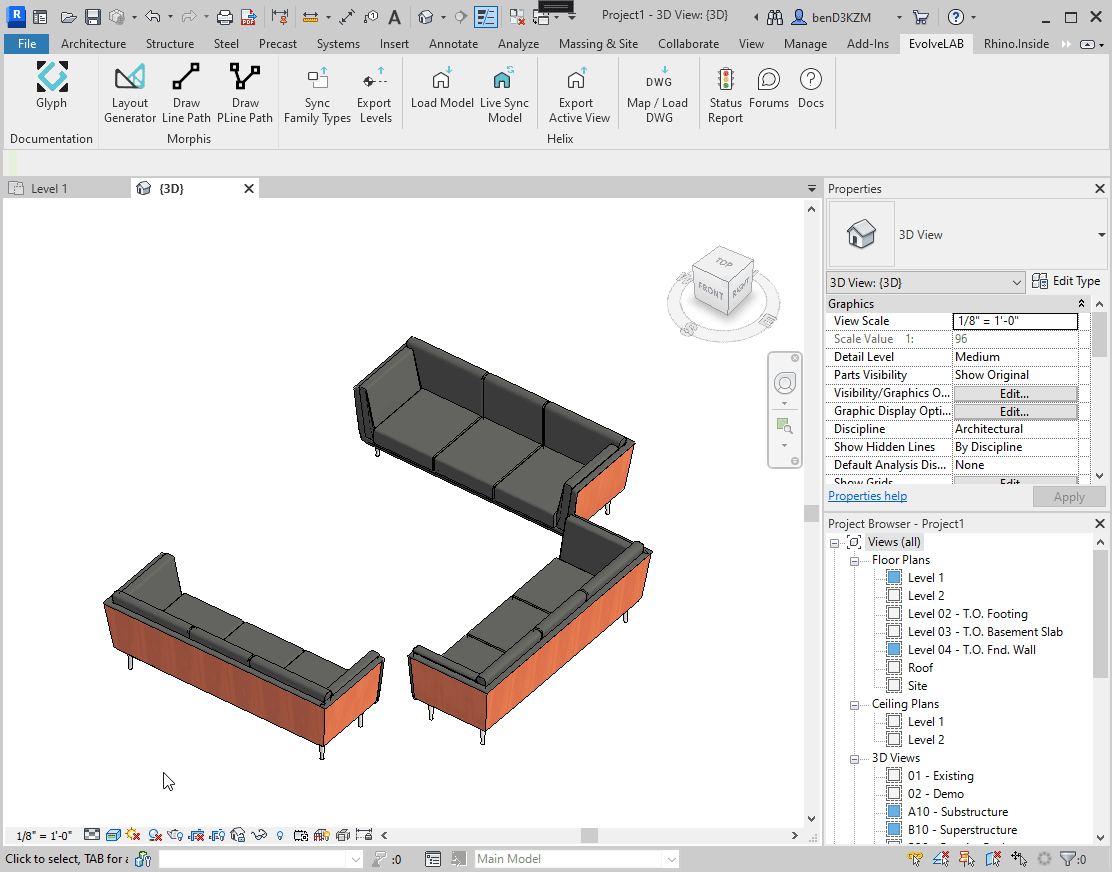
5 | Array the object in SketchUp (Optional)
You can copy and rotate the sofa within SketchUp if you have the Revit background loaded. Pressing the Send To Revit button will update the family placement in Revit without making unique families. Helix automatically detects the orientation and places multiple instances of the same family.
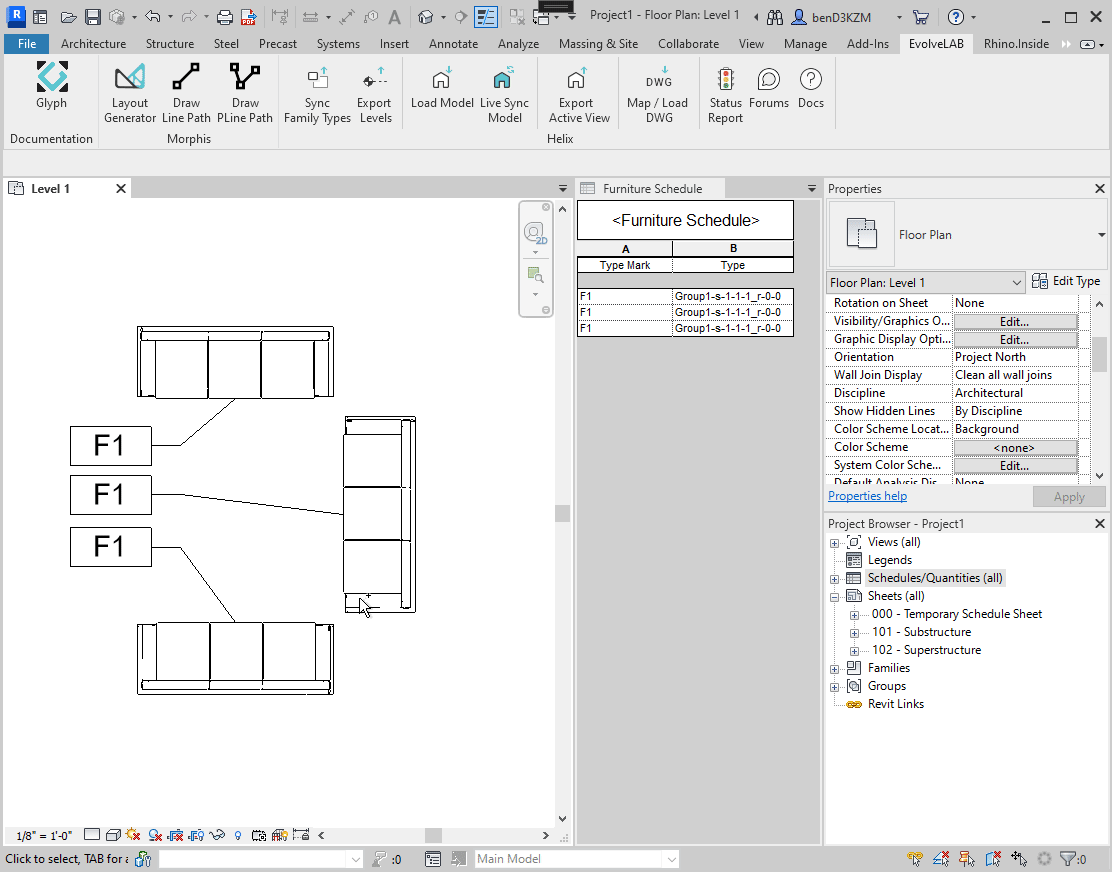
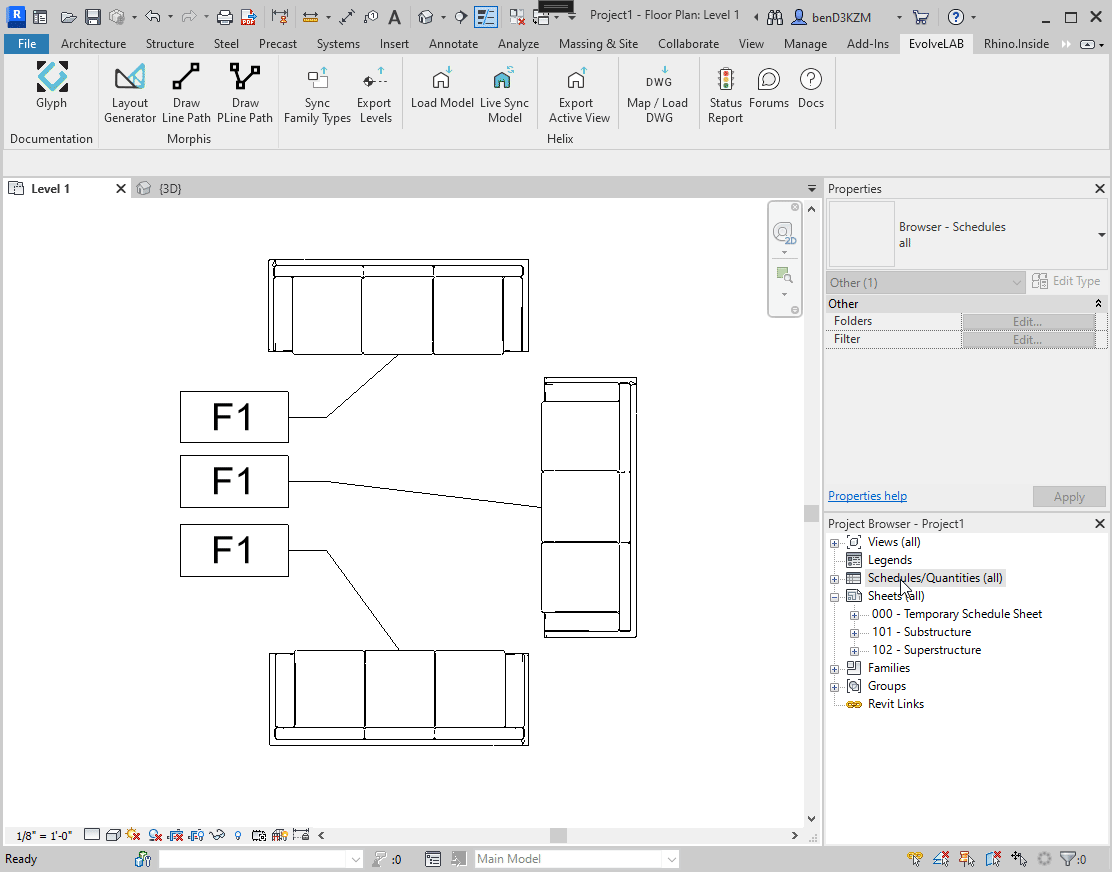
6 | Documentation
Since the DXF object is wrapped in a Revit family, the family can be tagged and scheduled like any other family.
-
go to a floor plan view and tag the families
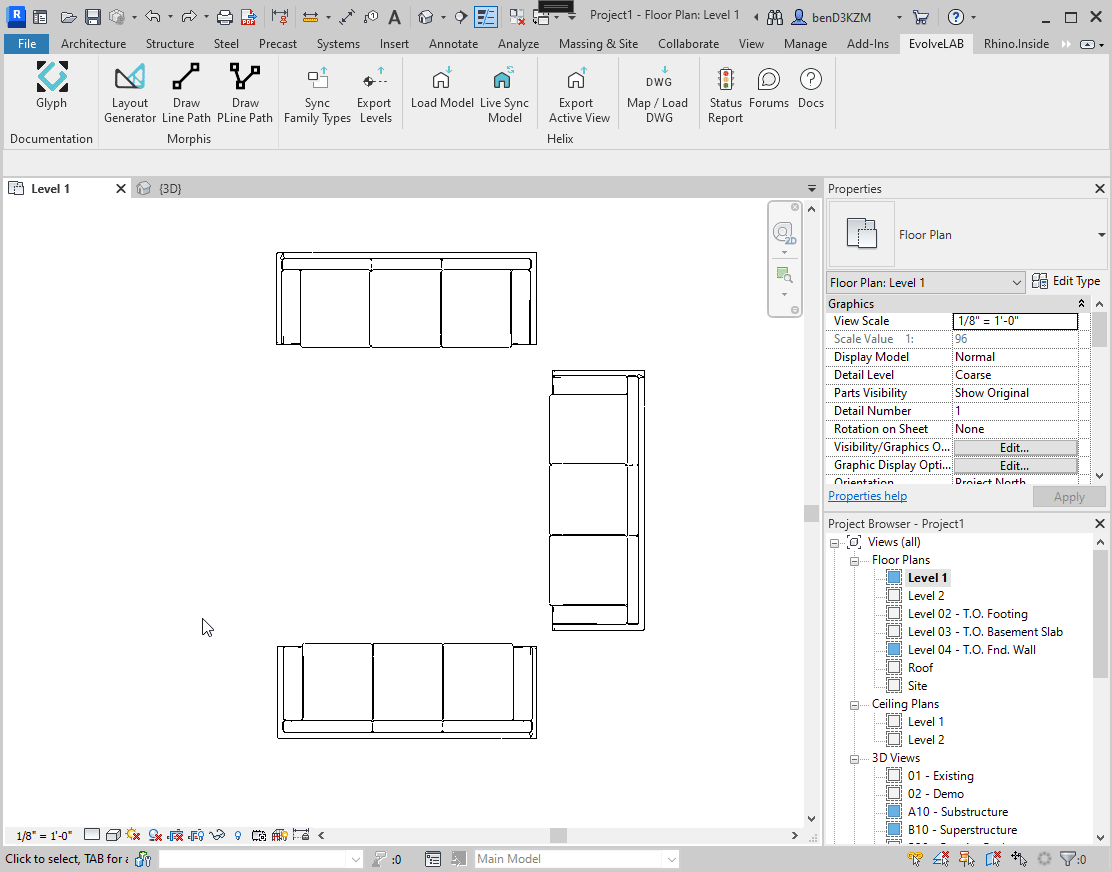
-
create a furniture schedule
NOTE
The DXF or OJB object cannot be tagged with material tags, even though the surfaces of these objects receive Revit materials.