Workflow Advantages
- Convert SketchUp line geometry to native Revit pipes with connectors.
- The native content will behave as if it was originally modeled in Revit. Ex: adding connectors, valves or moving the pipes.
- When setup is standardized, non-Revit users can have their content converted from SketchUp to Revit.
- NOTE: in this workflow the SketchUp pipe and plumbing fixture geometry was authored by the 3skeng SketchUp Plugin. However, this is not a prerequisite. As long as there is a SketchUp line available, it can be mapped to a Revit pipe.
1 | Map The Pipe Component Centerline in Helix
- Open the the Helix UI by clicking the Helix Icon in SketchUp
- Select the component centerline
- In the SELECTED ELEMENTS section change the selected Layer “3sCenterline” to Pipe in the dropdown

2 | Send to Revit
- Click the Send to Revit button in the Helix UI
- With Revit open, click the Load Model button in the EvolveLAB Revit Ribbon Tab
3 | Cleanup Pipes and Set Parameters
- Trim and clean up the placeholder pipes linework
- NOTE: you can use the trim tool on collinear lines to merge lines
- Set pipe properties
4 | Create Revit Pipes
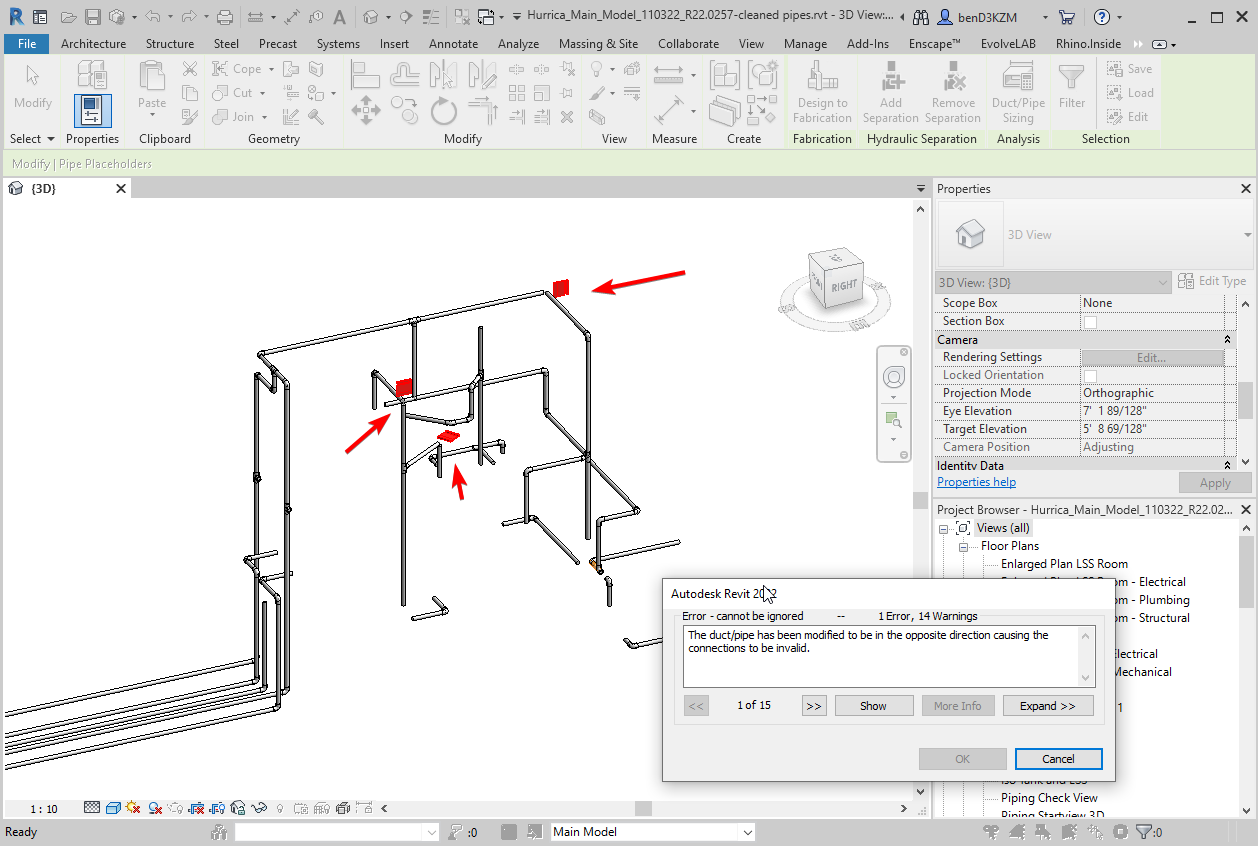
- Convert placeholder pipes (adds the necessary connections)
(Conditional) Fix any errors from Revit
5 | Map the Plumbing Fixtures (Optional)
- Place the plumbing fixtures on a SketchUp Tag
- Select one of the plumbing fixtures
- In the SELECTED ELEMENTS section change the selected Layer “Plumbing Fixture” to Mesh (DXF) in the dropdown and Plumbing Fixture
6 | Send to Revit (Optional)
- Click the Send to Revit button in the Helix UI
- With Revit open, click the Load Model button in the EvolveLAB Revit Ribbon Tab
- NOTE: these families have internal geometry that is not editable. However the geometry is clean of internal mesh polygons and have the correct materials assigned.
NOTE: components are properly instanced

Ideas & Feedback
Let us know how we can improve this workflow.
There are some ideas that would be cool to hear opinions on how important they are to this workflow:
- collinear pipe cleanup
- line off axis warning
- fix line off axis in Revit
- auto-trim placeholder pipes
- map valves to Revit families
- setting for pipe size and pipe system in the Helix SketchUp UI
- markers in the SketchUp components mapped to connectors for plumbing equipment
- CRUD for single element to many and
many to a single element - get material from parent group when using DXF mesh
- map elbows to Revit families (non placeholder workflow or in the same workflow)
- map equipment from SketchUp to families in Revit
- option to use placeholder pipes vs regular pipes
- preview SketchUp background in Revit
- other ideas that could be useful to this workflow