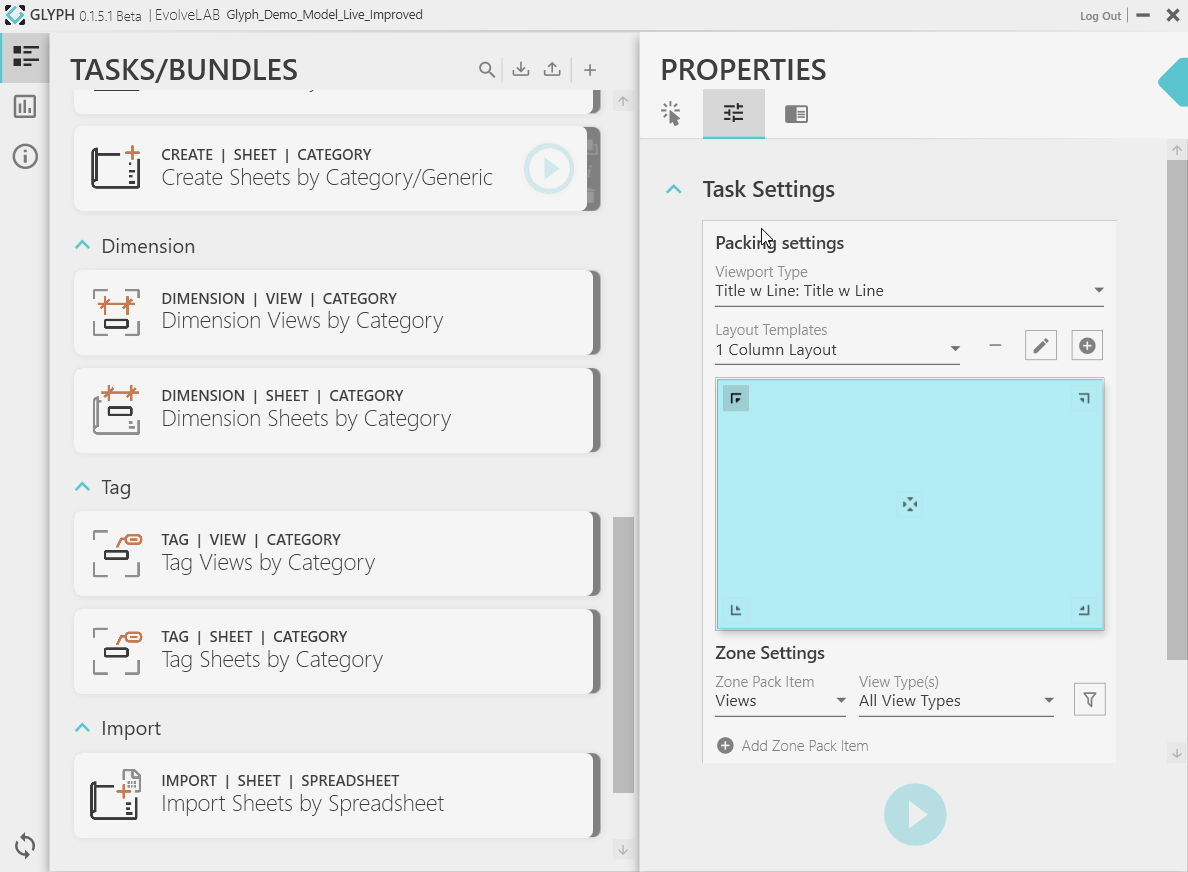
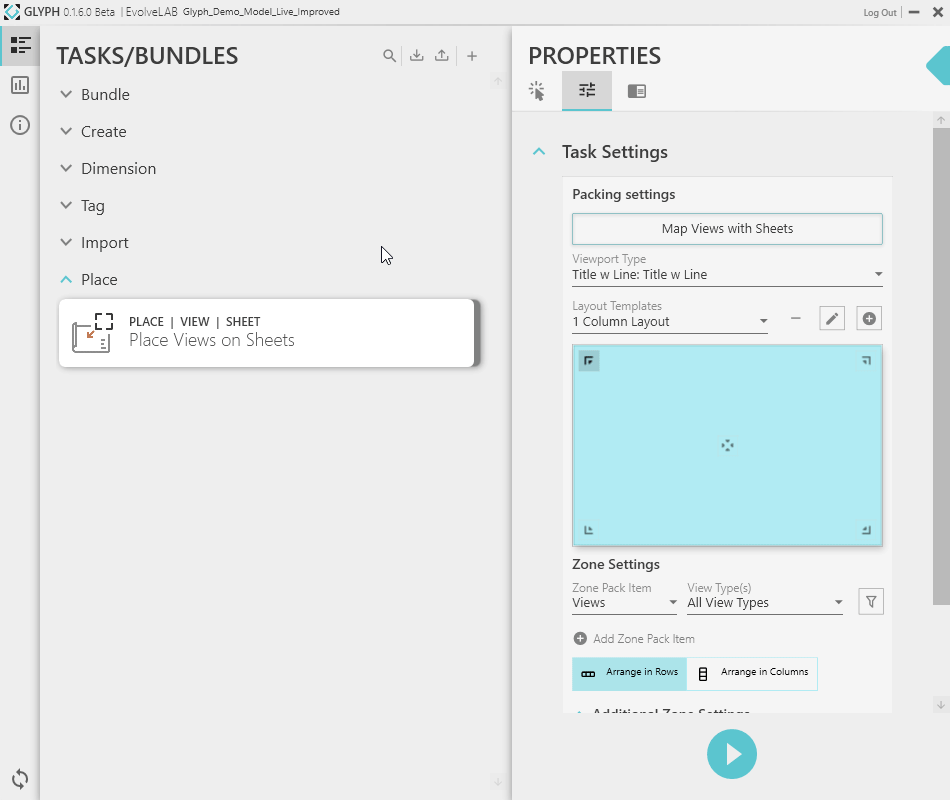
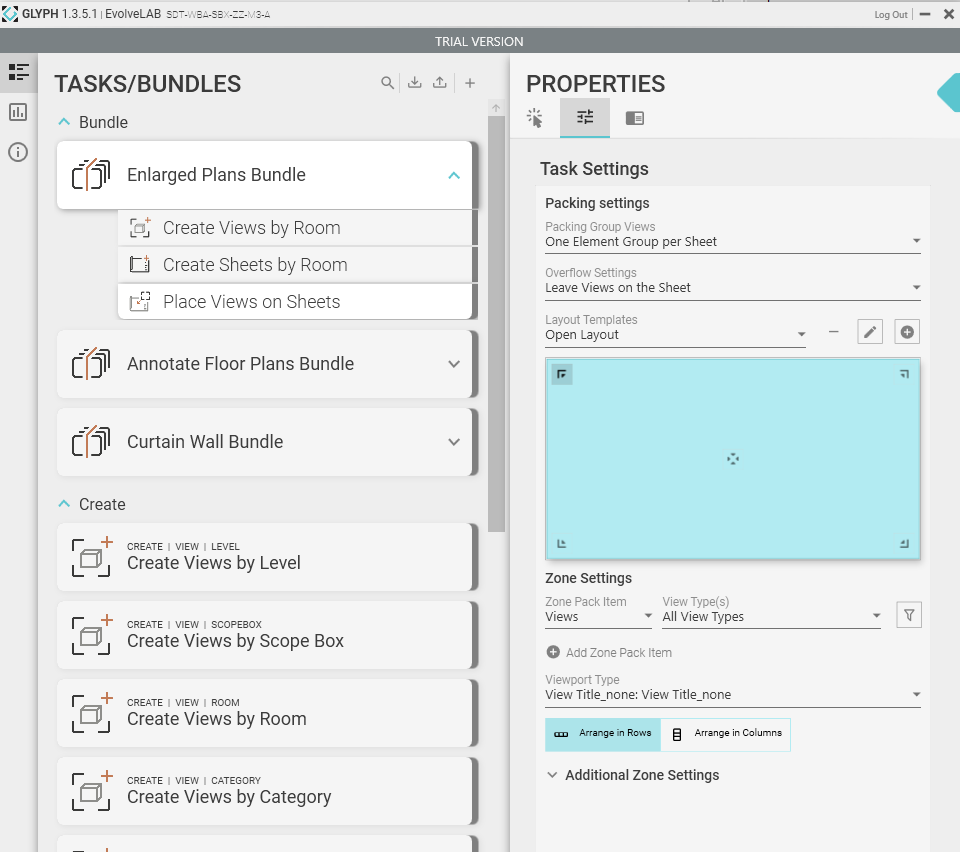
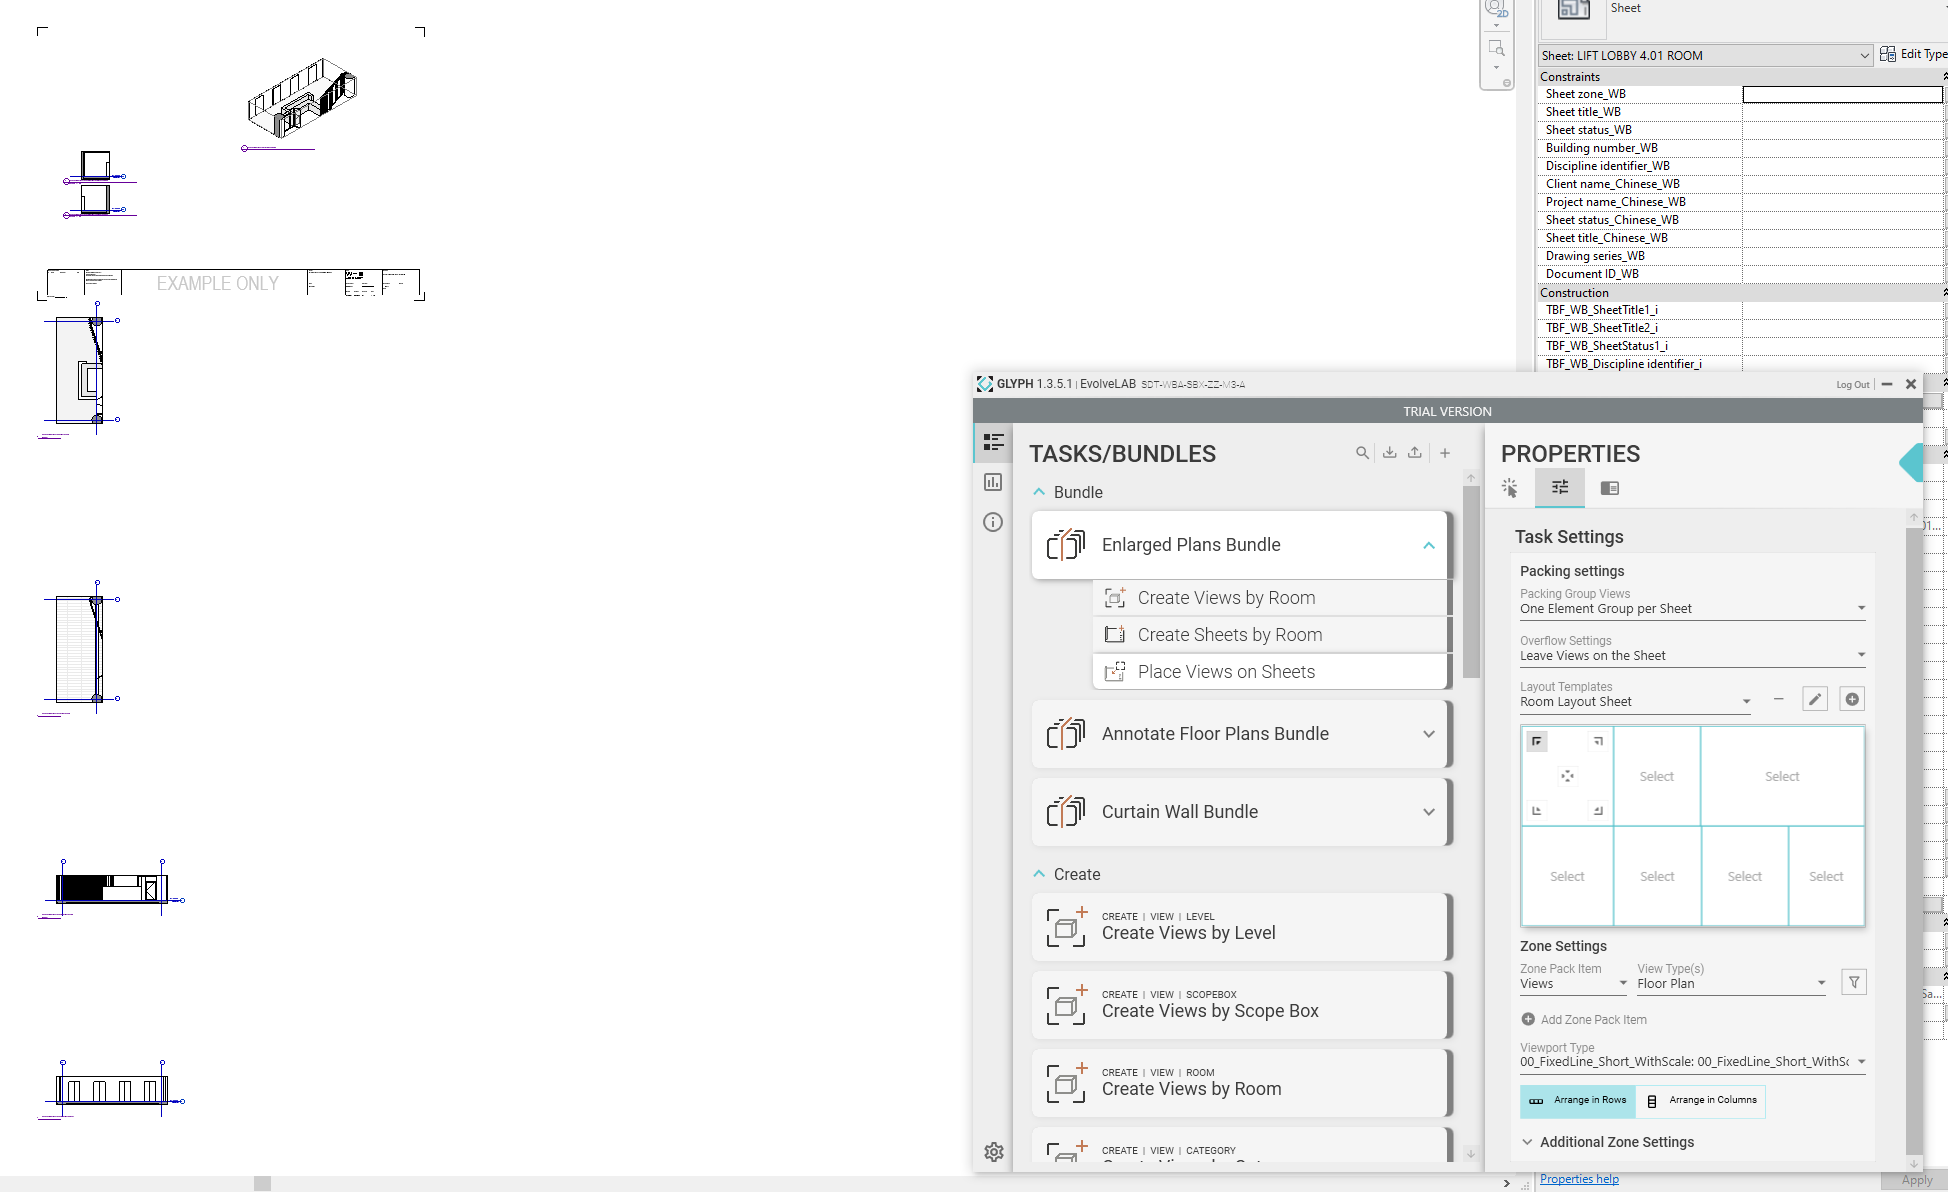
The settings available allow you to customize how and where you would like to place the views on the sheets. To understand how the settings work it is important to understand two terms:
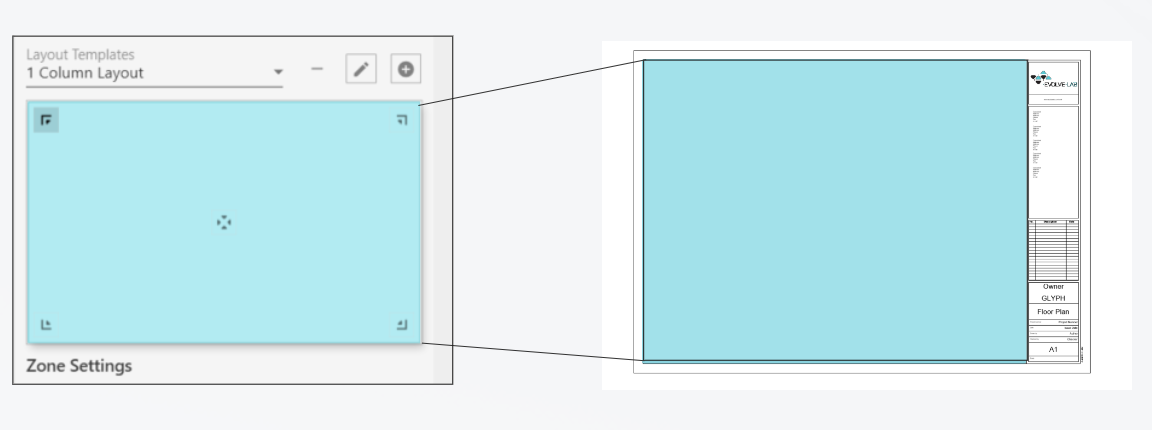
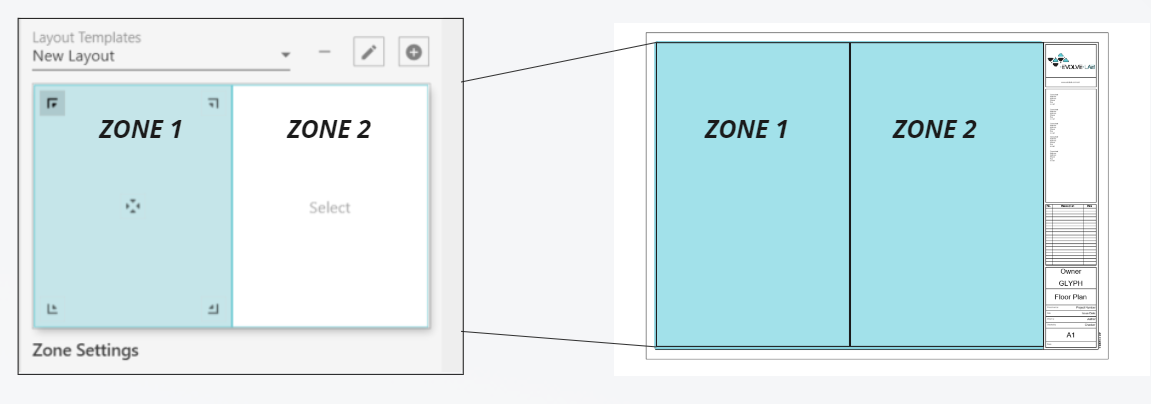
Layout: A layout is a representation of your usable area in your titleblock
Zone: A zone is a section within the layout that allows you to choose what kind of views go in there (floor plan views, elevation views, legends, schedules etc)
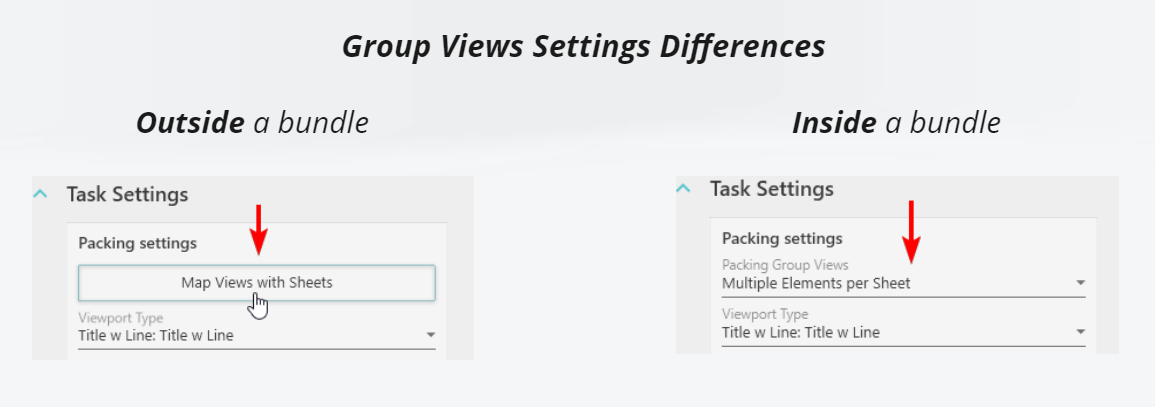
Packing Group Views: This setting allows you to choose how many “group element views” you would like to place on the sheet.
What is a group element? Let’s say we combine a “create views by room” task and a “place views on sheets” task into a bundle. Then select 2 rooms and create enlarged floor plans and elevations of those two rooms. One group element will be the room plus the enlarged floor plan and all the elevations from that room. So for this scenario, since we selected two rooms there will be two groups of views.
How does this setting work? There are two options: One element group per sheet or multiple element groups per sheet
One element group per sheet: Using the scenario above, the task will only place one group (floor plan (1) and elevations (4)) per sheet selected
Multiple element groups per sheet: Using the scenario above, the task will try to place all the groups into the first sheet selected then continue placing the groups with the other sheets (if views don’t fit)
2 -Viewport Type: Chooses which viewport type to use
Note: This setting will most likely move to the zone settings, that way users can pick different viewport types for different zones
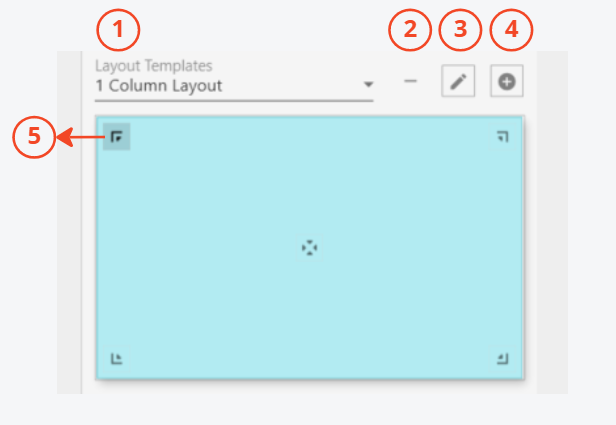
3 -Layout/Zone Editor: Choose, delete or create new layouts as well as add new zones to the layout
Settings and Buttons: 1. Layout Template: Selects the layout to use for sheet packing 2. Delete button: deletes selected layout from the list of layout templates 3. Edit button: opens the “sheet pack editor” window to edit the number of zones 4. Add button: creates a new layout and opens the “sheet pack editor” window 5. Anchor point: choose where the view/viewport will anchor to (top left, top right, bottom right, bottom left, and center)
Sheet Pack Editor: Allows you to customize the length/width and the number of zones within the layout.
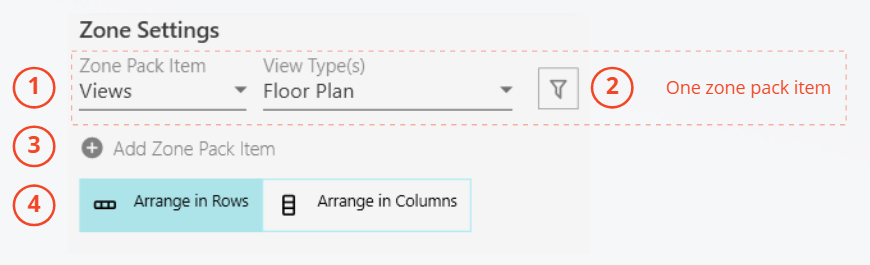
4 -Zone Settings: These settings are individual to each zone. Settings will change once you click a different zone.
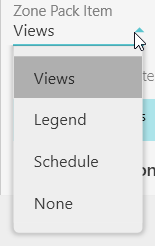
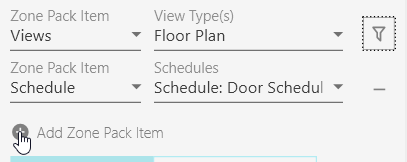
Zone Pack Item: A combination of settings that allows you to determine what type of views go in each zone
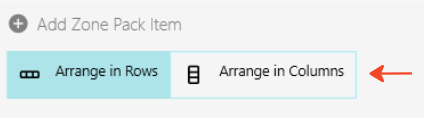
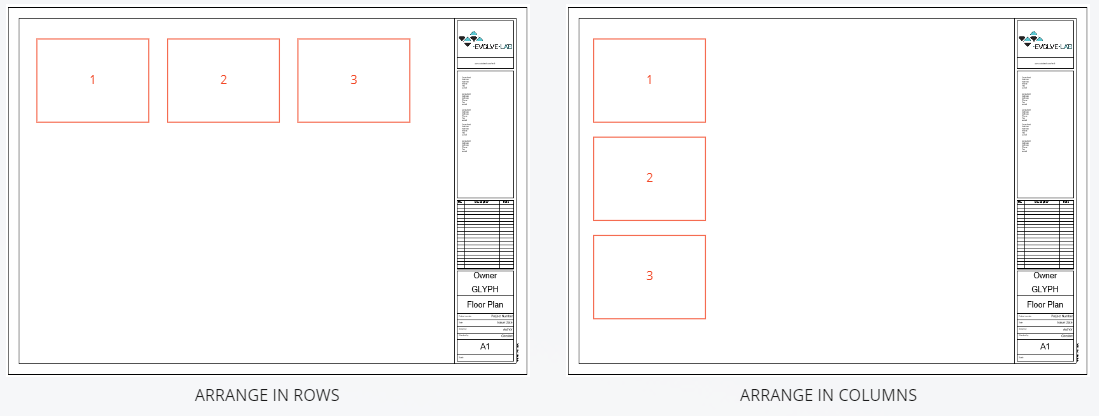
Settings and Buttons: 1. Type of Zone Pack Item: 2. Filter button: Additional view filtering 3. Add zone pack item button: Adds more “zone pack items”. Example: within the same zone you would like to place a floor plan and a schedule 4. Arrange in rows (left)/columns (right): chooses the orientation that determines how the views will get placed on the sheets
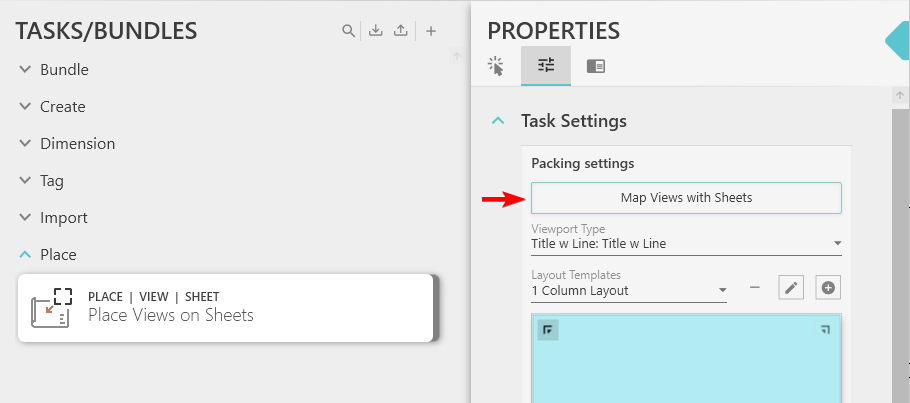
Click on the “Map views with sheets” button then group views with sheets by adding unassigned views to a sheet group. Two ways of adding a view to a sheet group:
Click the “Add view to sheet” button
Select an unassigned view then click the “Add view to sheet” button
I am having trouble with the “Place views on sheets” task. Views are not being placed on the sheet in the selected location. it has been an intermittent problem during my testing. I thought I had solved it by using the scope box to create views and place them on sheets, rather than levels. Any Ideas on how to solve this one? Is anyone else having the same problem?
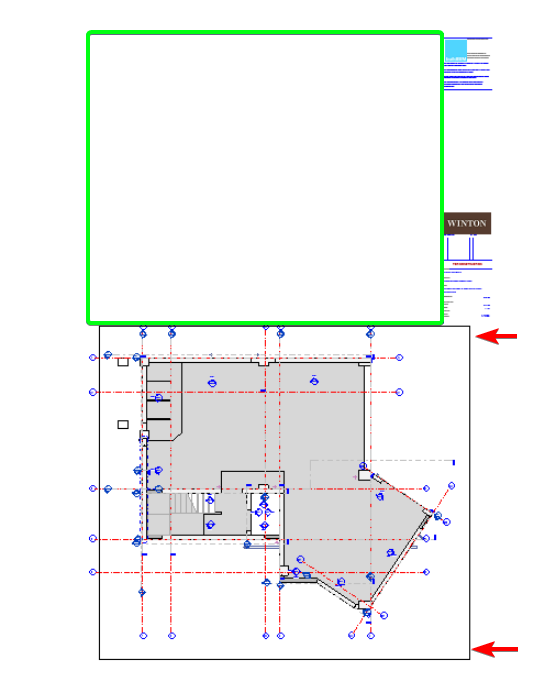
Thank you for giving Glyph a try. The view is not getting placed in the selected location because the viewport of that view(red arrows) is larger than the usable area in your titleblock(green square) (See the image below for reference).
We are working on a setting that will allow you to place the view regardless if it fits or not.
I’m curious as to how to save layouts and share them between projects? I could be doing something wrong, however I haven’t figured out how to save the layout, nor does it appear in a different project.
Good question @TrentB! The layouts will be saved to the task, then you can use the import and export buttons to export/import that task/bundle. More on how to export and import task in this link: Link
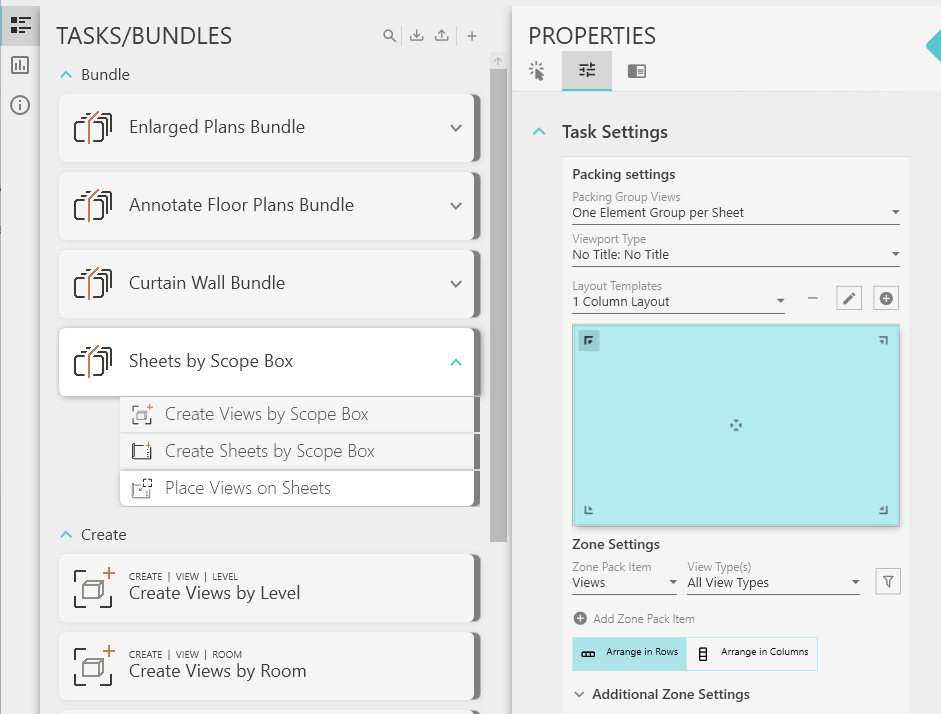
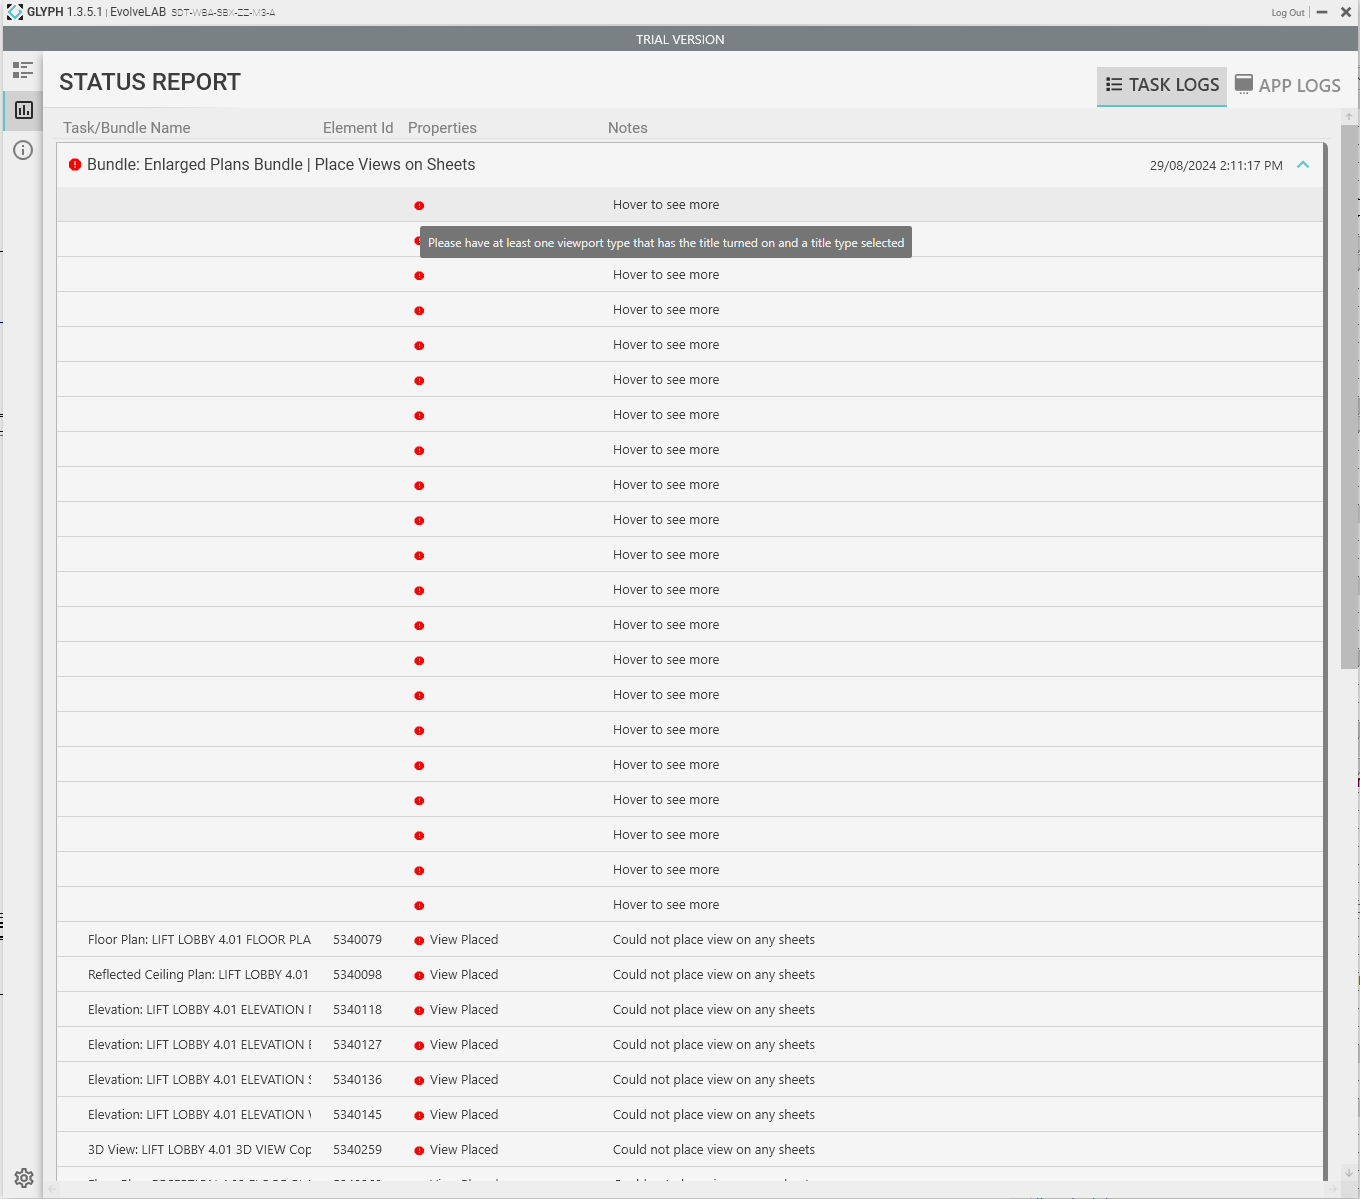
Hi @Miguel – I’ve just started using the trial, and was having trouble executing the ‘Enlarged Plans Bundle’. The ‘Create Views by Room’ and ‘Create Sheets by Room’ tasks execute fine, but the ‘Place Views on Sheets’ task does not work, though I’m told that the bundle has run successfully at the end. I’ve tried with different Layout Templates (from completely open to multiple zones), but not having any luck – none of the views wind up on the sheet. I’ve selected a handful of of Rooms as a test. What would you advise?
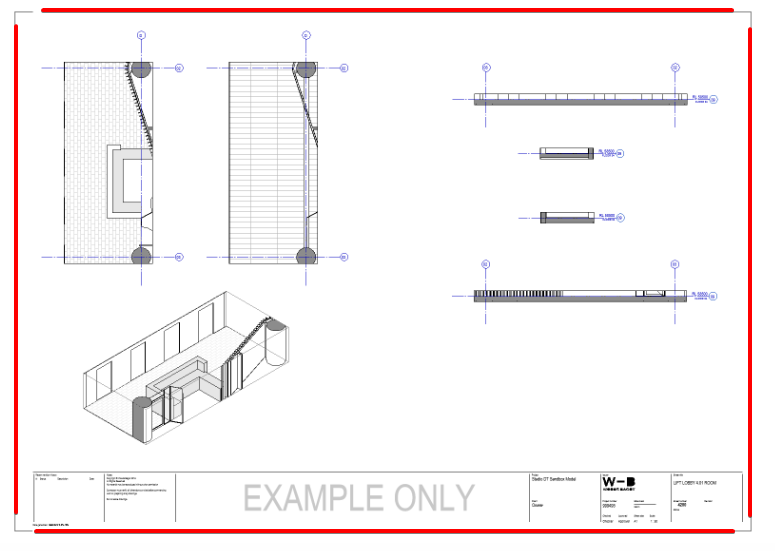
Hi @Miguel – sure thing, here you go! This was the default setting for ‘Place Views on Sheet’ – I have the task making floor plans, ceiling plans, a 3D view, and elevations for (in this case) three different rooms (so, three sheets).
The bundle shows progress for creating the views and sheets, but then doesn’t provide an error or anything afterwards to indicate that the views have not been placed (would be great to add that!)
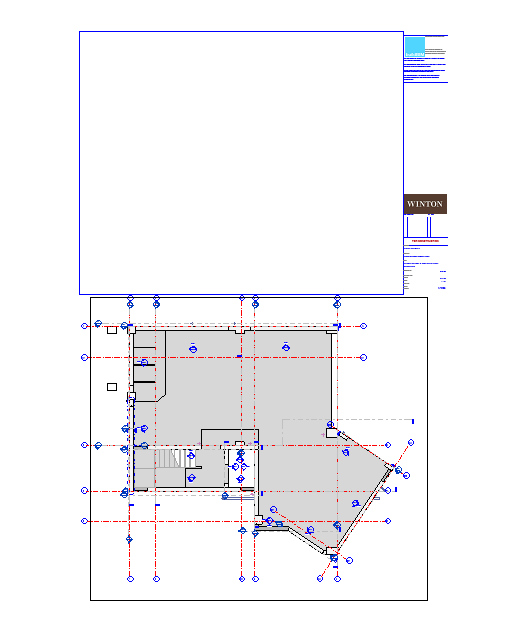
Here’s an example of one of the rooms, all views included on the sheet (I placed manually):
Note – I’ve just realised that the elevations have also cropped in a a strange way. They’re clearly not showing the full room correctly – would you know how to fix this?
@amh.wb Thanks for posting a photo of your settings and titleblock.
Title Block: Could you please open the title block and create invisible lines that connect the corners? In order for us to determine the usable area of the title block, an enclosed space needs to be provided.
The ‘Hover to see more’ suggested that I should change the View Title – which I did, it was previously set to ‘none’ – but even after updating, it gives the same error.
Hi @Miguel – that all worked a treat, thank you! I was able to get everything onto the sheet with the ‘Open Layout’ option; however, the new issue is if I go to make a new ‘Layout Template’, and set each of the squares to the appropriate view, it’s now resulted in this:
@amh.wb, I am glad that worked! It placed the views at the bottom because your zones are smaller than the size of the view you are trying to place. In the future, there will be a setting that allows you to leave the views on the zone even though it might not fit.
Hi @Miguel – great, thank you for that insight! I adjusted, and was able to get the elevations in place in the next run. The update you mentioned will be helpful – also, snapping the zones when doing a custom layout? Or to be able to type the dimensions for each zone.
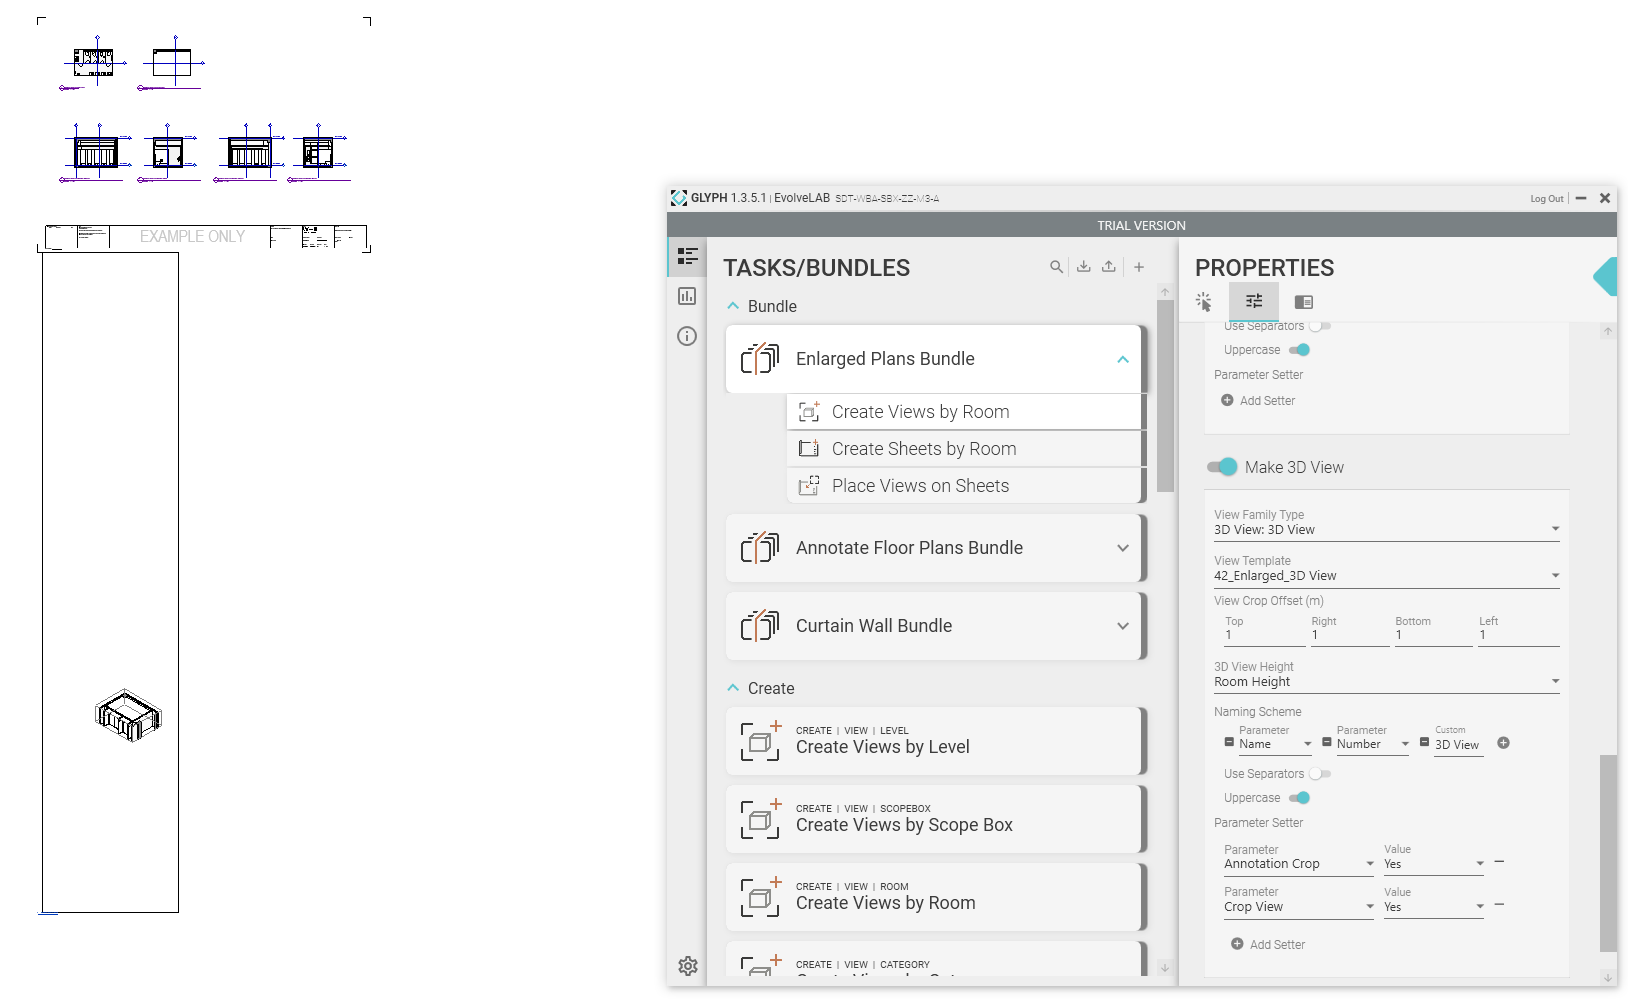
One more question – thank you so much for all of your help so far! – re: 3D views and having them crop correctly. I’ve changed the settings to Crop View and turn on Annotation Crop; however, the 3D views are coming out with a range of different crops, and therefore not going to the correct zone on the sheet. What would you recommend here? (Note: I had the crop offset at both 0 and 1, and the result was the same)
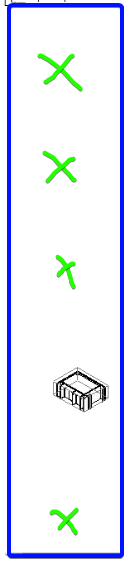
Great question! It’s likely that certain elements in the view, such as scope boxes, shaft openings, or other components, are still visible despite the crop box being set correctly. Could you please open the view and select everything? If the viewport (blue rectangle) appears as shown in the image, some elements (indicated by green crosses) are probably present within the view.
Yes, that does seem to be the case, @Miguel – any way to crop this (even if, in theory, it’s set correctly)? It’s unlikely that Shaft Openings would conform to one level at a time, for example. What’s the best way to handle?