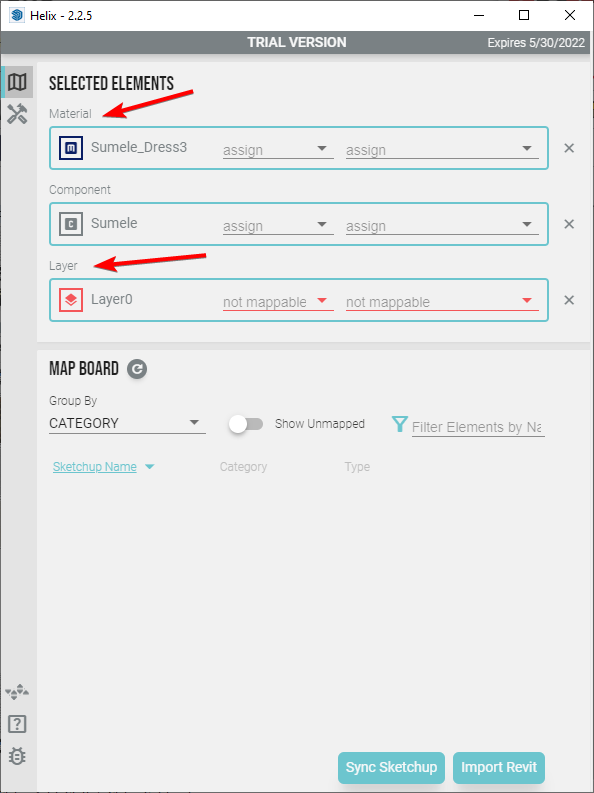
When should users map surface based BIM elements by layer and when should they map by material?
A little history: Helix 1 was originally built to work solely by mapping materials as the SketchUp layer based system did not allow for hierarchies, and using that system would have led to layer inundation.
Helix V2 now offers both methods of mapping, since it is now practical to have many layers (tags) in SketchUp in a way that is somewhat manageable.
Below is a breakdown of tradeoffs for using either mapping
| By Tag (Layer) | By Material |
|---|---|
| More prescriptive: need to make sure elements are placed on the correct layers. This could be more time consuming for the first time a model is mapped | More loose: What you see is what you get. Most SketchUp models have a decent organization of how materials are painted to surfaces. Less work to get major elements translated when standards were not followed |
| Less maintenance once standardized: Once the layers are created and users are expected to map by layers, any change to finishes do not need to be remapped. As the model is updated throughout the design process, new materials can be introduced and removed without needing to worry about mapping as the mapping is already properly set. | More maintenance when using model more than once: In workflows when the SketchUp model is updated along side with the Revit model, any change to the finishes need to be mapped again, if those finished have no mapping. This is not an issue, if the model translation is a one time thing. |
| More dynamic: Can use the same paint material for surfaces that need to be mapped onto different categories. For example, you can use the same paint material for walls and floors, but place those surfaces on different layers. | Less dynamic: What you see is what you get. If you wanted to use the same paint finish for multiple categories, you would have to duplicate the same material multiple times and rename it, then map that material to the respected BIM categories |
| Map Mixing: Users can map components “by component” by placing them onto a layers. Ex: can map all window components by placing the window components on the correct layer. Ex2: can map all generic mesh based work by placing all of it onto a certain layer. | Simple Mapping: Mixing material based mapping is not possible. The map by materials is solely used for walls, roofs, floors, ceilings and building pads (coming soon…) |
| More expandable: Can allow for future features to use materials in SketchUp for translation to Revit as actual materials. For example, using this workflow for walls, the layer would map to the Revit wall, and the materials could be painted onto the wall including split faces for walls that have different material finishes. This is especially useful for interior designers. (NOTE: this feature is not yet implemented.) | Less expandable: Mapping by material takes away the ability to use SketchUp materials for other translation purposes; like converting SketchUp materials to Revit materials and paint that imported material onto the Revit objects |
| Selective Workflows: With layer mapping, users can selectively place objects onto the correct layers, regardless of the material used, and sync that with Revit. This would allow for a diagnostic way to map elements to Revit, where a user could visualize the objects as they are being mapped. | Selective Workaround: to only visualize how certain objects translate to Revit using material mapping, the user would have to hide and unhide geometry to preview selectively how object sync to Revit. |
| Live Sync: With Live Sync, users could see the geometry translated to Revit right away without having to paint it the correct material first. This enables ways for users to better follow how geometry translates to Revit | Live sync: Can still use Live Sync with this mode, but you have to paint the face first. |
To see a list of supported mapping techniques and supported Revit categories, see this post: SketchUp ⥤ Revit | Supported Categories and Mapping