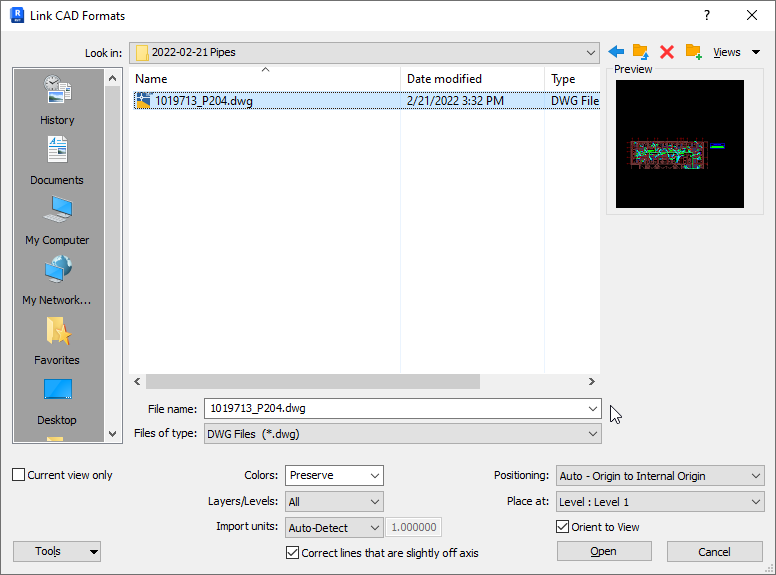
Be aware of what options you choose, especially “Correct lines that are slightly off axis” as it may influence the location of the geometry that Helix produces.
@bill.allen im trying to understand the logic that Helix reads. Will it create pipes from Lines and Polylines?
I am looking to take field engineers as built points and line work and create a pipe network or geometry that I can run in Navis against new and proposed layouts. but it doesn’t seem to work. I’ve even started a new project with layers and tried drawing test Lines and Plines to do the conversion.
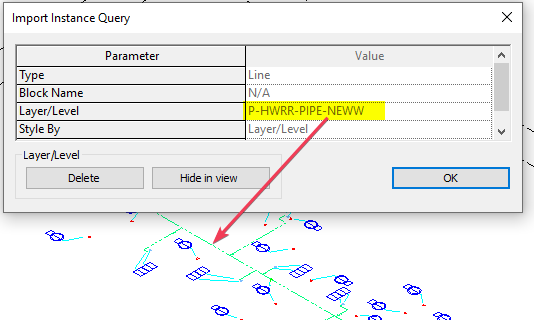
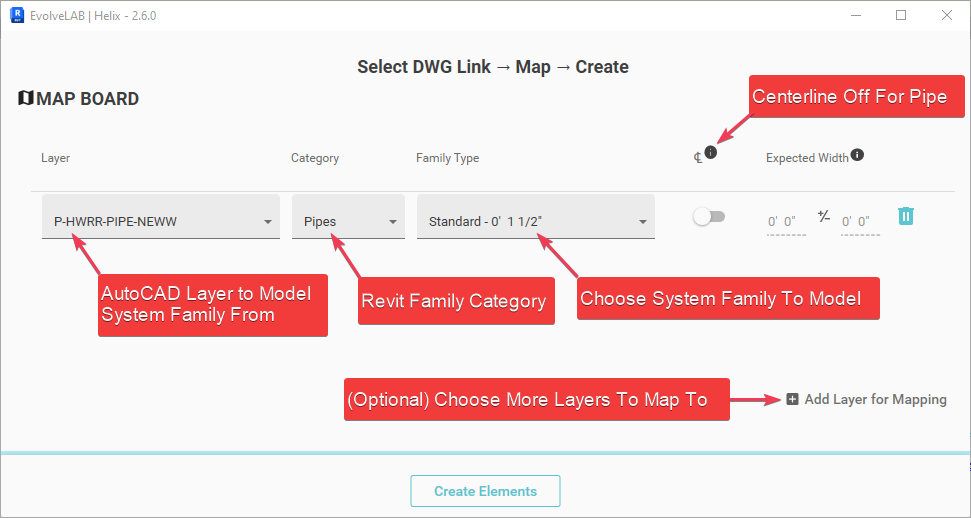
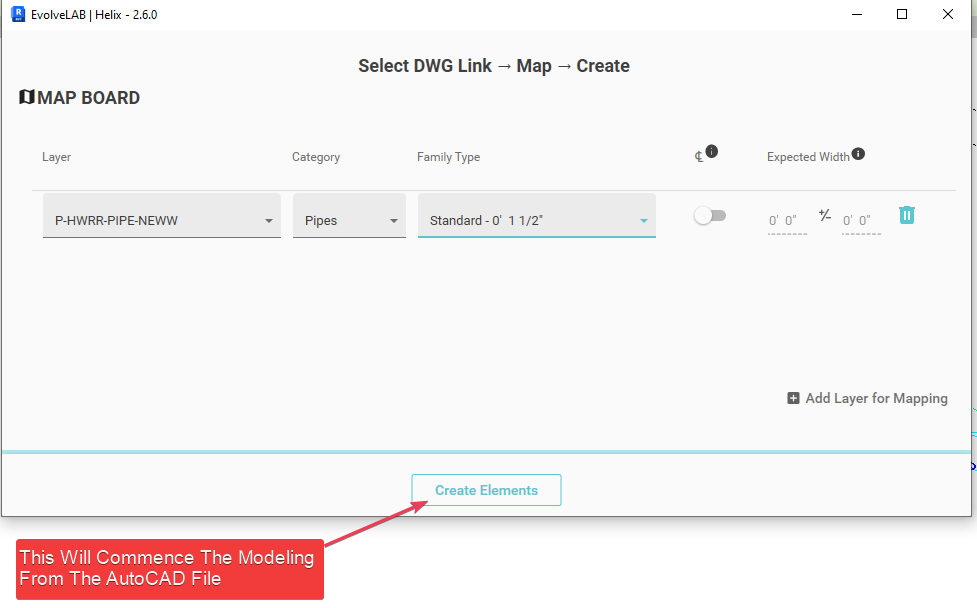
@jmorris, thanks for the comment. Helix translates native AutoCAD linework to Revit families. If you have native vector one line linework, it should be able to convert to a pipe system family. If it’s still not working for you, maybe you can shar the file with us and we can take a look at it for you and see what the issue is.
@jmorris I’m unsure how the AutoCAD Line → Revit Pipe workflow will work for your case, as I don’t have much experience with that specific type of geometry, but I’d be interested to find out!
If you’d like (and haven’t already), you can download Helix and start a trial (no credit card info needed), and just give it a go on your CAD file and see what happens.
If you’d like to set up a call, we can probably schedule a time next week. Please just send me a DM on this forum with your email, and I’ll reach our about setting up a call.
@jmorris I sent you a DM, let me know if you didn’t get it or can’t respond.
Typically, I’m able to send a DM by clicking on someone’s username at the top of one of their posts or replies, and clicking on the ‘Message’ button that appears. I’m unsure if you’ll see the same interface as me though, but here’s what I see:
@jmorris I have just upgraded your ‘trust level’, which I believe should let you view and send DMs. Are you now able to see my DM, or see a button to be able to send me one?
To keep the conversation complete, I’m posting here an idea discussed on other channels: it would be great to set the pipe slope when bringing in the pipes.
Looking at the API, this is not too challenging. The more challenging portion is to establish a direction for the pipes.
At the moment this could be easily set in Revit after the pipes get baked with 2 clicks per interconnected system: