
In this workflow, we have a 3d dwg file from a manufacturer’s website, and we want to use it in Revit. Importing the dwg straight into Revit is a BAD IDEA!
You will get many useless layers in the Object Styles. You might consider importing it into a family first, then load the family into Revit. That’s still problematic, as you get a polluted “Imports in Families Object Styles”, and you still have a triangulated mesh look. The triangulated mesh is the main culprit to slowing down Revit and making Revit crash.
The solution: use Helix with SketchUp to get a clean mesh that is automatically wrapped into a family, and set materials with material textures. What’s great about this workflow is that you can use this content to render the imported families with render apps like Enscape! Updating & resyncing the content will not require you to restart Enscape.
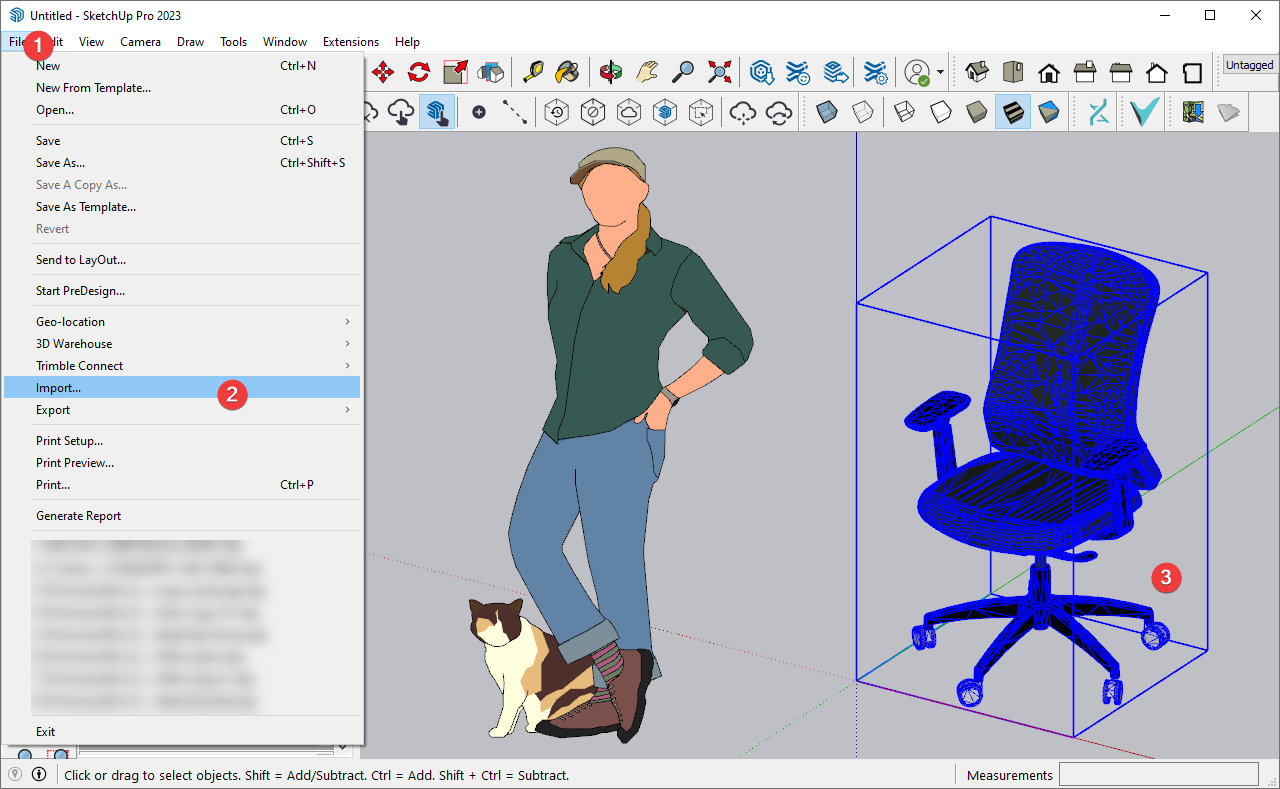
1 | Import DWG into SketchUp
Import > Import > “Select the dwg file”
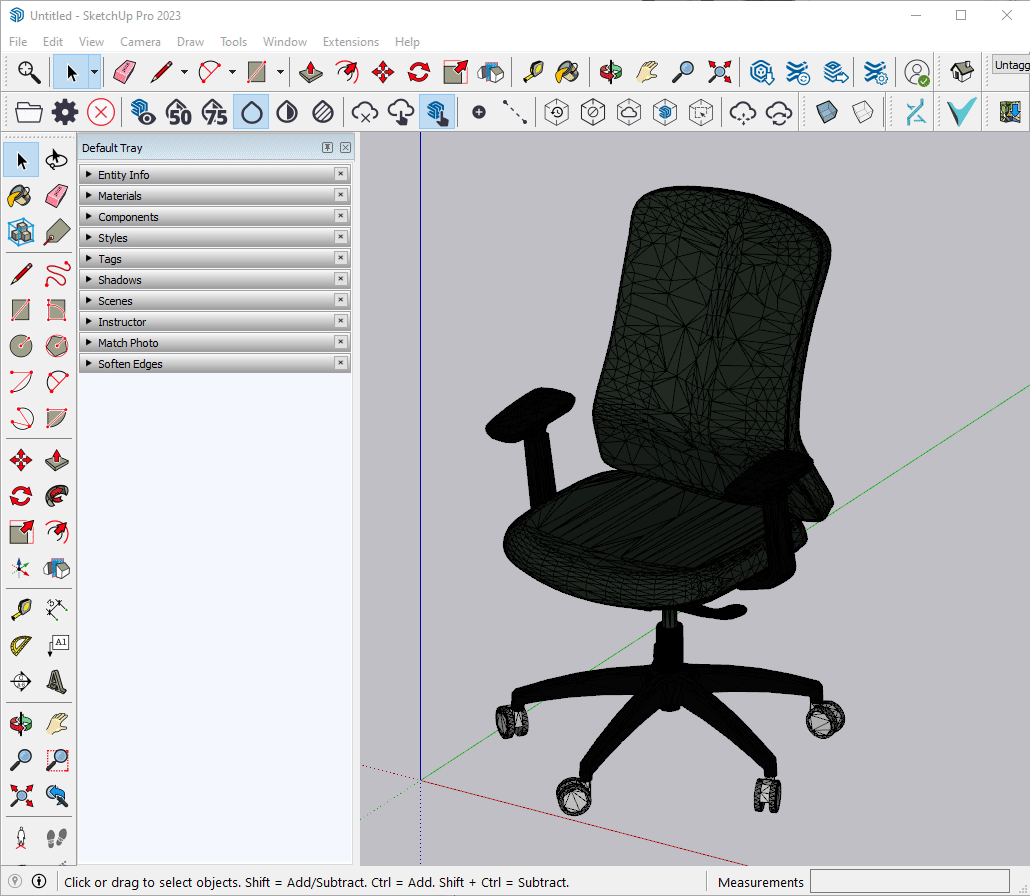
2 | Cleanup the Chair
The chair has visible triangles that will show up in Revit if we don’t make them disappear
- double click into the object until you can select the edges and faces
- triple click to select all the edges
- go to the Soften Edges Dialog in the Tray
- NOTE: if you don’t see it there you can enable it by Right Click, Manage Trays…, select the Default Tray and check the Soften Edges, then Close
- with the geometry selected set the Angle between normals to 75 degrees, and make sure both Smooth normals and Soften coplanar checkboxes are checked
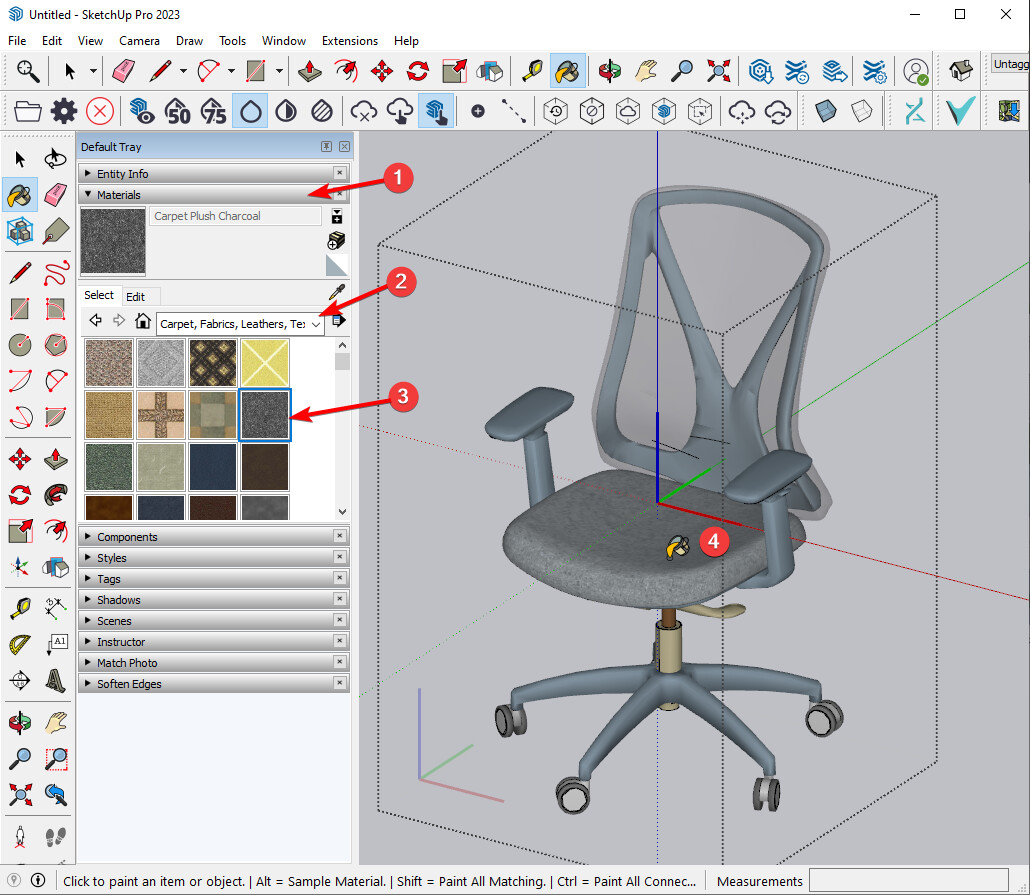
3 | Set Materials
If you want to change the materials independently in Revit for each part of the chair, the chair needs to have materials painted to those surfaces.
Hint: you can use Shift+Click with the paint bucket tool to replace the old material with a new material within the current group
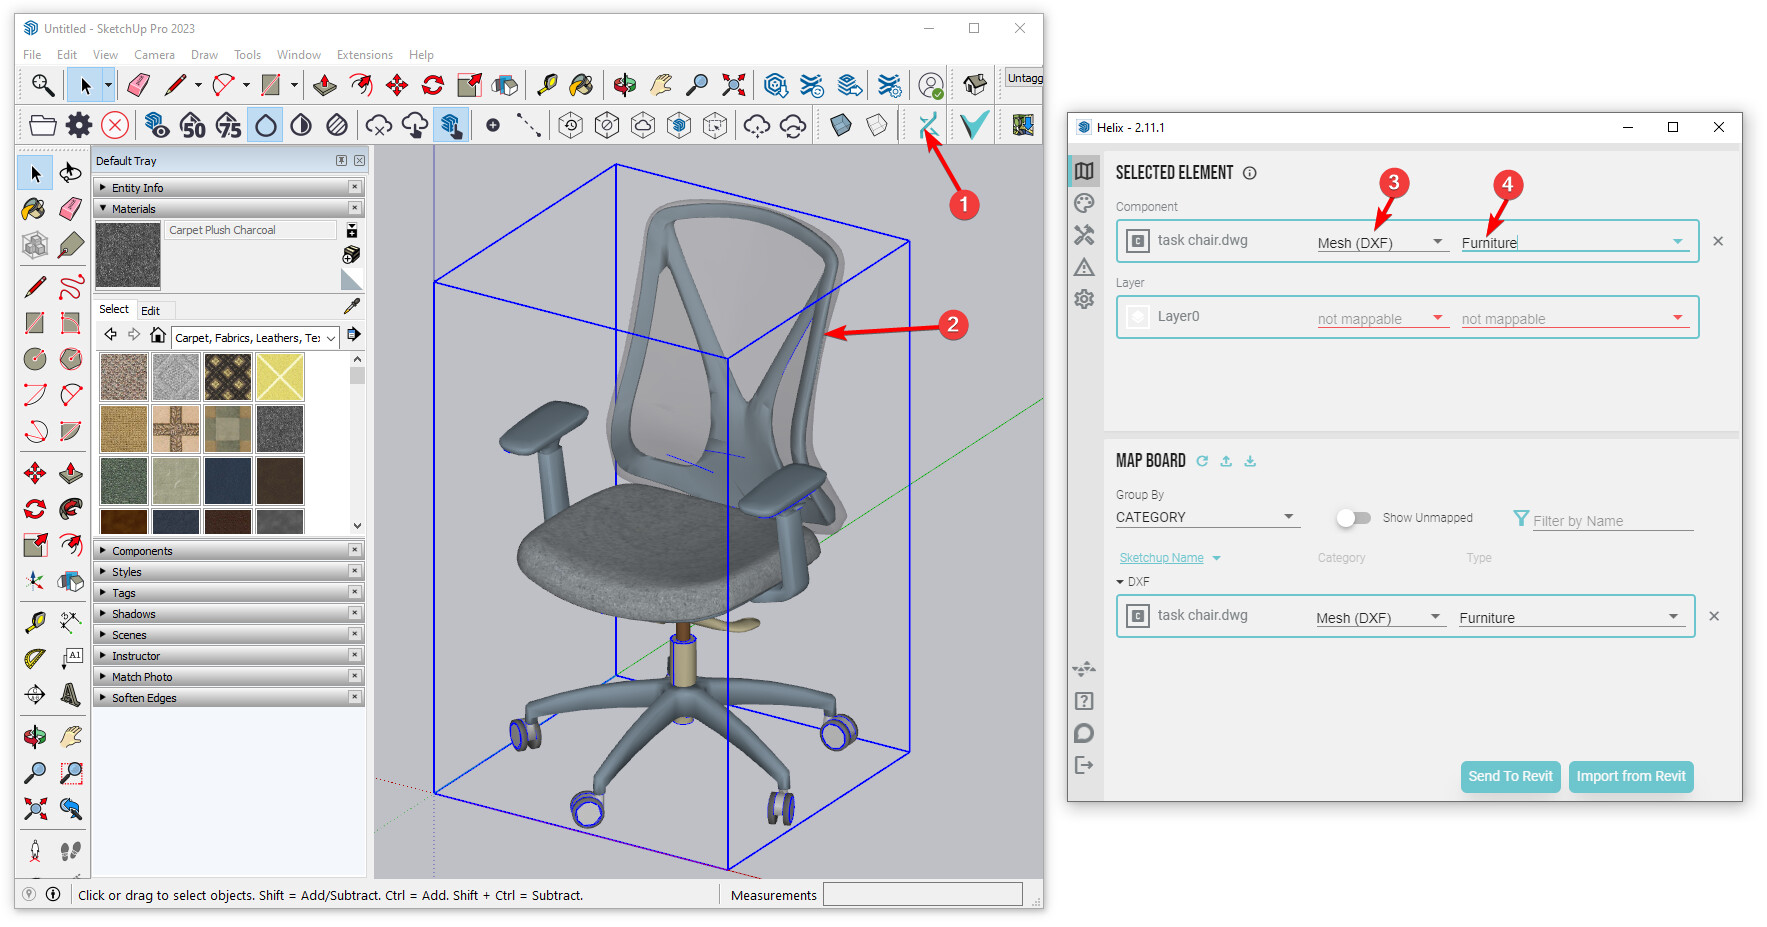
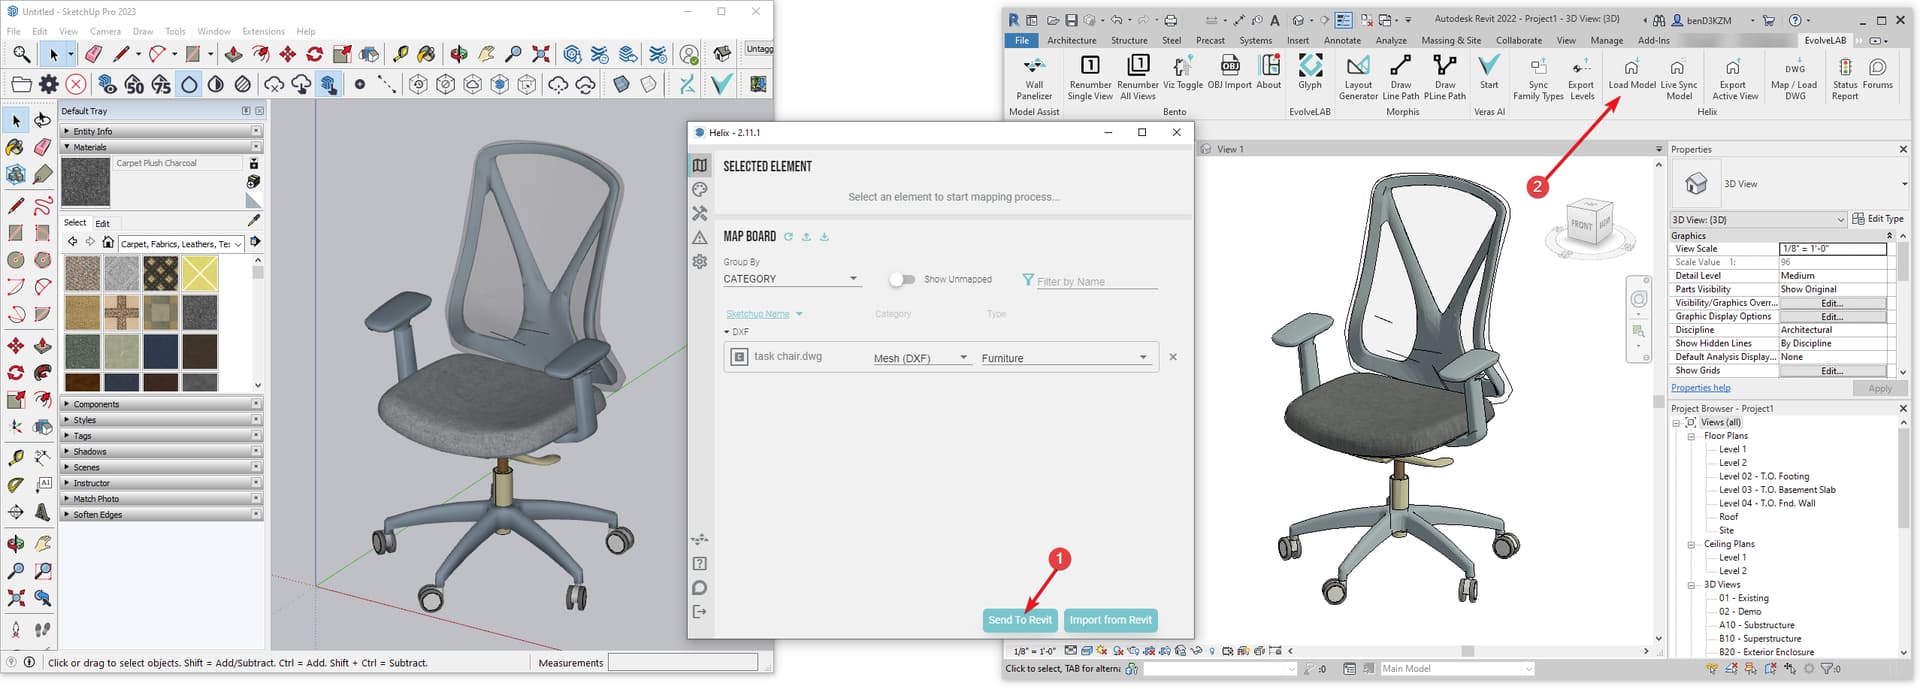
4 | Map the component with Helix
- start Helix
- select the chair component
- assign the Mesh (DXF) and the Furniture Category in the Helix window
5 | Send to Revit
- click the Send to Revit button in the SketchUp Helix UI
- click the Load Model button in Revit under the EvolveLAB Tab
- NOTE: to see the textured, turn on the Realistic Mode
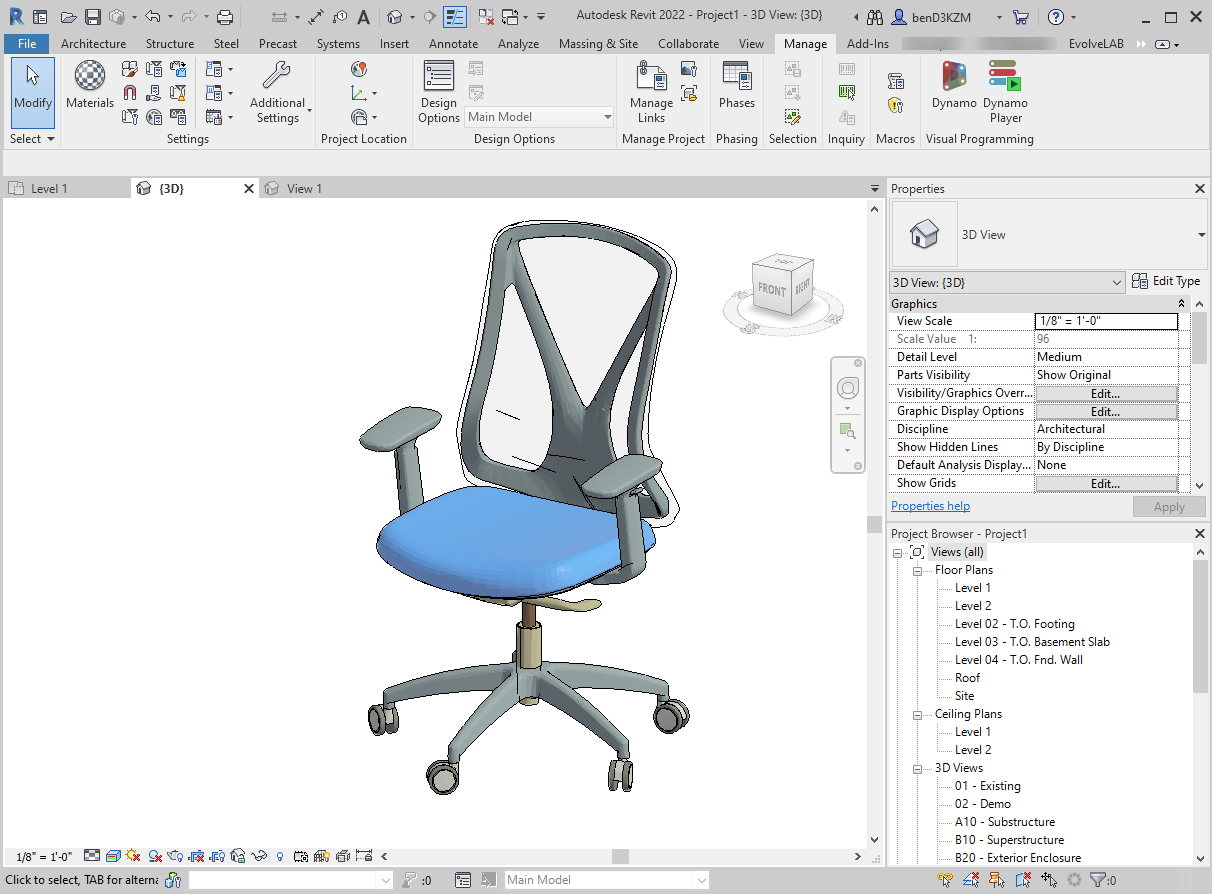
6 | Change the Materials (Optional)
- go to the Object Styles under the Manage tab

- go to the Imported Objects tab
- expand the Imports in Families item
- find the name of the material you want to change
- select the material, and press the tiny square button to change it to another material
- then press OK on all the menus
.

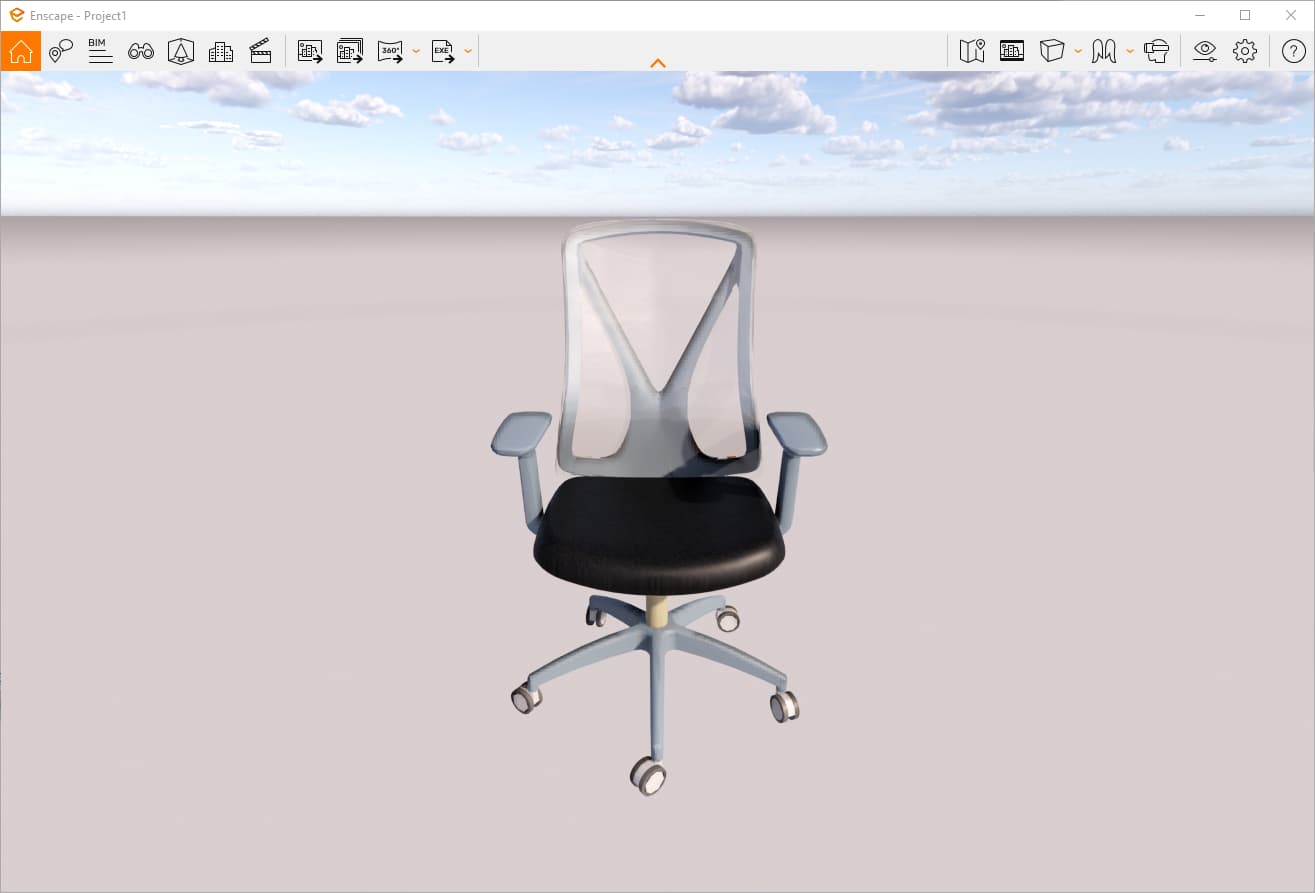
7 | Render with Enscape (Optional)
NOTE: When converting transparent SketchUp materials to Revit, we automatically create the appearance asset. You can change the material appearance asset attributes to further refine how the material renders.
Sample Files From This Workflow
Check out the original and generated files from this workflow in the attachments below.
- Original 3d DWG: task chair.dwg (442.7 KB)
- Cleaned SKP model (SketchUp 2023): Chair.skp (1.1 MB)
- Helix Generated RFA (Revit 2022): task chairdwg-s-1-1-1_r-0-0.rfa (784 KB)